Hello, FollowFox community!
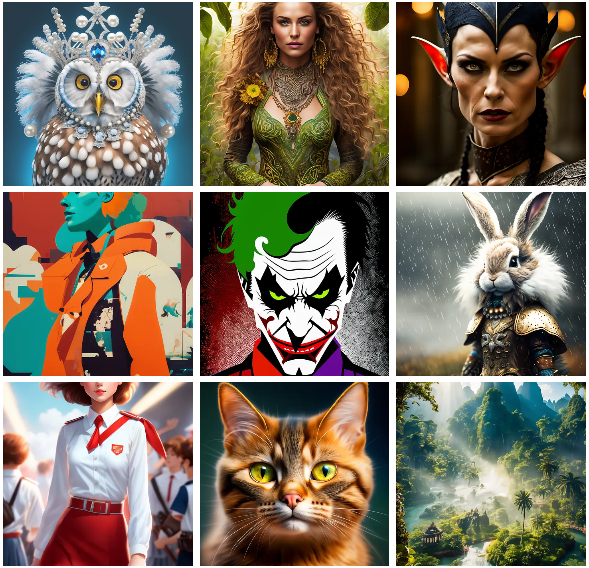
TLDR: We are releasing Vodka_V2 by FollowFox.AI, a general-purpose model fine-tuned on an updated dataset - now from Midjourney V5.1. And as usual, in this post, we will share all the details how we got there. What you should expect from the mode:
Check out the updated model on CivitAI, and if you test it, please add your images and reviews there (link).
Check out part 1 of the series to understand better what’s going on here (link).
TLDR: We are releasing Vodka_V2 by FollowFox.AI, a general-purpose model fine-tuned on an updated dataset - now from Midjourney V5.1. And as usual, in this post, we will share all the details how we got there. What you should expect from the mode:
- We used an objectively better dataset - 2.5x larger, which was cleaned better.
- The resulting model is quite similar to V1 but marginally better. It’s a step up but not a breakthrough-type improvement.
- In the current state, we can generate some cool images with some effort
- The model is still far from effortlessly and consistently generating MidJourney or even top SD models level output
Check out the updated model on CivitAI, and if you test it, please add your images and reviews there (link).
Check out part 1 of the series to understand better what’s going on here (link).
The Plan for V2
We are keeping the spirit of quick, “lazy” models to test things out.
So we plan to try aggressively changing a few things to start noticing in which direction the resulting model is changing.
After training the V1, we had a lot of hypotheses and things to try, and the choice for the V2 was somewhat random from the pool of the top options. Partially it was influenced by the release of Midjourney v5.1. So here are the key changes we made ahead of starting the V2 training process:
- Use MidJourney V5.1 synthetic data
- Increase the dataset from ~4k images to ~10k
- Do a better job of cleaning the data to exclude duplicate prompts, image-to-image generations, and anything that would stand out as odd in the data.
- Lower the Learning Rate value given the “cooked” feel of version 1.
- Decrease the Zero Frequency Noise Ratio to 0, given that MidJourney generations already over-index on that visual.
1 - Gathering the New Dataset
Once again, we used DiscordChatExporter (link) to get the initial dataset. You can find the raw CSV files on Kaggle (~1.9GB total) if you want to explore them yourself (link).
A cleaned version of this file will be linked in the next section.
2 - Cleaning the Data
The last time we did just the bare minimum on this front, we decided to invest more time here.
Here is the Kaggle notebook we used; not the most elegant code, but it got the job done. (link).
Here are the key steps we took to clean the dataset:
- We got the rows that didn’t have a prompt or a link to the image
- There were some small amount of suspicious rows with different authorID, so we just dropped those too
- We removed all the entries where the prompt contained a link - an indicator of image-to-image flow that we don’t want to use for our training.
- Then we did a bit more cleaning of the unusual entries and split the columns to have just the prompt part of the image in a separate column and all the additional associated information separately
- We are again using only upscaled images as we think this indicates high-quality generations. This time we noticed a few patterns in additional information to match to filter them out. This increased the ‘yield’ of upscaled images significantly compared to our previous approach.
- Then we split the prompts from the additional parameters that users typically input using double dashes formatting, for example --v 5. We kept the relevant and interesting ones while removing many made-up ones that users believe exist and keep using in their prompts.
- Before creating the final dataset, we had to deal with one more issue. In many cases, users keep upscaling the same prompt in different variations, and this was not ideal for our training as it creates almost identical images with identical prompts and overfits the model. So we decided to keep only the last of such identical upscaled prompts.
And thus, we ended up with a cleaned dataset; from the start, 4.1 million rows went down to 445k.
You can find the cleaned CSV file on Kaggle using this link.
Now we had to download all the images. We used a similar approach as the last time but did a bit more filtering and analyzing to end up with our target dataset of ~10k images. You can find the script we used for download here, but please note that we ran this locally instead of Kaggle (link).
The downloaded dataset looked good, by all definitions, better than what we had for V1. As usual, you can access the full dataset; this time, we uploaded it on HuggingFace (link).
3 - Training Protocol
We are not changing much here from the previous version. Key updates:
- "lr": 1e-07 (this is 5x lower than the previous version!)
- "zero_frequency_noise_ratio": 0.0
The training configuration files are uploaded on HuggingFace with the model and checkpoints (link).
4 - Fine-tuning the Model
Once again, the training was run locally using RTX3090 GPU.
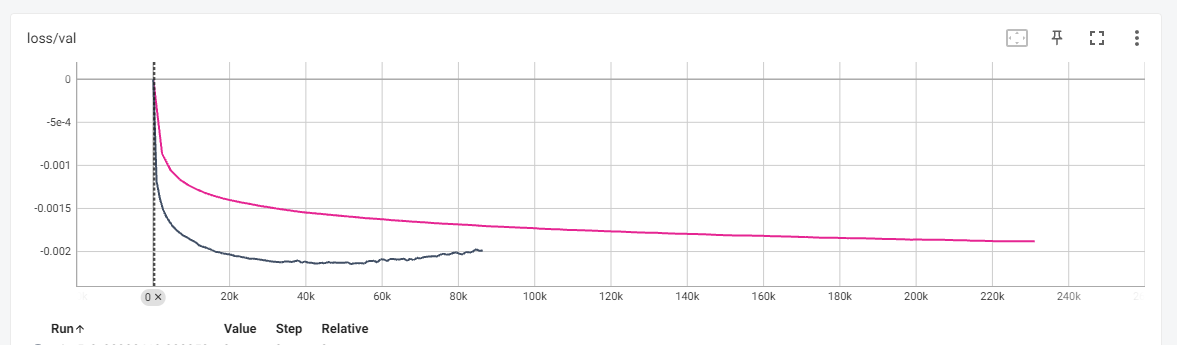
The 100 epochs translated into 231,100 training steps. The whole training took ~50 hours to finish.
The validation loss graph looked very smooth, with no divergence - suggesting that potentially we might have undertrained. For now, we decided to keep it as is, check that hypothesis via output images and adjust in future runs.

Compared to the Vodka V1 loss graph, the absolute values never reached as low as the V1 (likely due to Learning Rate), but the overall training was much smoother and in the desired direction.
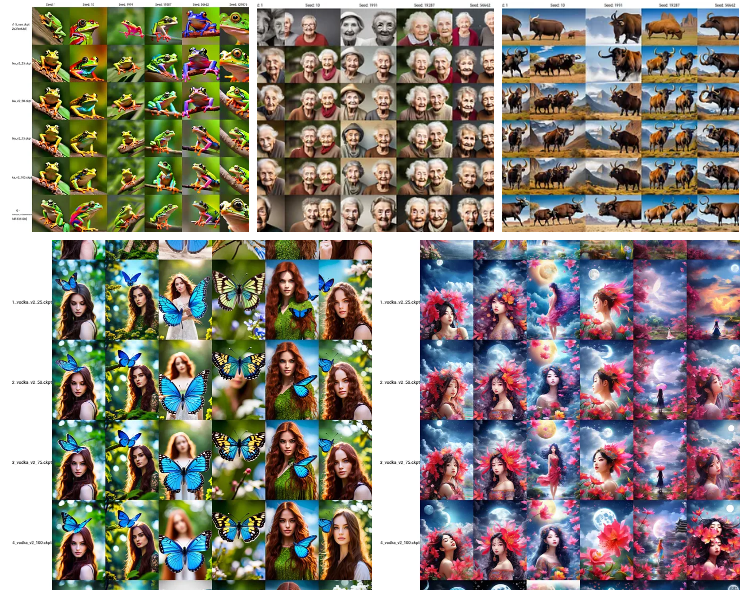
5 - Choosing the Checkpoint
We saved checkpoints every 25 epochs, so the first goal was to choose an optimal one from the four checkpoints.
You can find all four to test on Huggingface (link).
For this, we mainly did the visual tests, and it was clear quite soon that the 100-epoch version was simply the best; generations looked quite similar across the board but the issues and quality were gradually improving. This also made us feel that more training or a slightly higher learning rate could improve this model.
We won’t upload all comparison grids, but here are a few examples to highlight what we did to choose between the checkpoints.
You can check full-sized grids on HuggingFace (link).
6 - Choosing the Release Version
We have mixed feelings about this part because we are giving up some control over the process here.
But at this point, we had two models - Vodka V1, which we released the last week, and a newly trained 100-epoch version of the V2 candidate. So we decided to do the 50/50 mix of the two models and compare which performed better, pure V2 or mixed with V1. And so we did a few more tests. See full-size grids on HuggingFace (link).
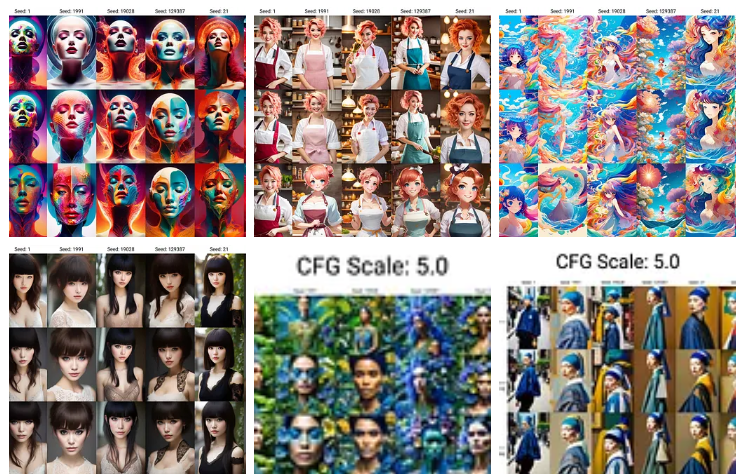
In the end, we made a call to release the mixed version. We don’t like that we cannot attribute and understand what happens to the model when the two checkpoints are mixed. We know the mechanics and math that’s taking place but do not have a solid explanation for why the 50/50 mix of two models trained on similar but different datasets performs better.
7 - Parameters and Workflow that Works Well for Vodka V2
There is a lot more to test here, but we will share a few observations:
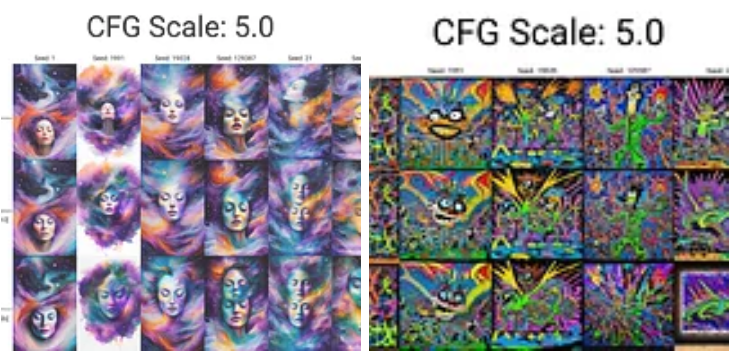
- Compared to V1, you can try a wider range of CFG values; anything from 3 to 7.5 can generate good output
- Booru tag-only prompts do not work well since we didn’t tag the dataset
- Human sentence-type description followed by adjectives and “magic words” works quite well
- Almost all samplers seem to generate interesting results.
- SD upscale workflow (outlined below) with tile ControlNet enhances the image quality of this model
- Using EasyNegative TI (link) is recommended. “blurry” in negative prompts also helps.
Upscale Workflow to Try in Automatic1111
After generating the initial image you like in the txt2img tab (we recommend doing a grid of different samplers and CFG values for each prompt to find the promising ones), send it to img2img.
- Use the same prompt and sampler as in the original generation
- Set sample steps high; in our case, we used 150 for most of the images
- Set width and height to 2x the original. So 512x512 should have 1024x1024
- Set the denoising strength to something low; we used 0.2 to 0.25.
- For the CFG value, we used the (original - 0.5) formula. So if the original image was generated at 7.0, we would set it to 6.5.
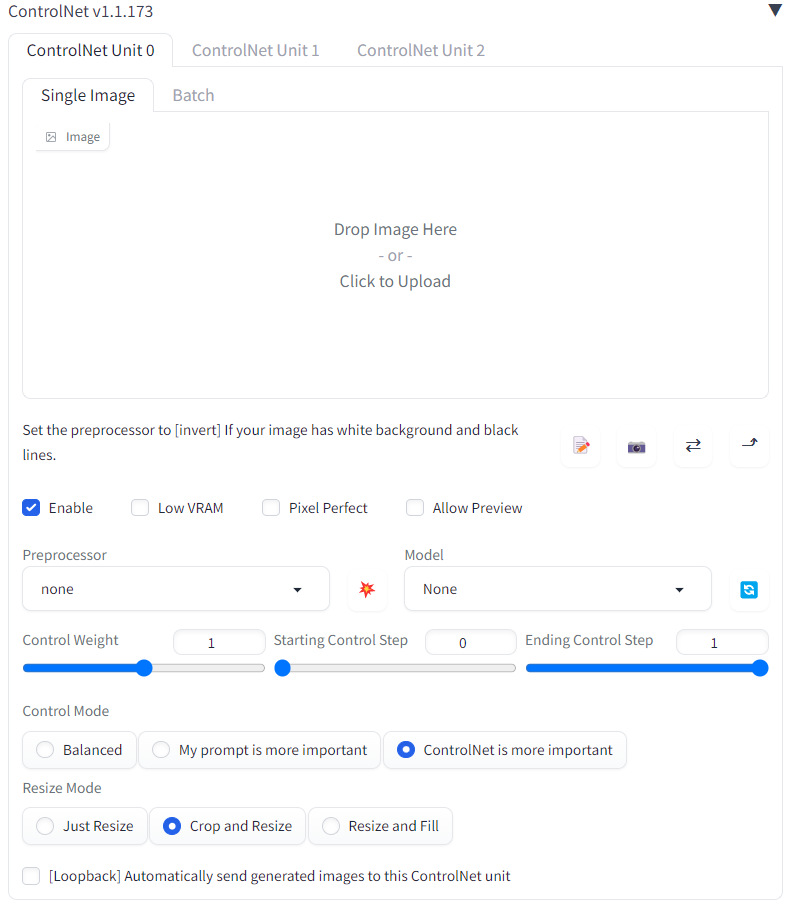
- ControlNet settings: enable it; for preprocessor select “tile_resample,” and for model ‘control_v11f1e_sd15_tile’. You can also switch to the “ControlNet is more important” option. No need to adjust any other settings.
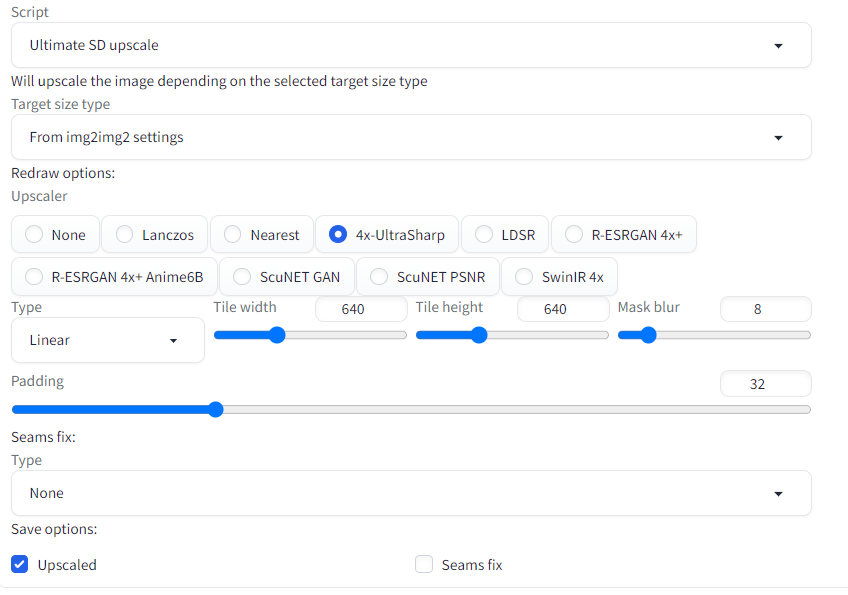
- Make sure to have the “Ultimate SD upscale” extension installed. Select it from the Script dropdown, select the 4x-UltraSharp upscaler, and set tile width and height to 640x640.
- Press generate, wait a bit, and you should have a decent output. You can repeat the process to go even higher resolution.
Conclusions and Next Steps
We believe the model development is going in the right direction, and we will continue releasing the new versions. And, of course, we will document and release every step of that journey.
For the V3 release, we already have a working hypothesis of where the blurriness and lack of details in some of the generations might be coming from, and we will try to deal with that.
Stay tuned!
