Hello, FollowFox community!
Today, we will do something different and test a brand-new Image-to-video model from the Chinese DAMO Academy called I2VGen-XL (link). The model promises a lot and claims to be substantially better than the available alternatives, and most importantly, it is open-sourced!
In this post, we will take it for a spin and write a step-by-step guide on how to do it on the cloud (using RunPod) so that you can do the same. We will test it in a few scenarios, and let’s see what it can achieve.
Overview of I2VGen-XL
The project description does a good job of summarizing what the model is about, so let’s take a look at that:
The I2VGen-XL project aims to address the task of HD video generation based on input images. I2VGen-XL is one of the HQ video generation base models developed by DAMO Academy. Its core components consist of two stages, each addressing the issues of semantic consistency and video quality. The total number of parameters is approximately 3.7 billion. The model has been pre-trained on a large-scale mixture of video and image data and fine-tuned on a small amount of high-quality data. This data distribution is extensive and diverse, and the model demonstrates good generalization to different types of data. Compared to existing video generation models, the I2VGen-XL project has significant advantages in terms of quality, texture, semantics, and temporal continuity.
In short, it takes images as input, understands the context, and turns the image into a short video. The second model takes that video and turns it into an HD video. In theory, it should be able to work with all kinds of topics. Interestingly, the second model also takes text as an input on top of the video generated by the first model so we should see how it affects the output.
They suggest using two GPUs or a single one with at least 50GB of VRAM so let’s see how we will be able to run it.
Setting up I2VGen-XL on Runpod
To get started, create an account on Runpod (link) and make sure to have some credits. (Note that we are not sponsored by Runpod and feel free to use any other cloud GPU services). In this case, we will be using one of the Community Cloud GPUs.

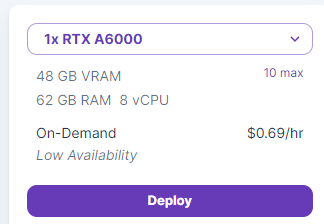
48 GB seems close enough to 50 so we decided to give that a try and deployed a served with RTX A6000 at $0.69/hr.
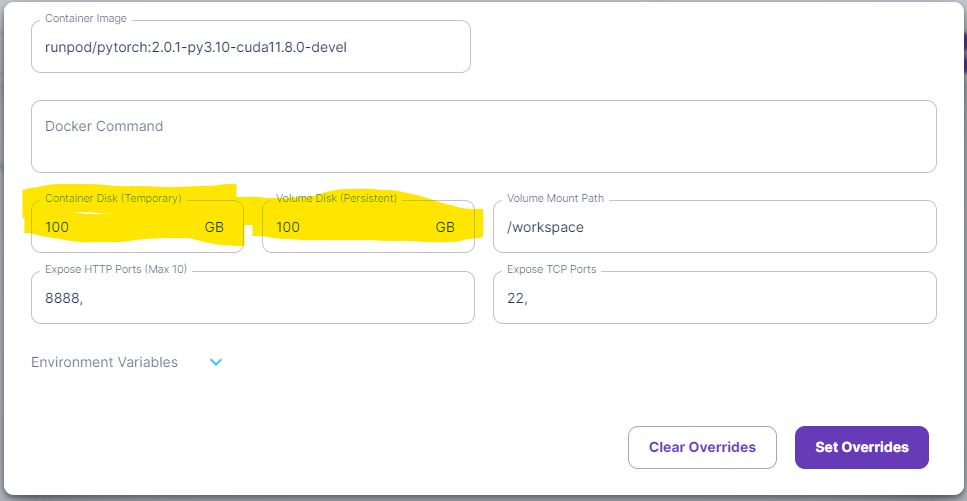
The models are quite large, so we need to make sure we have enough disk space when working with these models. So before deployment, we set both the container and volume disk space to 100GB. Make sure you have the RunPod Pytorch 2.0.1 Template selected.
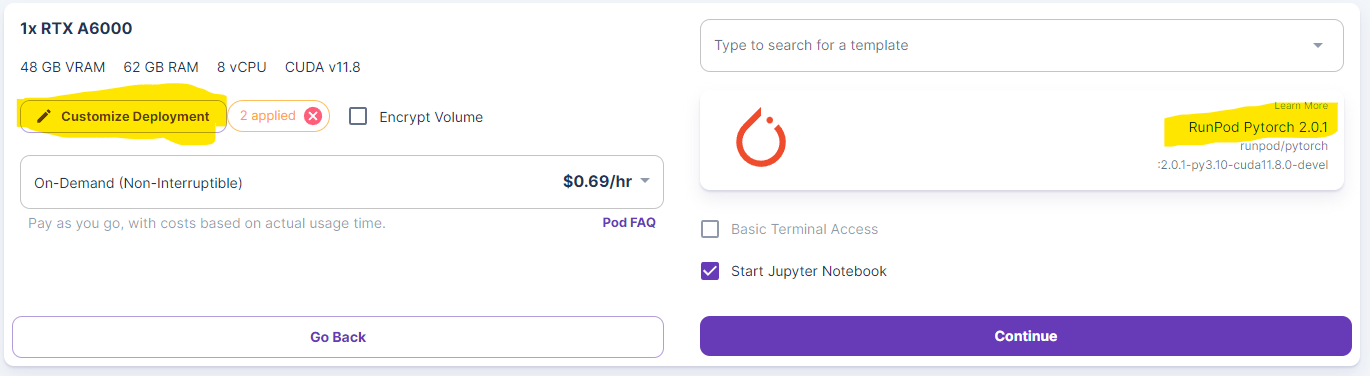
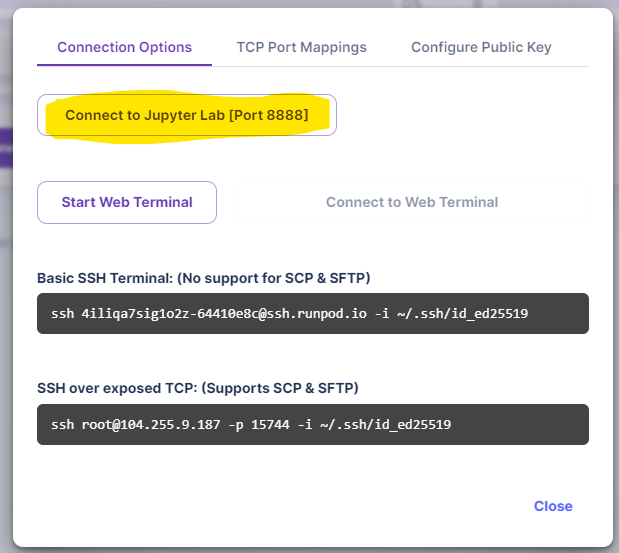
From there, just press Continue and then deploy the server. After a bit of waiting, the server will be deployed, and you can press the connect button.
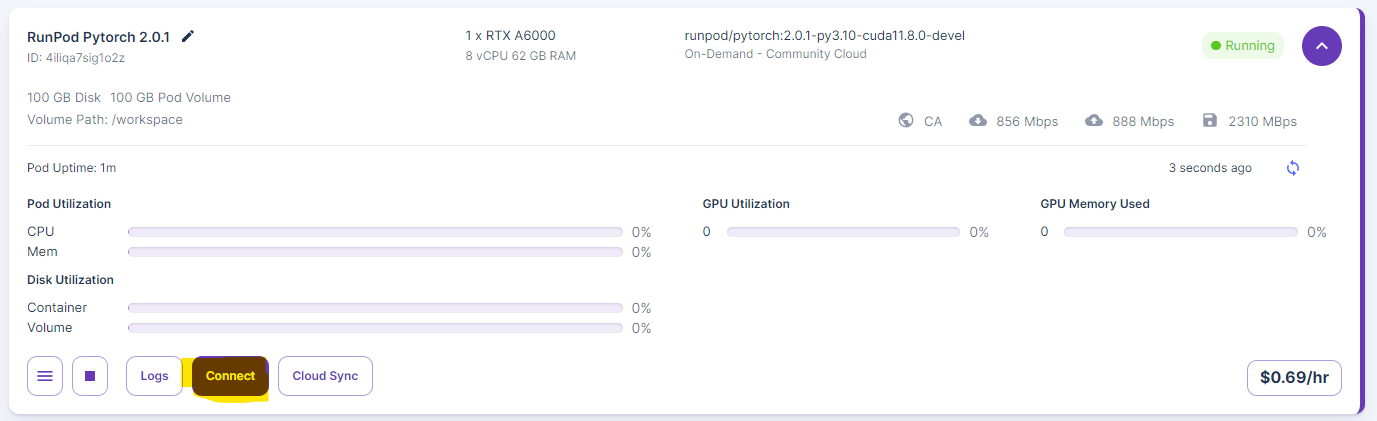
Then select the Connect to Jupyter Lab option.
In the new window, select the Python 3 option to create a new Jupyter notebook where we will do all the work.
We must install all the prerequisites before downloading and launching the models. We will need the ffmpeg library and a few other things listed on the project webpage. We will need to install the ffmpeg with the sudo command, which is not part of our server template, so let’s start with that. Install it by running these two lines of code:
We must install all the prerequisites before downloading and launching the models. We will need the ffmpeg library and a few other things listed on the project webpage. We will need to install the ffmpeg with the sudo command, which is not part of our server template, so let’s start with that. Install it by running these two lines of code:
!apt-get update
!apt-get install sudo
With the sudo command installed, we can install the ffmpeg library.
!sudo apt-get update && apt-get install ffmpeg libsm6 libxext6 -y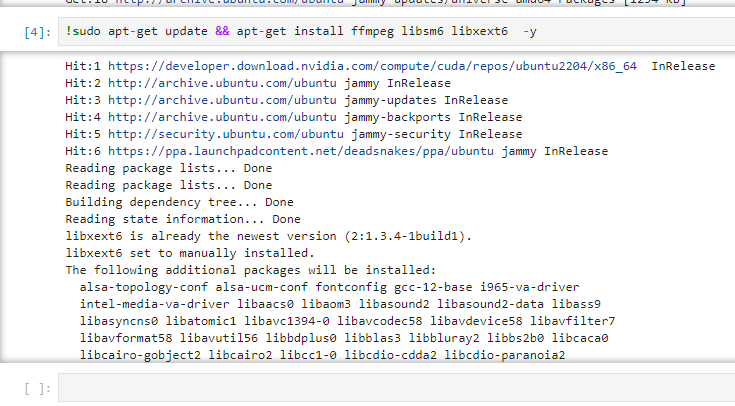
Finally, we install the rest of the requirements.
!pip install modelscope==1.8.4
!pip install xformers==0.0.20
!pip install torch==2.0.1
!pip install open_clip_torch>=2.0.2
!pip install opencv-python-headless
!pip install opencv-python
!pip install einops>=0.4
!pip install rotary-embedding-torch
!pip install fairscale
!pip install scipy
!pip install imageio
!pip install pytorch-lightning
!pip install torchsde
!pip install easydict
The next task is to download the models and set up our pipelines. We faced many issues at this step but got through with Modelscope’s snapshot_download option. If you get a network error during downloading, simply rerun this command. Also, note that this will take some number of minutes.
from modelscope.pipelines import pipeline
from modelscope.outputs import OutputKeys
from modelscope import snapshot_download

#models
model_dir_1 = snapshot_download('damo/Image-to-Video', revision='v1.1.0')
model_dir_2 = snapshot_download('damo/Video-to-Video', revision='v1.1.0')

# set pipelines
pipe1 = pipeline(task='image-to-video', model=model_dir_1, model_revision='v1.1.0', device='cuda:0')
pipe2 = pipeline(task='video-to-video', model=model_dir_2, model_revision='v1.1.0', device='cuda:0')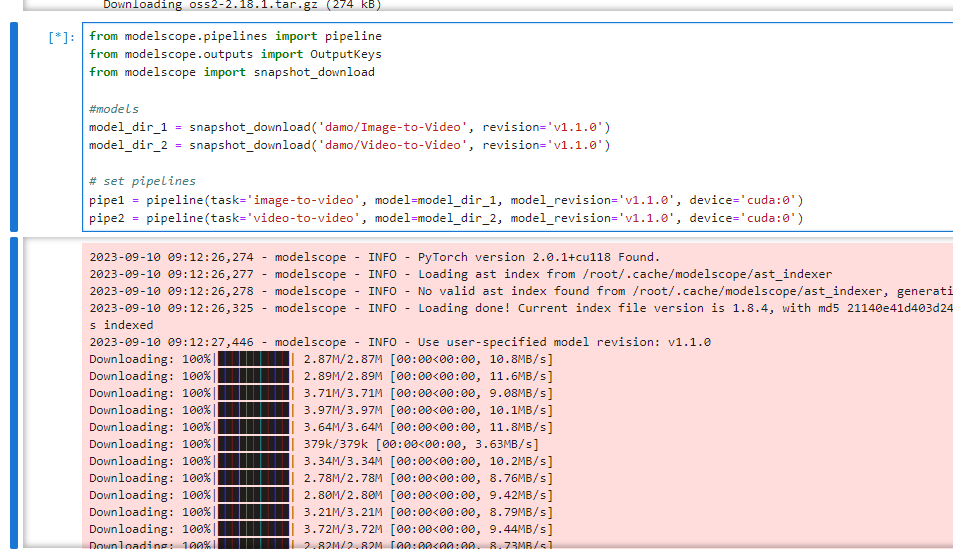
Testing Video Generation
The first generation
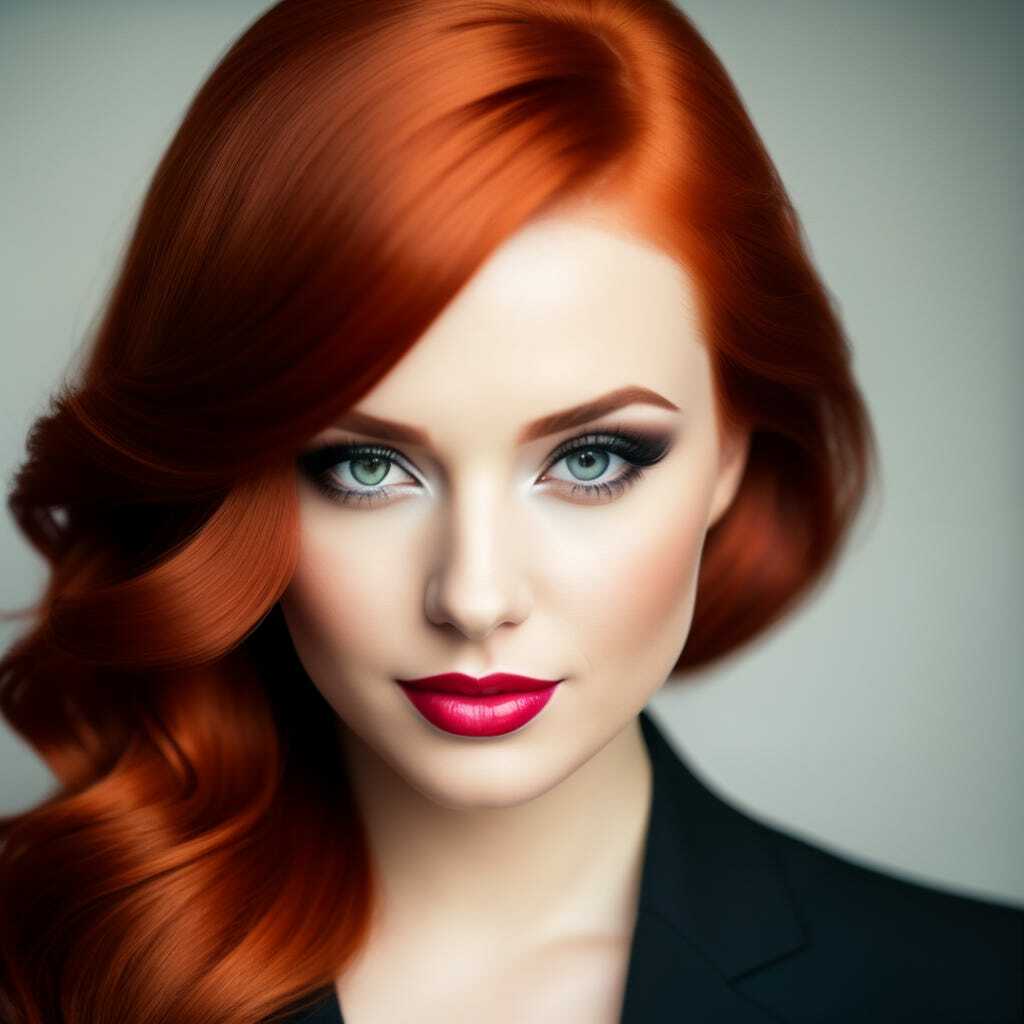
We will need an input image, so let’s start with something simple - a human portrait. We generated this image with Distillery (link) and uploaded it to our Jupyter notebook by dragging it there. We call this image as input_1.png.
For the initial generation, we will not use text input for the second model, so our code looks like this. Note that you have to match the input file name.
# image to video
output_video_path = pipe1("input_1.png", output_video='./output_1.mp4')[OutputKeys.OUTPUT_VIDEO]

# video resolution
p_input = {'video_path': output_video_path}
new_output_video_path = pipe2(p_input, output_video='./output_1_HD.mp4')[OutputKeys.OUTPUT_VIDEO]
We run the cell, wait for some time, and after about five minutes, we have two outputs - a smaller video from the first model and an HD version from the second.
Here is the initial video from the image-to-video model
Here is the initial video from the image-to-video model
This is the second video from the second HD video-to-video model

The initial output is quite cool. The video is four seconds long. It has a lot of similarities with the original, but the character has definitely been heavily altered. The hand looks a bit weird (duh), and the whole sequence is very interesting to observe.
The second output is interesting. It has definitely done what it promised - upscaled to higher resolution and introduced more artifacts. Hair looks less natural, and the video gives a weirder feeling.
Adding Text Prompt
Let’s keep everything the same, but see what happens if we add text to the second model. To make the change obvious, let’s try simple “neon lights.” To achieve this, we modify the code and run this cell.
#text input
p_input = {'video_path': output_video_path, 'text': 'neon lights'}

# video resolution
new_output_video_path = pipe2(p_input, output_video='./output_2_HD.mp4')[OutputKeys.OUTPUT_VIDEO]
And here is the result of this. Note that we only have a new HD video; the initial one will be the same as before since the first model doesn’t take text as an input.
So, the text input has definitely altered things, but it’s hard to say if it followed the prompt. Most noticeably, eye color has changed to something that resembles “neon lights.”
Chinese Text Prompt
Since the model is from a Chinese source, we wonder if the training data mostly consisted of Chinese text prompts. So, we translated our previous text input to Simplified Chinese, and let’s see what happens.
We let the model rerun the initial image generation and got a new first video, which is quite different from the previous one. This leads us to believe that each generation uses a random seed, so one could run the initial generations multiple times to get an output that looks the best and only then does the second stage upscale. Here is the new initial video.
And this is the upscaled version with Chinese text.
We can observe many more changes in the sequence but not necessarily closer to the “neon lights” prompt. It feels a lot more plastic and fake overall.
Longer text Prompt in Chinese
As the final test with the text inputs, we decided to do a longer text prompt, once again translated in Simplified. The prompt was “Beautiful redhead girl shoots a laser from her eyes, cyborg, killer, special force. Futuristic warrior.”
Here is the first video (once again, we have generated a new one).
And here is the HD output with the prompt.
It became an Asian look, but we don’t see lasers, cyborgs, or futuristic warriors.
16:9 ratio for input image
Since the final output of the model is 16:9, we were wondering if matching that would significantly improve the quality. So, we generated a new input using Distillery to match the aspect ratio and rerun the code. This is our new input image.
Here is the first output generated from this image.
And the HD version.
In both cases, we see a bit more artifacts. This can be just an unlucky seed, but we almost certainly do not observe a significant quality improvement. So, inputting 1:1 aspect ratio images seems to be an okay option.
Different Inputs
Let’s try some more inputs, and we will keep using square images since it seemed to have worked better. We will also eliminate the text input since it didn’t seem to do much.
Joker
For the first additional test, we used a human-like character to see if the character is consistent enough after the video generation. This was our starting image (generated with Distillery).

The first video output.
HD Version.
The consistency is definitely not enough to say that this is still Joker. The first video looks more interesting and usable.
Lizard Character
We decided to move from human characters to something different and generate a lizard-like character. Here is the output from Distillery that we used as an input image.
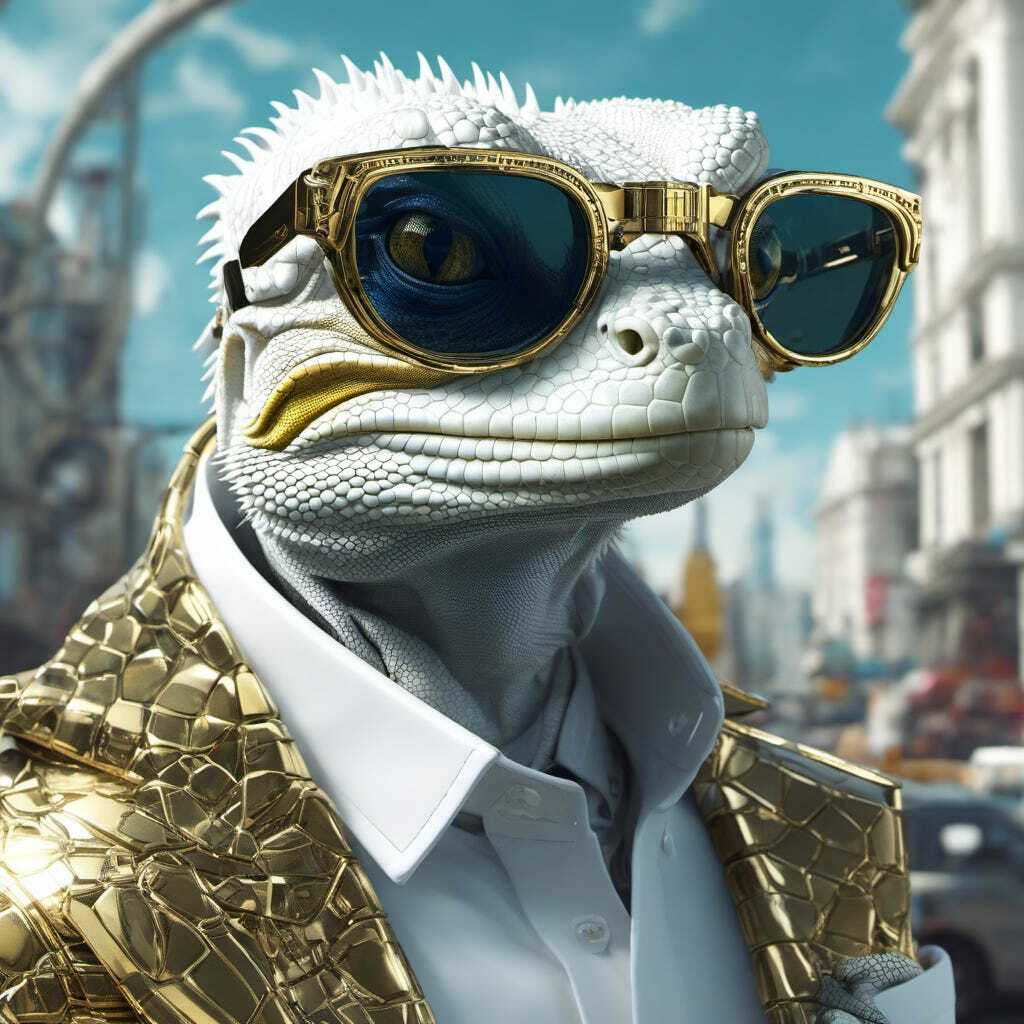
The first video output.

HD Version.
We find this generation rather impressive. It has picked a lot of detail from the starting image, and since it is a made-up, brand-new character, the lack of consistency feels much more acceptable.
Castle Painting
From the characters, we decided to move a castle painting and see what happens. This is the starting image from Distillery.
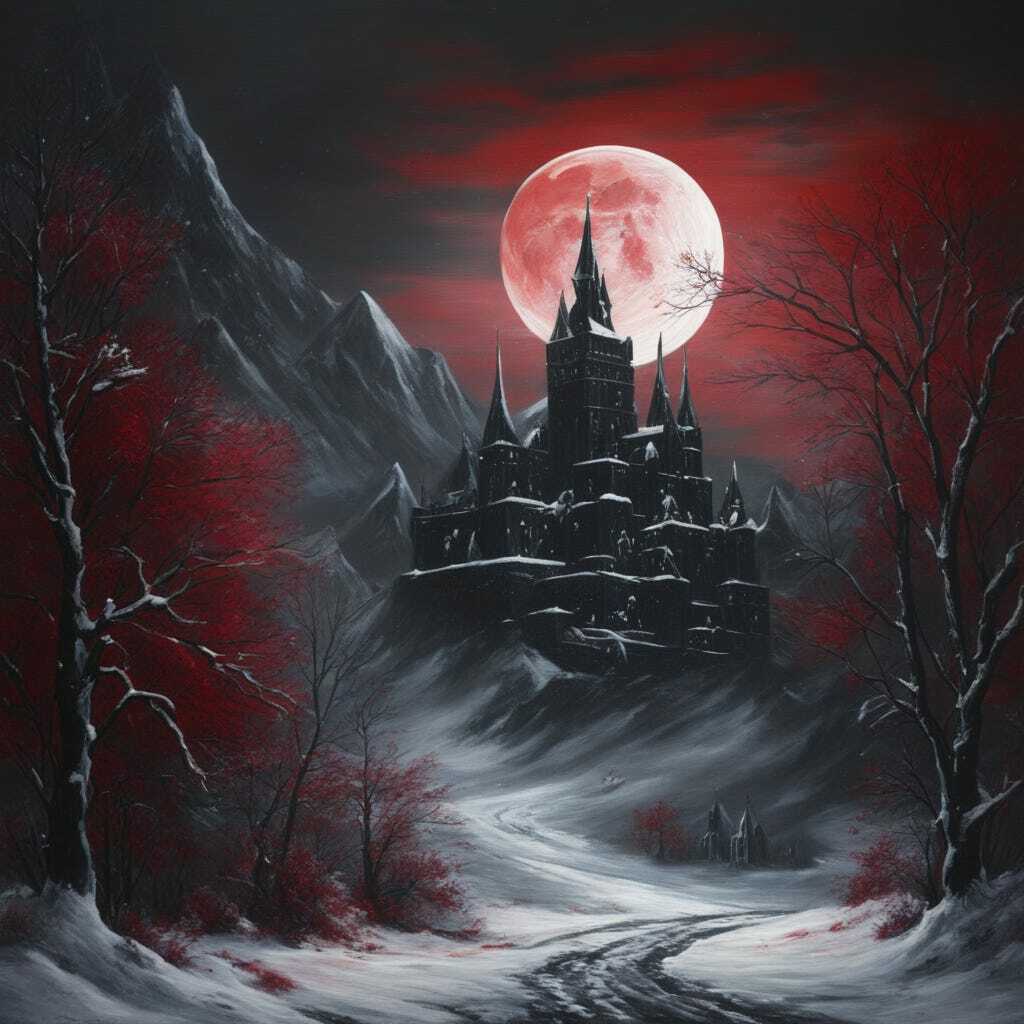
The first video output.
HD Version.
We see much more consistency but at the cost of way less movement and scene development. The video output seems to be doing a very slow camera zoom-out. Once again, the upscaled version seems less consistent, and it added a lot of blurriness.
Multiple Characters
For the final test, we uploaded a grid of four human-like characters.
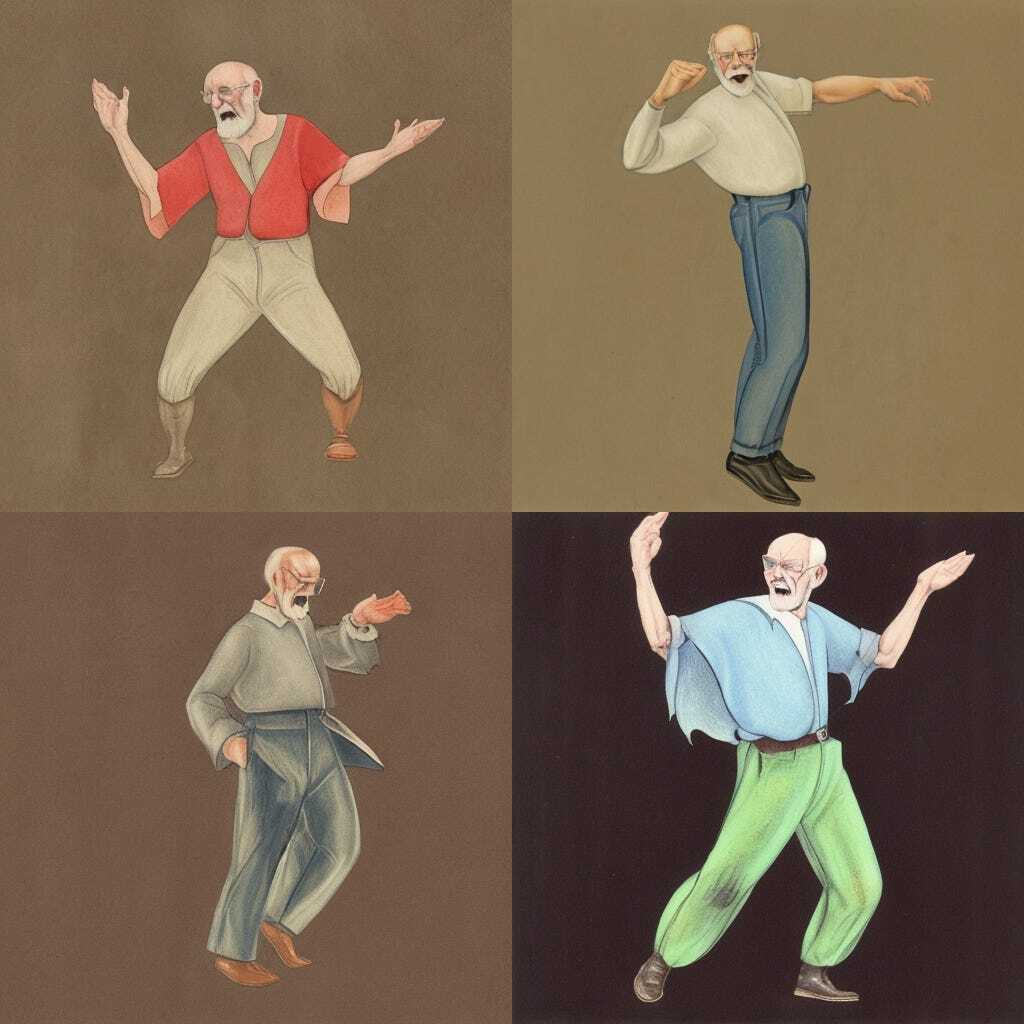
The first video output.
HD Version.
Interestingly, the model treated multiple characters as such, expanded their count from four to eight, and animated each separately. The moves are weird, but all eight of them feel human-like.
Final Thoughts
Overall, the tech feels powerful and interesting, but still has a long way to go. The control over the video generation process is quite limited as of now. Coupled with the lack of consistency from the source image, this makes the real-life use cases of this tech hard to find. However, we know how quickly things can evolve and improve in the Generative AI space, so let’s see where we go.
In terms of accessibility, we found the VRAM requirements and difficulty to make things rather acceptable. Yes, it cannot be run on an average consumer PC just yet, but in less than an hour on Runpod, we managed to create ~10 videos.
P.S. Do not forget to stop and delete your pod on RunPod once done, or you will be charged for that.
