Hello, FollowFox community!
This week, we have an exciting announcement and teaser before diving into our post!
We have been collaborating with Professor Maurizio Forte from Duke University (Professor of Classical Studies, Art, Art History, and Visual Studies; LinkedIn) on the fascinating topic of using generative AI tools for archaeological reconstruction and immersive experiences.
The first results of this collaboration will be showcased at the Field Museum of Chicago, and Professor Forte will be delivering a lecture on the subject on April 26th at 12pm local time. We'll share more materials with you soon, but if you happen to be in the area and are interested in attending the lecture, please reach out, and we'll provide more details.

Let’s get back to our topic!
Why you must try ComfyUI
In general, it is very easy to get used to certain workflows, tools, and approaches; the same is true for AI toolkits. However, we think that given the speed at which generative AI is evolving, we cannot get attached to certain tools. Flexibility is and will remain to be one of the major treatments that can unlock the full potential of space, and lack of it could be a straight road to extinction. That’s why we are building FollowFox on the philosophy of high flexibility.
With that in mind, we decided to take a pause from Automatic1111 for a bit and explore another tool.
ComfyUI Interface for Stable Diffusion has been on our radar for a while, and finally, we are giving it a try. It’s one of those tools that are easy to learn but has a lot of depth potential to develop complex or even custom workflows. But most of all, it’s a visual display of the modularity of the image generation process is a great way to enhance our intuition on how the stable diffusion works and what are all the components that we incorporate in our generation process.
So far, we feel that working with it a slightly more overhead than working in Auto1111, but we have a lot more experience with the latter. At the same time, we developed a few workflows that are just tailored to specific tasks (for example, testing different VAEs), and having the whole chain in front of us really helps us ensure that we are changing just one thing at a time for our experiments.
So if you are like us and have been hesitating to get out of your comfort zone of Auto111 and try other tools, just follow along with this post and see if this is for you! In this post, we will go over the installation process and the first run.
Installation
There are many ways to install ComfyUI, and you can read some tips on how to do so on their repo (link). However, we will continue our tradition and, in the best practice of ML practitioners, run it using Linux through Windows WSL2. In fact, our guide on how to do the same for AUTO1111 to this date is our most popular post (link).
Preparing WSL2 (only if you don’t have it setup)
This part is identical to the AUTO1111 post, and if you already have a WSL2 ready in the manner that we did for Automatic, then you can skip to the next section:
Setup WSL2
- Run CMD as admin
- Run the command: wsl --install
- Restart computer
- After restarting, we see Ubuntu is being installed
- It prompted us to create a username and password
- Once installed, I ran update commands for Ubuntu:
- sudo apt update
- sudo apt upgrade
7.Close the ubuntu terminal
8.Run CMD as admin
9.Run the command: wsl --update
10.Problem: it installed Ubuntu 22.04, which is a newer version and causes problems. So I’ll uninstall and install 20.04 instead
11.Uninstall by going to windows, add or remove programs, finding ubuntu, and uninstalling. Restart windows once done
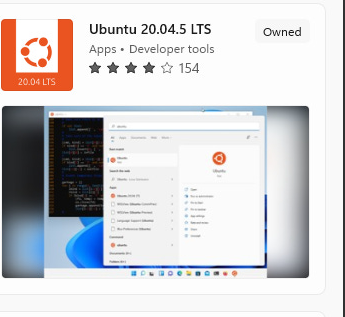
12.To install a new version, I opened Microsoft store, searched for Ubuntu 20.04
8.Run CMD as admin
9.Run the command: wsl --update
10.Problem: it installed Ubuntu 22.04, which is a newer version and causes problems. So I’ll uninstall and install 20.04 instead
11.Uninstall by going to windows, add or remove programs, finding ubuntu, and uninstalling. Restart windows once done
12.To install a new version, I opened Microsoft store, searched for Ubuntu 20.04
- Launch, wait for installation, and repeat from step 5
Install the latest Nvidia drivers on Windows
- Go to and select system details https://www.nvidia.com/Download/index.aspx?lang=en-us
- We ended up with game-ready drivers, downloaded and installed it
- We restarted PC as requested by the installer
Install WSL2 Cuda
We decided to use CUDA 11.6.2 as Dreambooth wanted to use 11.6, so let’s try that.
- Go to https://developer.nvidia.com/cuda-11-6-2-download-archive
- Select settings for wsl
- Run wsl by entering wsl the run. A dark prompt window appears
- Got to the base folder by entering: cd ~
- Optional: if you want to watch what’s up in that folder in windows explorer, type explorer.exe . (there is a dot after a space in that command).
- Run commands:
b.sudo mv cuda-wsl-ubuntu.pin /etc/apt/preferences.d/cuda-repository-pin-600
c.wget https://developer.download.nvidia.com/compute/cuda/11.6.2/local_installers/cuda-repo-wsl-ubuntu-11-6-local_11.6.2-1_amd64.deb
d.sudo dpkg -i cuda-repo-wsl-ubuntu-11-6-local_11.6.2-1_amd64.deb
e.sudo apt-key add /var/cuda-repo-wsl-ubuntu-11-6-local/7fa2af80.pub
f.sudo apt-get update
g.sudo apt-get -y install cuda
7.After done, we restarted wsl and went to the base folder (cd ~) again.
Install Conda
- Inside wsl, enter: wget https://repo.continuum.io/archive/Anaconda3-2022.10-Linux-x86_64.sh
- then enter: bash Anaconda3-2022.10-Linux-x86_64.sh
- Press enter a bunch of times, enter “yes” when asked, and press enter a few more times.
- Restart wsl go to basre (cd ~)
- Update conda: conda update --all -y
Install cudatoolkit with Conda
- Start WSL, go to base (cd ~)
- Enter: conda install -c anaconda cudatoolkit
- It’s gonna take some time, once done restart WSL and go to base (cd ~)
Install git with Conda
- Start WSL, go to base (cd ~)
- Enter: conda install git -y
Install ComfyUI
- Start WSL, go to base (cd ~)
- run update commands for Ubuntu:
- sudo apt update
- sudo apt upgrade
3.restart WSL
4.Clone repo:
4.Clone repo:
- git clone https://github.com/comfyanonymous/ComfyUI.git
- to confirm it got cloned, type explorer.exe . command in wsl and confirm that there is a ComfyUI folder there
5.Create a virtual environment with Conda
- start wsl and run the command: conda create --name comfy python=3.10
- Press y when prompted
- confirm installation by running conda activate comfy
6.Paste at least one stable diffusion model for the start
- Go to the checkpoints folder by cd ComfyUI/models/checkpoints/
- Use your preferred way to paste the model there. In our case, we open the explorer window by explorer.exe . pasting sd_v1-5_vae.ckpt checkpoint there
7.Install required packages and dependencies
- make sure you have the conda environment activated:
- go to ComfyUI main folder
- run
- restart wsl
First Test Run
- start wsl
- activate environment
- Go to ComfyUI main folder.
- Launch UI by running
b.or xformers should work too: python main.py --xformers
- You will be provided a local link; go there. In our case, it’s http://127.0.0.1:8188/
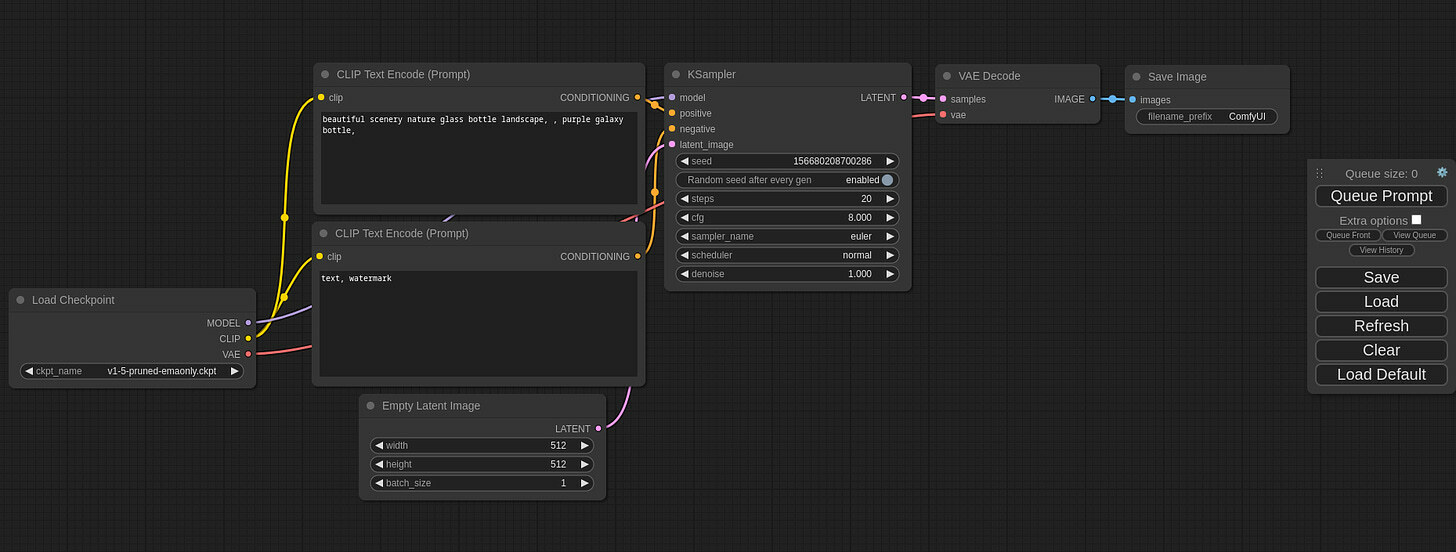
- You should see the UI in your browser. Let’s test if it generates an image
- First, in the leftmost window, select your checkpoint

- Then on the right-hand side, press Queue Prompt
What to do next?
We plan to write more about the workflows and explorations we are discovering now, but we won’t go there in this post. Instead, here are a few suggestions for what you can try:
- Try to understand what each module is for the default view
- Try to match output with your AUTO1111 setup (so far, we are getting close but failing to get 1 to 1 identical images).
- Check out, download, and try examples from their examples repo https://comfyanonymous.github.io/ComfyUI_examples/
- Right-click on the UI, press Add Node, and try to explore what each Node types do. Try to add that to your workflows
- Share what you find!
