Overview
There are many ways to fine-tune stable diffusion to your specific styles or images. This time we run it locally on a Windows machine using smy20011 / dreambooth-gui (link).
In our previous posts, we wrote how to do the same using third-party services like astria.ai (post link) or how to run it on a rented cloud GPU (post link).
Installation
Installing Docker
The first step is to install one of the two prerequisites, called Docker.
- Go to docker.com and click “Download Docker Desktop”.

- Once downloaded, run it, click ok, and wait.
- Once finished, click close, and the first step is done.
Installing WSL (Windows Subsystem for Linux)
The second prerequisite is WSL2.
- Run CMD as admin by clicking the Windows icon, typing CMD, right-clicking on the icon, and selecting “Run as Administrator. A black window will pop up.
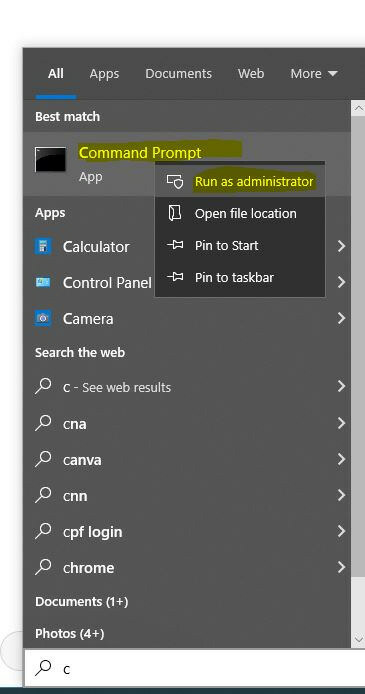
- In the window, type “wsl --install”, hit enter, and wait.
Launching Docker
- Launch the Docker we just installed and click accept.

At this point, it’s common to encounter an error. Here is a fix if you see it:
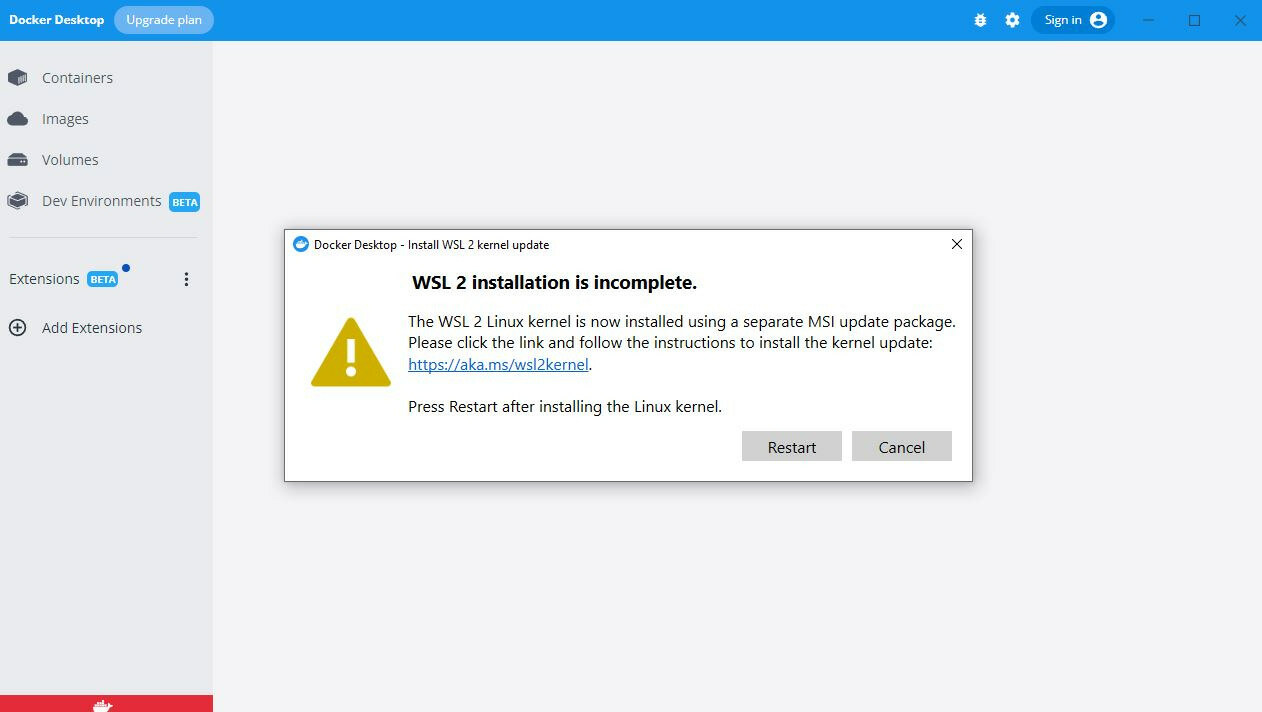
- Visit the link in the error message (link)
- Press the link under “Download the latest package:” (link to download directly)

- Launch the downloaded file, click next, and finish.
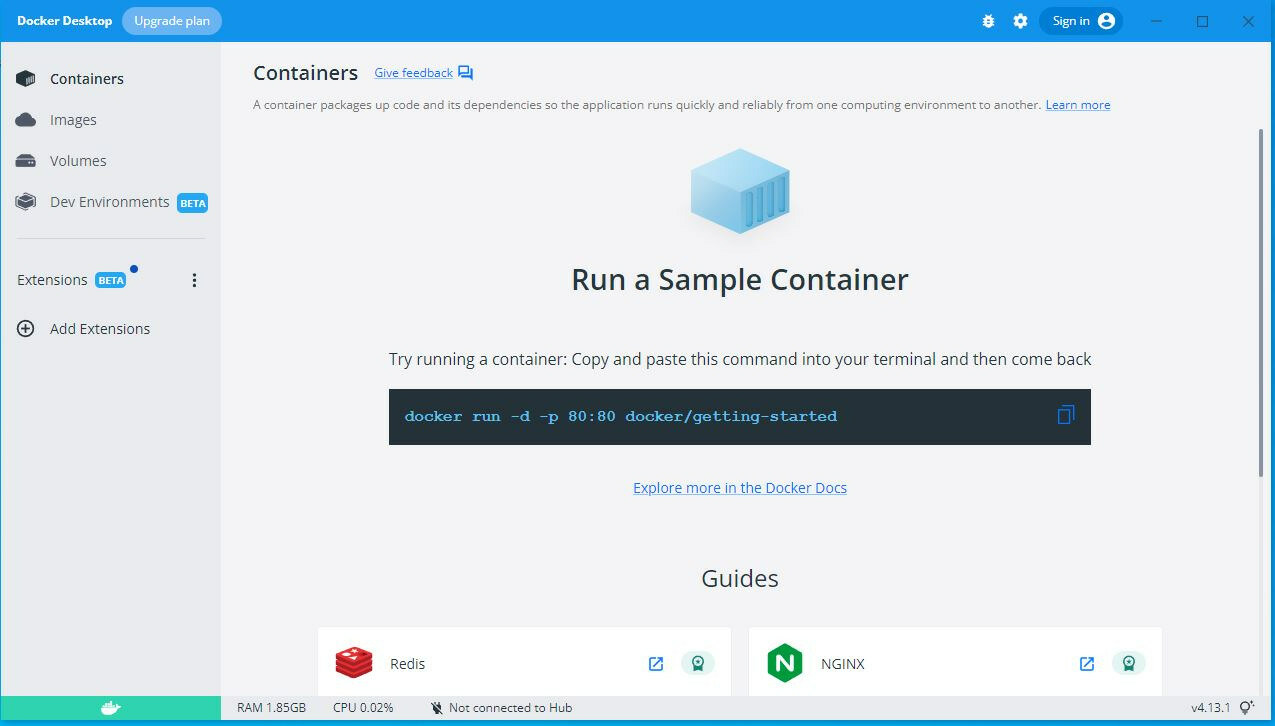
- Now you need to restart the Docker. If all goes well, you’ll see:
- If Docker is still giving errors, restart the computer, which usually solves it.
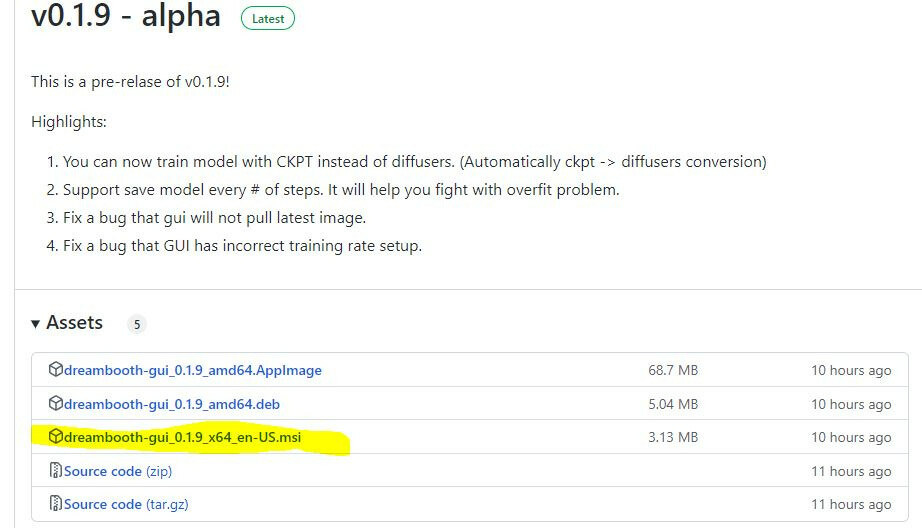
Install Dreambooth GUI
- Visit GUI Github, and download the x64 installer.
- If Windows gives you a warning, click Run anyway.
- Click next, select installation path, click install and wait.
Running GUI and Training
Note: this is just a quick overview with no details about image formats, settings, etc. The goal is to get this GUI running and training for now.
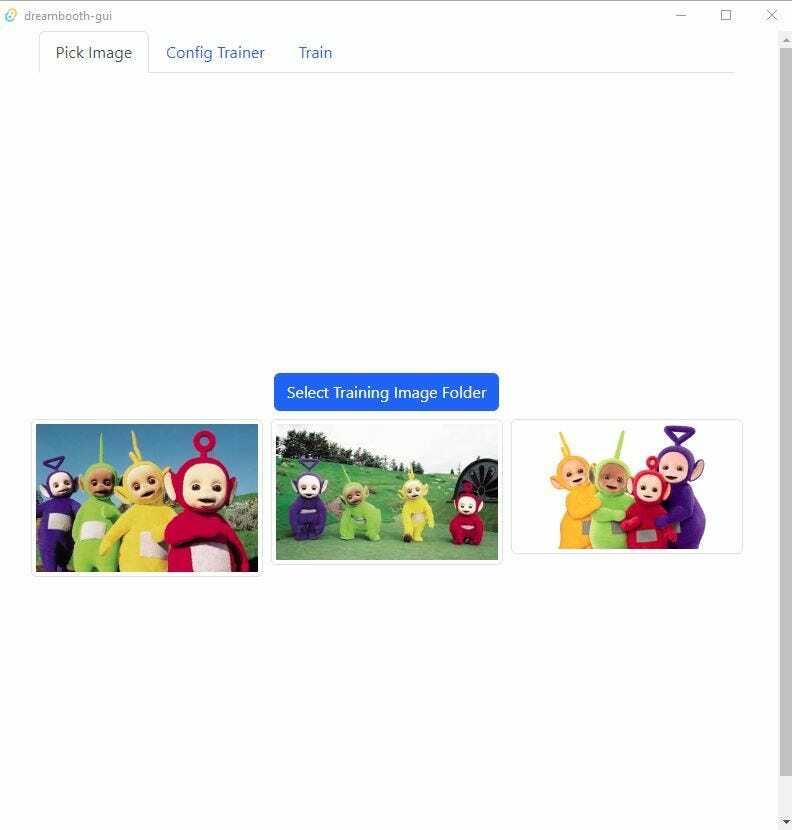
- Once you run the installed GUI, it will have a simple UI with a few tabs.
- From the first tab, “Pick Image” select a folder where you have a few training images. (tubes are not there by default, I selected them)
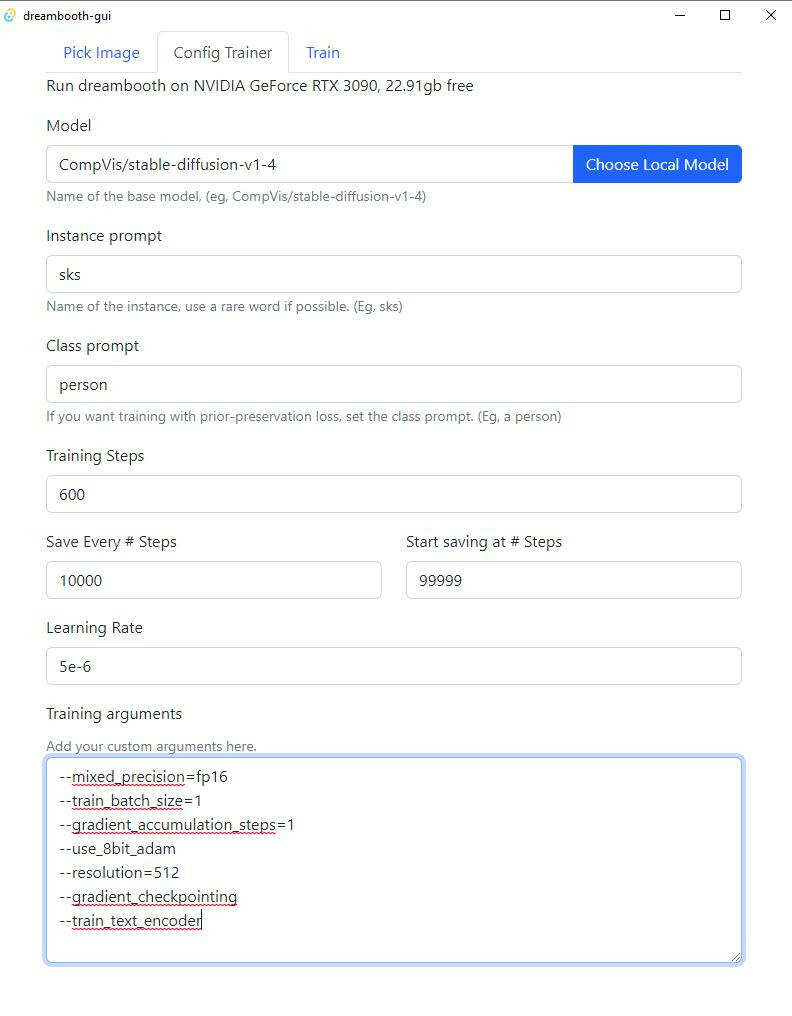
- In the next tab, “Config Trainer” make sure to enter your Class Prompt (something generic like “person”) and edit training steps and learning rates.
- Under training arguments, make sure to at least have these lines (or more if you know about Dreambooth training details)
--train_batch_size=1
--gradient_accumulation_steps=1
--use_8bit_adam
--resolution=512
--gradient_checkpointing
--train_text_encoder
- On the last tab (Train), set the output destination folder; just keep in mind these files get large.
- If you don’t have a huggingface token:
- Go to https://huggingface.co/ and create an account.
- Log in there, click your profile icon on the top right corner, and click settings.
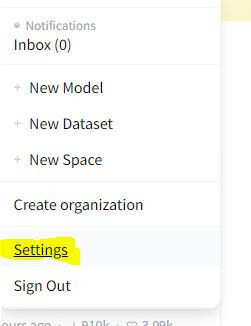
- Under the settings, click “Access Tokens”, click “New Token,” and copy generated token to the clipboard.
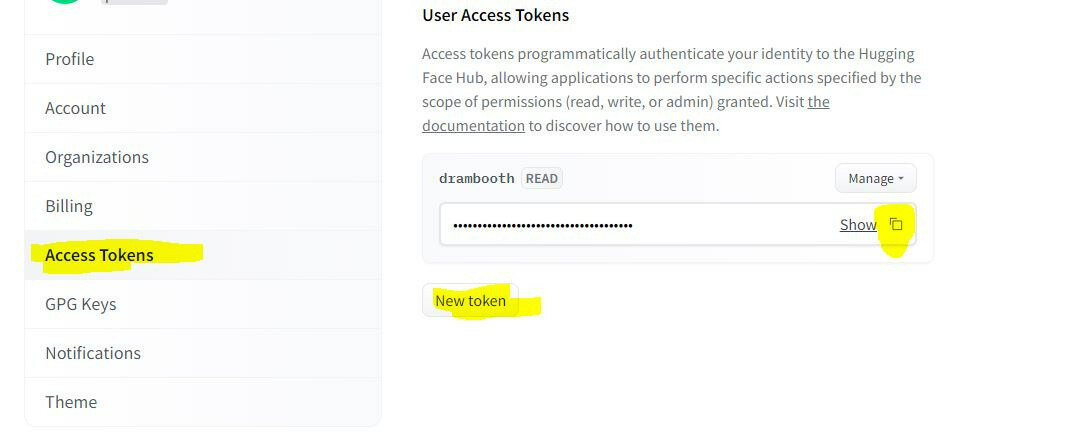
- Now paste it to GUI under “Hugging Face Token”.
- Done - press Start. The first run will take longer as it installs all the required packages.
- It will take some time and generate a cpkt file in the folder that you selected for results.
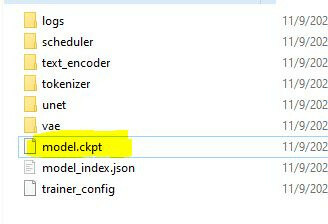
- You can copy and paste the cpkt file to your Stable Diffusion models. If you want to run it with WebUI, check out our previous post. Link
