Hello, FollowFox community!
SDXL 1.0 is officially out (link), it looks very promising, so it’s time to start adopting it and see how far we can push its possibilities. Huge thanks to stability.ai for fueling this whole movement!
In this post, we will install and run the new SDXL mode, write the steps to achieve it, discuss some observations, and draft future work.
We highly recommend reading the SDXL release technical report as it contains a ton of useful information about the model that will be relevant and useful as we build upon this model. (link)
We hope that we have discussed the topic of why WSL2 vs. native Windows installs enough already, and today, we just want to reinforce this statement once again - for our team, this choice has proved itself over and over again.
Installation
Automatic1111
This ended up being surprisingly easy. If you already have Automatic1111 installed with WSL2, you must update it.
If you are doing a fresh install - our installation method posted a couple of months ago still works fine, and you should follow it. (Post link)
To update to the latest version:
- Launch WSL2
- Activate your environment
conda activate automatic- Navigate to your installation folder
cd ~/stable-diffusion-webui/- do the pull for the latest version
git pull- launch as usual and wait for it to install updates
python launch.py --xformers- If you get xformers error, for a one-time launch like this, it will fix it, and for the subsequent runs launch as before
python launch.py --reinstall-xformers --xformersDownload the SDXL model weights in the usual \stable-diffusion-webui\models\Stable-diffusion folder. Base weights (link) and refiner weights (link).
They also released both models with the older 0.9 VAE, available on Huggingface. We haven’t investigated the reason and performance of those yet.
We will discuss the workflows and image generation process in the next section.
ComfyUI
Once again, our older post on ComfyUI worked like magic so you can follow these steps for the fresh installation (link).
Place the downloaded models in \ComfyUI\models\checkpoints folder, and you are ready to launch it as usual using the “python main.py” command.
Generating First Images
Automatic1111
It is important to note that as of July 30th, SDXL models can be loaded in Auto1111, and we can generate the images. Still, the fully integrated workflow where the latent space version of the image is passed to the refiner is not implemented. Instead, we manually do this using the Img2img workflow.
For starters, let’s generate an image using the base model:
- select the SDXL base model from the dropdown
- As usual, enter and negative prompt, and feel free to tweak the parameters.
- Set the resolution to 1024x1024 or one of the supported resolutions ( - 1024 x 1024, 1152 x 896, 896 x 1152, 1216 x 832, 832 x 1216, 1344 x 768, 768 x 1344, 1536 x 640, 640 x 1536.)
- And you are good to go; this will generate the initial images from the base.

The first image generated by us using SDXL
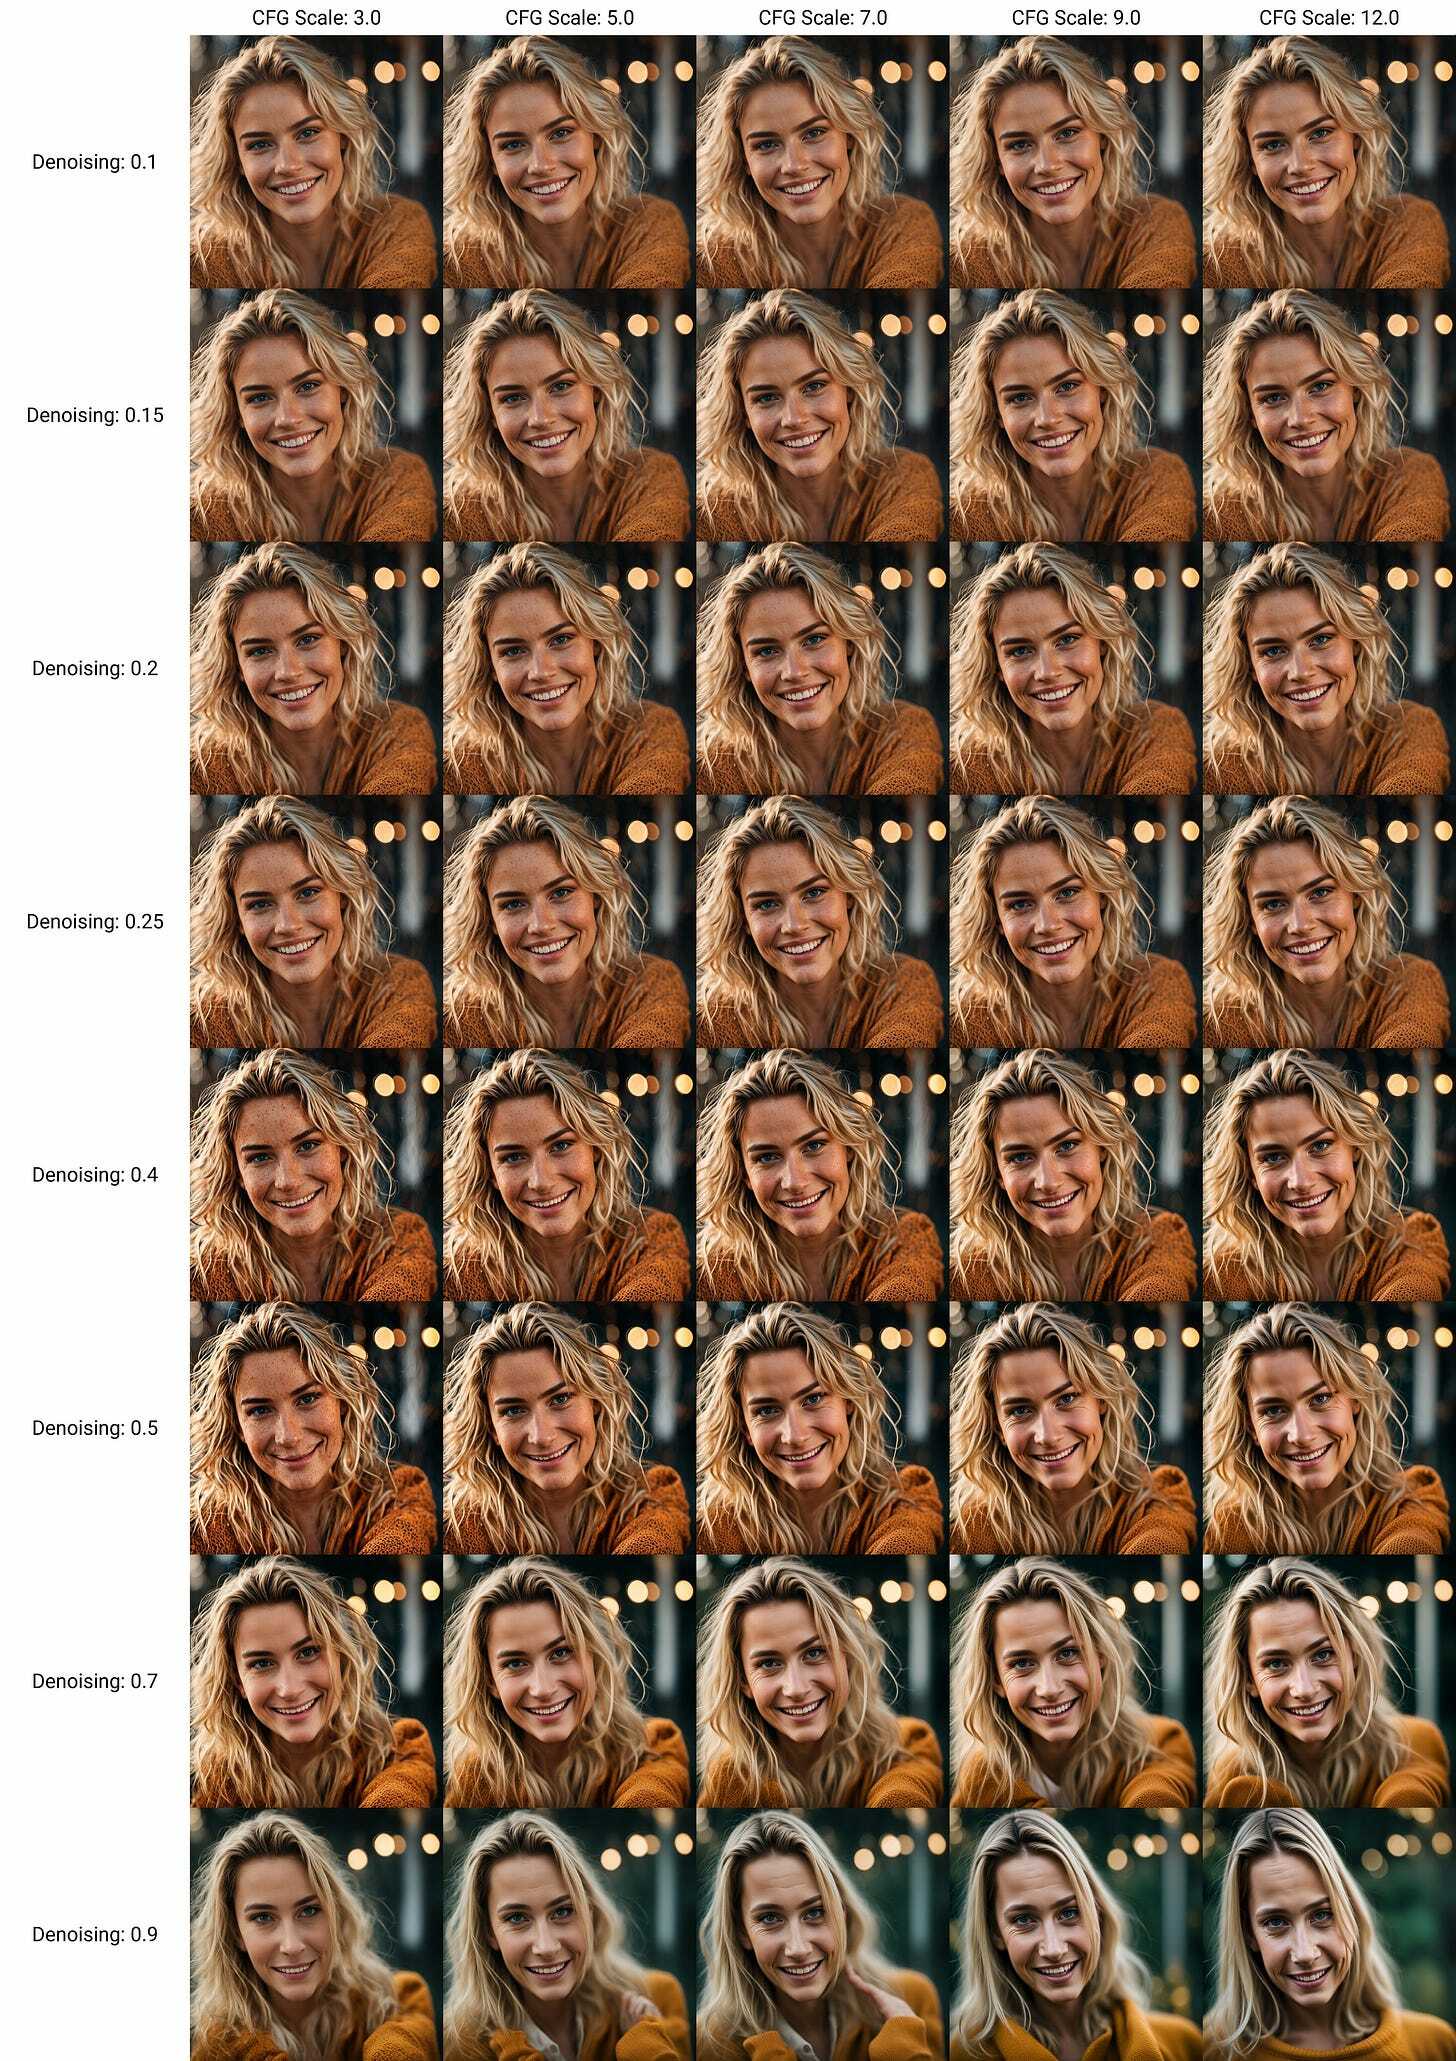
The refiner part is not yet properly implemented - we expect it to get implemented soon in some hiresfix upscale type workflow. Meantime, you can send generated images to the img2img tab, switch the model from base to refiner, select relatively low denoising strength, and refine your base-generated image.

And here is a quick grid of this hacky workflow of refiner with different parameter combinations
ComfyUI
After launching ComfyUI and opening it in the browser window, the easiest way to start with the first workflow is by using an example image. Go to this link (Examples section of ComfyUI GitHub), download the image from there, and drag it into the WebUI. It will load the nodes as it needs to be. Pressing “Queue Prompt” will generate your initial image.
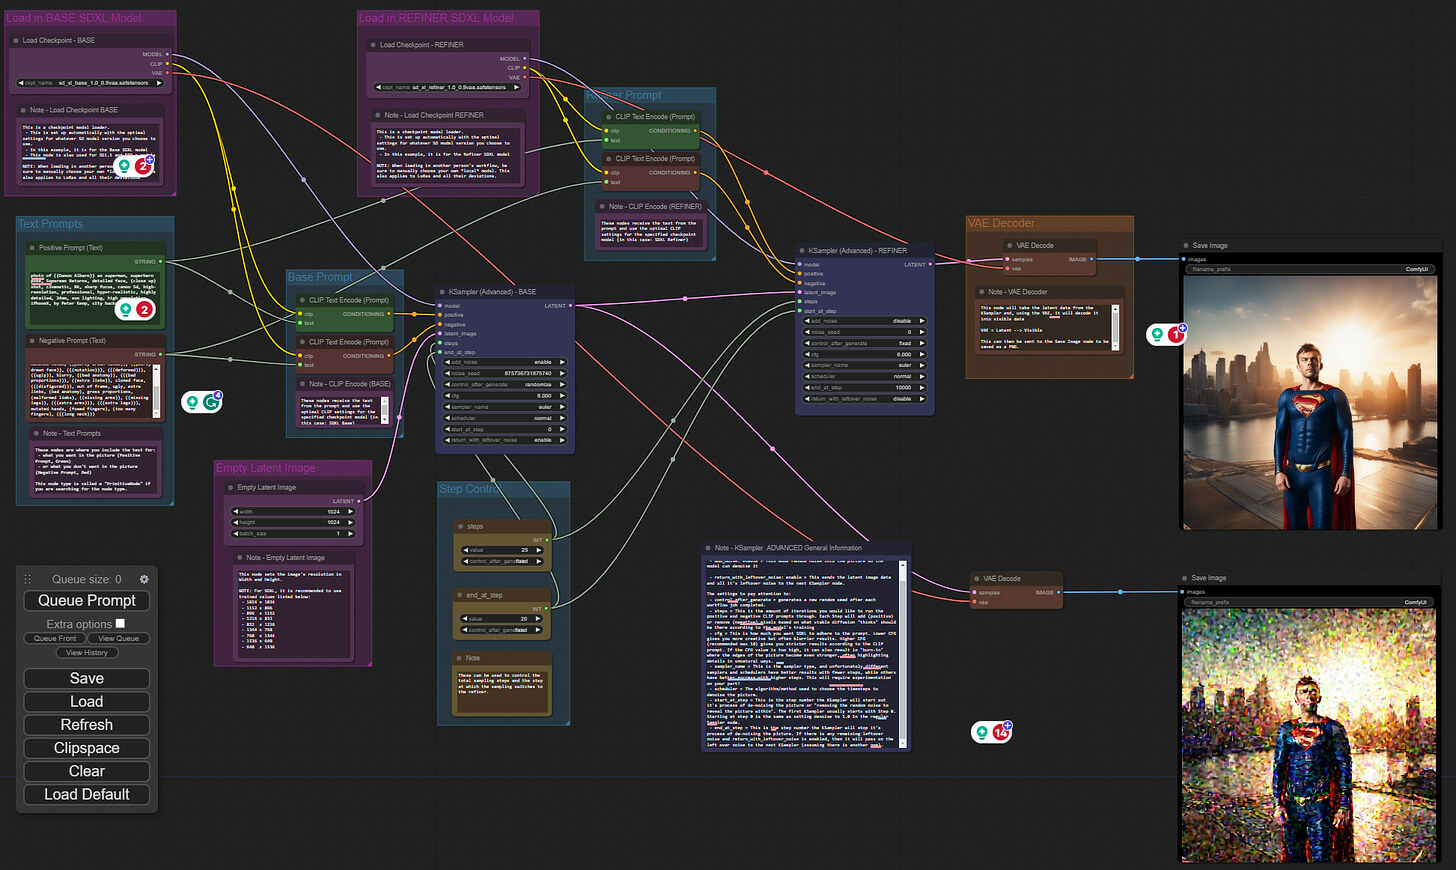
Note that we manually added the bottom right-hand side to take a look at the image that’s passed to the refiner
Reviewing each node here is a very good and intuitive way to understand the main components of the SDXL. We can see that two models are loaded, each with their own UNET and VAE. In this particular workflow, the first model is set to create an initial image with 25 steps. However, the latent space version of the image after 20 of those 25 steps is passed to the refiner model, and the last 5 steps are done in that latent space. And as the last step, VAE from the refiner is used to decode the latent representation into a visual image.

Hope this helps you to get started and make sure to stay tune for more in-depth explorations!
