Overview
I installed Stable Diffusion WebUI on my PC a few days ago and documented it here. But an alternative is to rent a GPU on a cloud, especially if you don’t have a beefy PC (and I understand that at some point, with more complex tasks cloud will be the only option for me).
So I decided to give it a try on runpod.io, which has a lot of stuff already pre-configured for us.
How I did it
- I register on https://www.runpod.io/ with my email
- I know I’ll need some $ to spend, so I topped up the account with USD 25. I’ll write about the actual usage rate of these credits later on
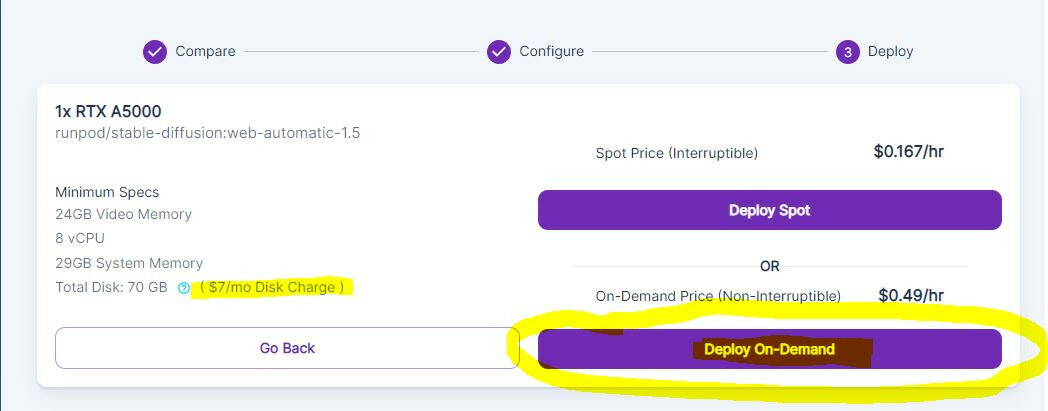
- Pricing expectation: as I understand, the total cost will be the hourly usage rate of the pod I will rent + data storage cost that is calculated based on the pro-rated monthly price of $0.2/GB/month. details link
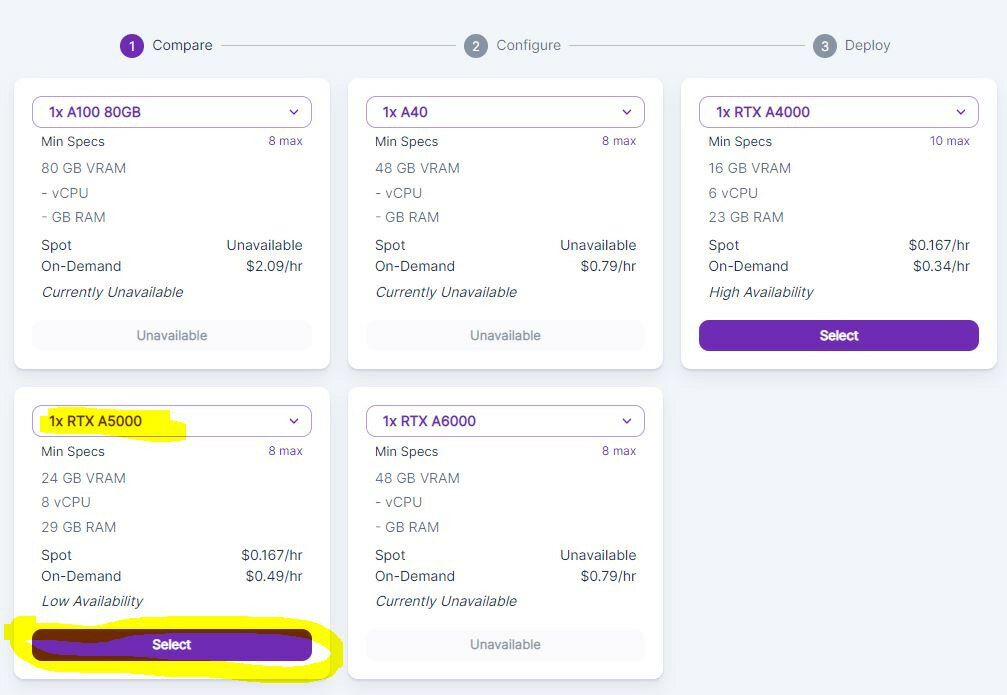
- Cloud type selection: The first step is to choose a cloud type, and I decided to go with Secure Cloud. I don’t know much about the difference and might experiment with it later

- Pod selection: The next is to choose what type of server to rent; I decide to go with RTX A5000 given no availability of other ones and that it has 24GB of VRAM, which I remember seeing as a requirement for other tasks
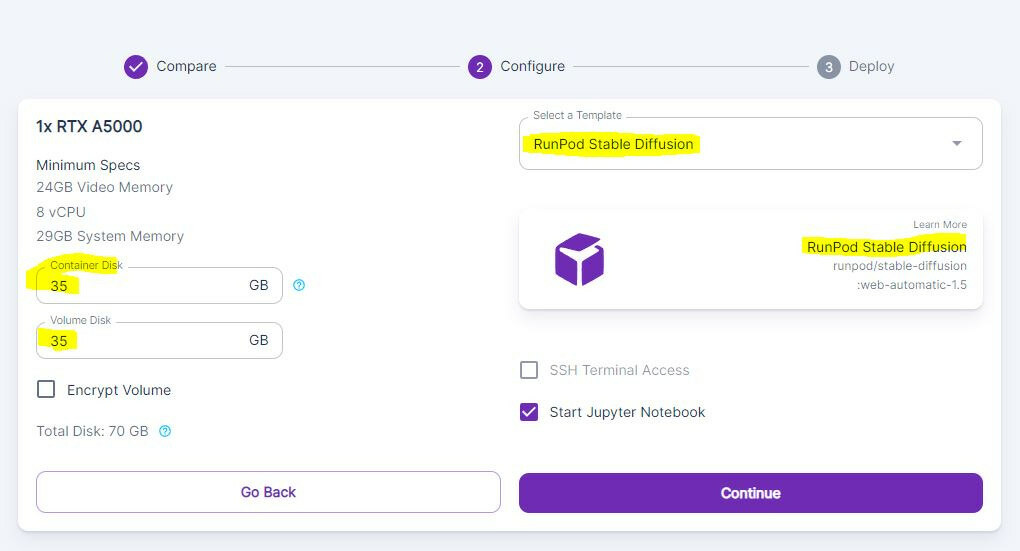
- Configuration: I selected “RunPod Stable Diffusion” from the templates and set Container and Volume disk sizes to 35GB each.
- Spot vs On-Demand: I decided to go with an expensive On-Demand one which, as I understand, won’t be interrupted, unlike Spot one, where you can get kick-out if other users bid more. I' might experiment with it more later on (or let me know if you have experience with this.)
- Once deployed, you’ll have to wait a bit and select Connect via HTTP [Port 3000]. It will open a new window in the browser, and if it’s not loading, it means it’s still being deployed (usually takes 5 minutes)

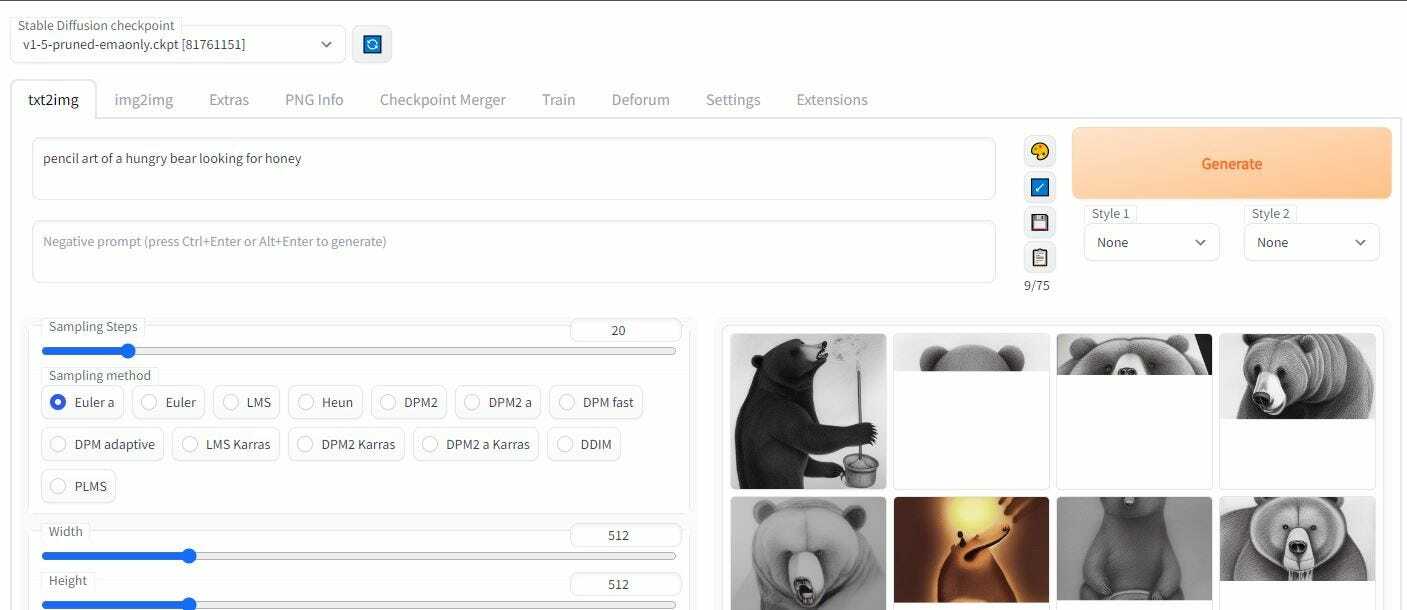
- Once loaded, the usual Webui from AUTOMATIC1111 shows up. However, from a few prompts, I can tell that it works slower than my local install, especially when downloading things.
Updating WebUI
- On your runpod, press connect and “Start Web Terminal”. Once available, press “Connect to Web Terminal”. A new window will pop up that looks like a cmd terminal.

- In that new window, type “git pull” and press enter.
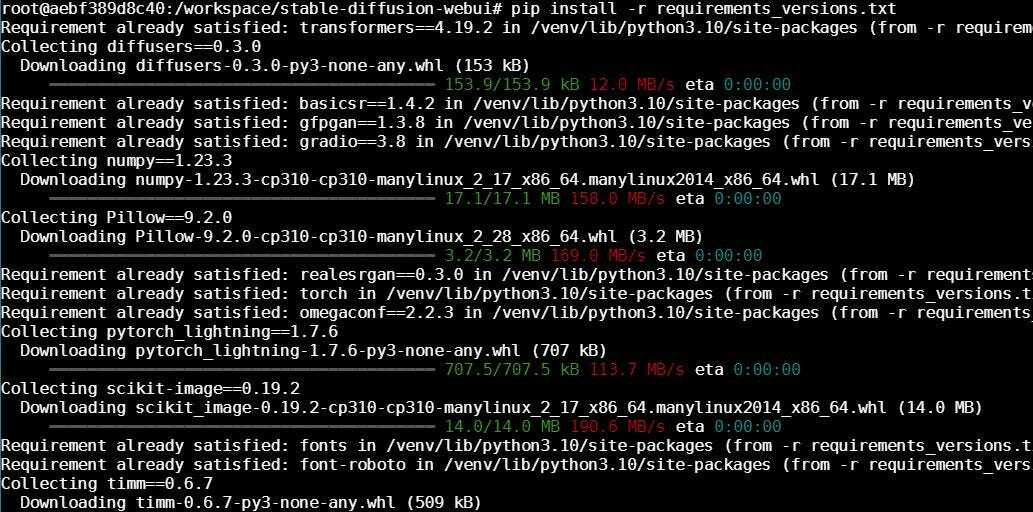
- Once done, type “pip install -r requirements_versions.txt” and press enter to install any new requirements. Some text will be displayed, indicating the progress.
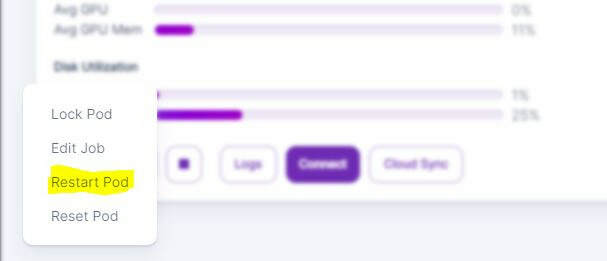
- Once done, close the cmd window. Next, press “Stop Web Terminal” on your pod tab. Then on your pod, select the more actions tab and press “Restart Pod”.
- Now press connect via HTTP as usual, you might need to wait around 5 mins, and an updated WebUI will launch in a bit. Done!
Uploading Custom Checkpoints (ckpt files)
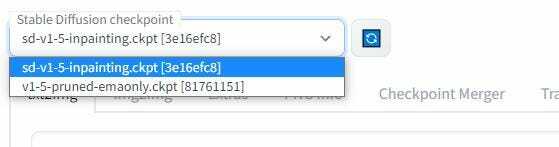
I wanted to replace the cpkt model with my one - for example, the inpainting version.
- On your runpod, press “Start Web Terminal”. Once available, press “Connect to Web Terminal”. A new window will pop up that looks like a cmd terminal.
- In that new window, type “pip install gdown” and press enter.
- Once done, enter “pip install --upgrade gdown” and press enter.
- Now upload your ckpt file to your google drive. Once done, make sure sharing is set to "Anyone who has a link can View"
- now in pod cmd, I need to go to the models’ folder, so I type “cd models/Stable-diffusion”.
- Now type “gdown https://drive.google.com/uc?id= ##############” but replace hashtags with your file-id from the Google Drive. It looks something like 1pMzO0jfHIT7EDu73kopwassadasRfMnjDK and can be seen when you copy the file link. Once you hit enter, the progress bar will show the upload progress.
- Once done, I closed the terminal, restarted my pod, selected “Connect via HTTP,” and waited a few mins until it loaded. This step might not be necessary, by the way.
- From the dropdown, select the desired model, and it works like magic!