Happy Lunar New Year!
This week we decided to start exploring image captioning. In our recent fine-tuning experiments with Stable Diffusion, we have been noticing that, by far, the most significant differences in model qualities were due to changes in the quality of the captions. And this is not surprising - Stable Diffusion is as much an image model as a language/text model. When it comes to fine-tuning and captions, we have a lot of unanswered questions:
- How is a high-quality caption defined?
- Should we mimic caption quality and style as close to the data that SD was trained in or try to improve the quality?
- How does caption length during fine-tuning process impact various aspects of the model, such as its flexibility and accuracy?
- What about repeated words in captions?
- Is it better to have one optimal caption per image or mix captions with copies of the same image?
There are many more questions like these, and we believe that conducting experiments to answer some of these is the best approach.
However, before starting those experiments, we need to be able to generate captions and have some level of control over that process. So in this post, we will do an introductory, practical exploration of some of the tools and approaches to generating image captions. Like everything related to Stable Diffusion, this topic is a rabbit hole that can be explored very deeply. This post doesn’t aim to do that, so the depth of exploration will be relatively limited.
Approach to the Exploration
Tools
As mentioned above, we wanted practical exploration so that we could use some of the discovered methods in our future fine-tuning experiments. So we will start with two captioning tools we discovered in our journey: Smart Pre-Processing Extension in Automatic1111 (link) and EveryDream tools (link).
Both tools use the BLIP model (link) to generate sentence-like captions for the images, but the slightly different settings. Additionally, the Smart Pre-process extension uses CLIP (link) to generate additional tags for the images.
Evaluation Method
We will generate captions for a few different types of images, observe how different settings change those tags and discuss the captions' quality accordingly. While we cannot know precisely what we are looking for before conducting some of the above-mentioned experiments, some things are apparent. We borrowed a few hints from other places. For example, in the BLIP paper (link), we noticed that the diversity of the captions had a significant impact on the model performance, so we hypothesize that the same could be the case with fine-tuning Stable Diffusion.
“Diversity is Key for Synthetic Captions… We hypothesize that the reason is that nucleus sampling generates more diverse and surprising captions, which contain more new information that the model could benefit from.”
So a few factors we will pay attention to and try to gain control over:
- The overall accuracy of the captions (monitor amount of true and false positives)
- Length of the caption
- Diversity of the captions (while preserving accuracy)
- Level of detail
- Anything else that will be noticeable
Images to Caption
Many possible types of images can be captioned, and we won’t cover everything here. We chose four different types of images that cover some potential use cases. Still, we encourage you to run more experiments on the topic using different images (and share results with the community!). Our selected images:
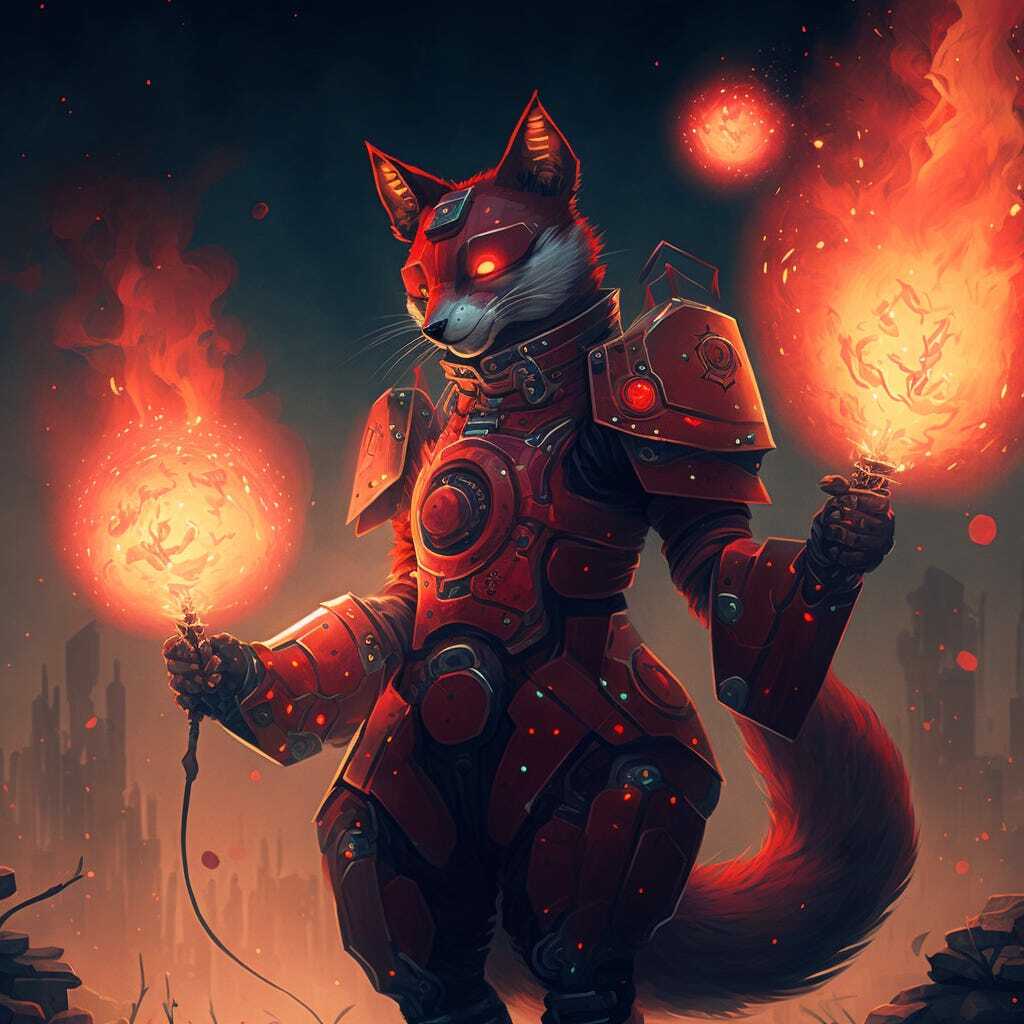
1.Realistic photo of a person - we are bringing back Damon Albarn from our previous posts

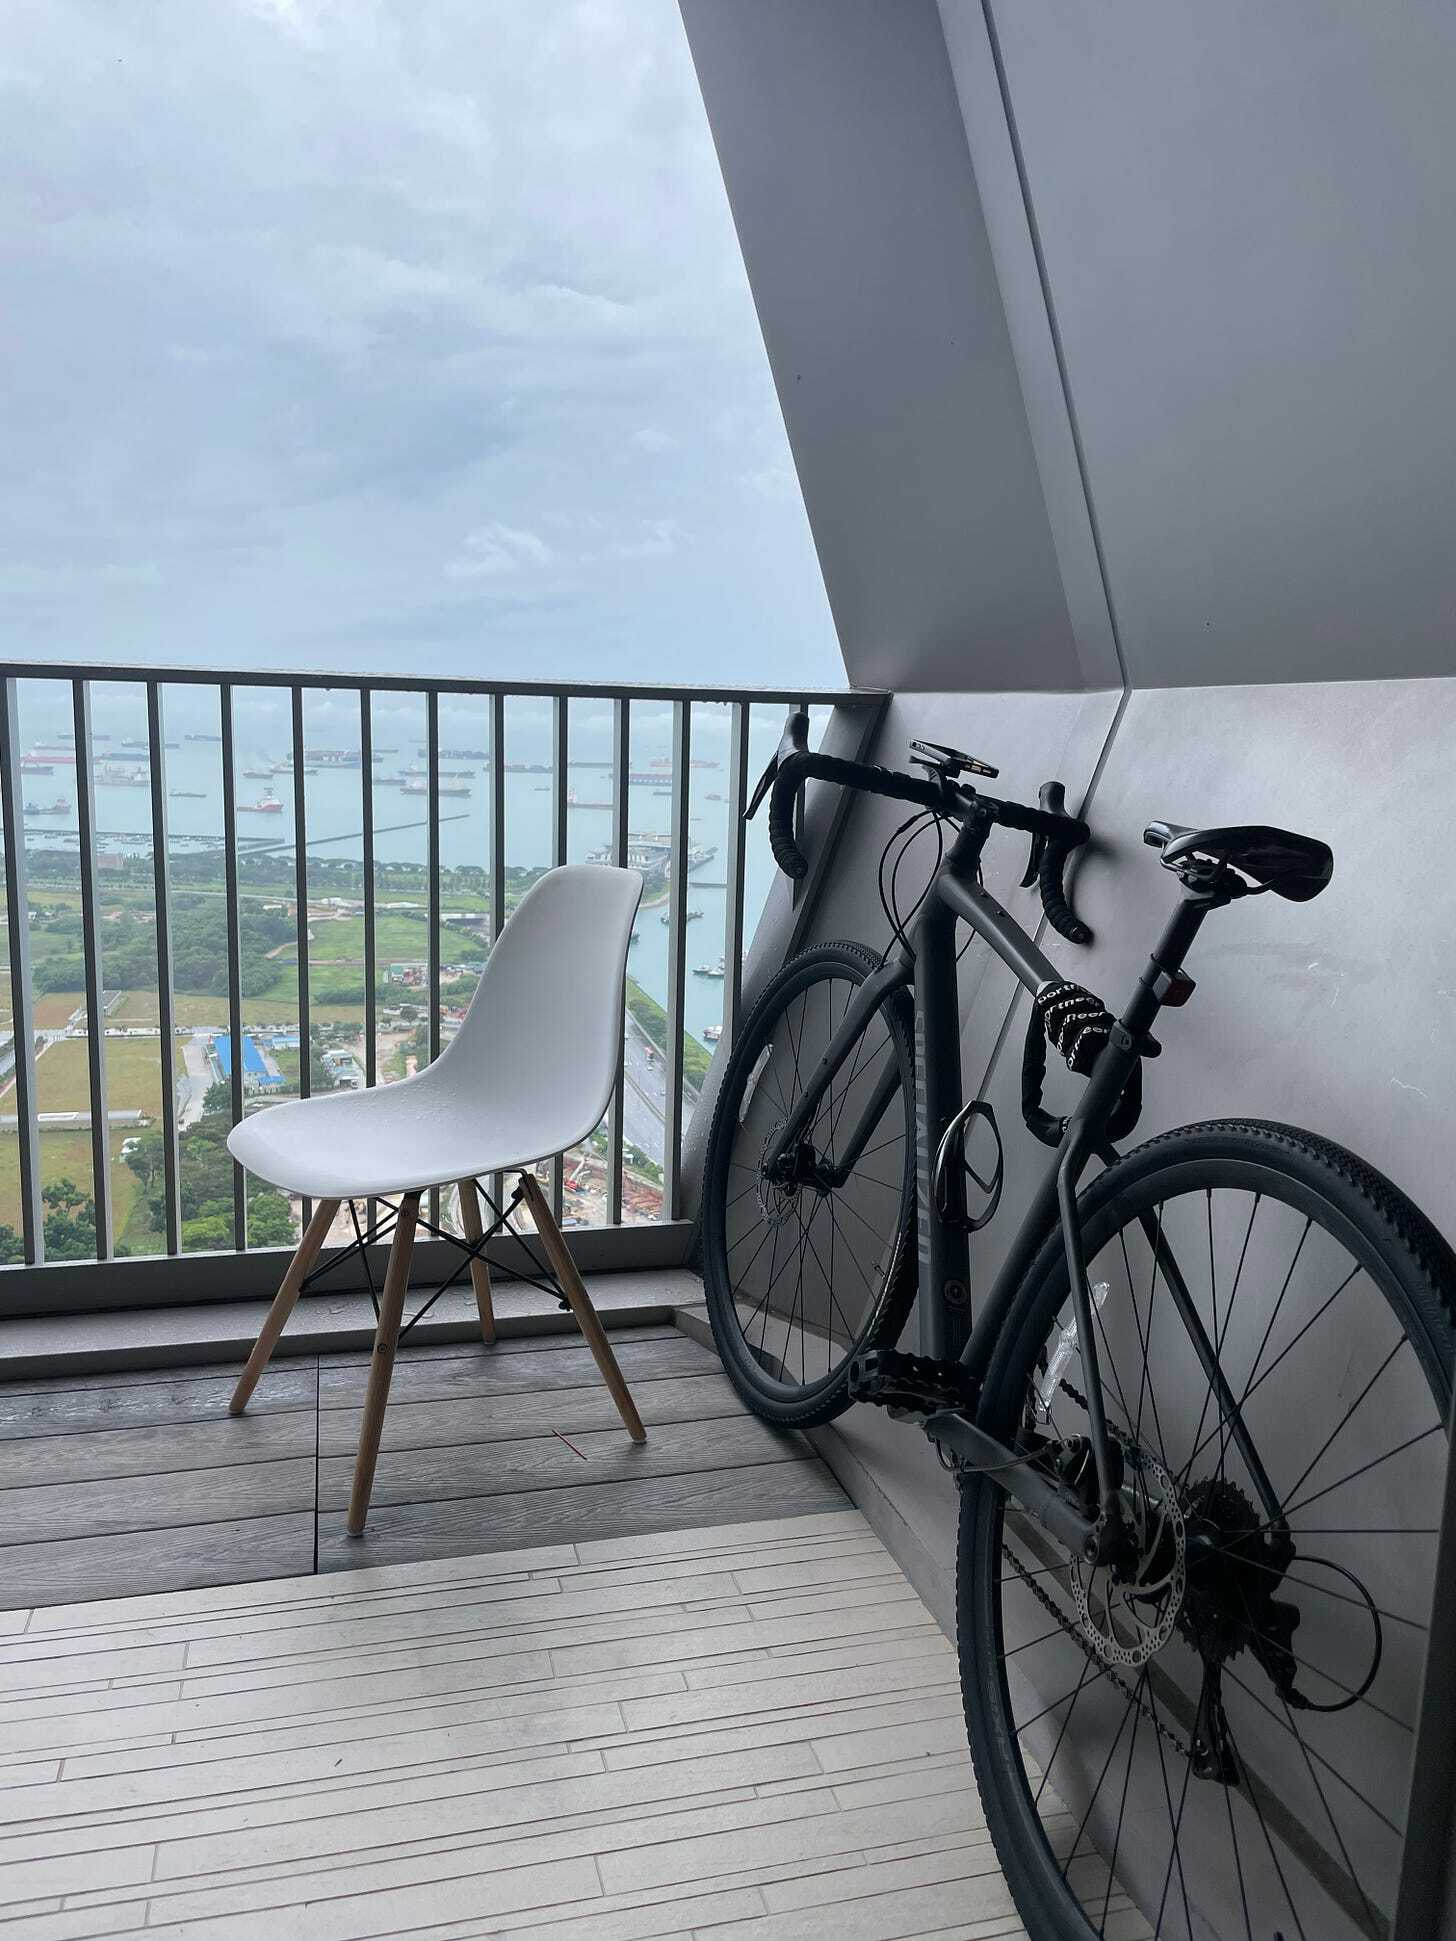
2.Realistic photo of an item - one of the images from my iPhone
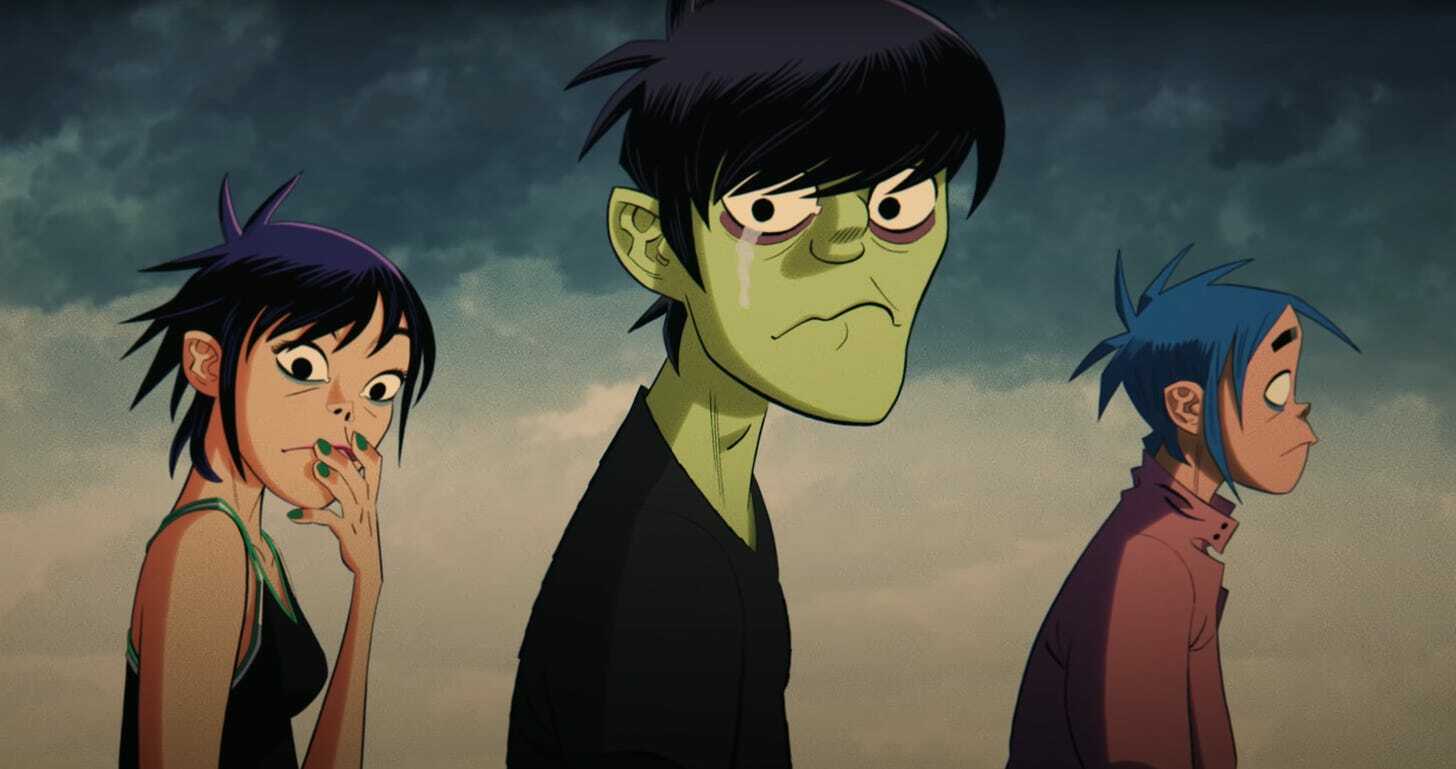
3.Stylized image with a character - we will use a shot from one of the Gorillaz videos.
4.Simple icon - a black and white web icon of a dog with a leash

Results and Findings
EveryDream Tools
Let’s start with EveryDream Tools. If you are looking for an installation guide, we have used this tool in one of our previous posts for captioning (link). You can find some of the details about the tool under the documentation section of the repo (link). From this + some hints from the code, we will pay attention to a few important things.
First, it uses BLIP’s captioning fine-tuned checkpoint called “BLIP w/ ViT-B and CapFilt-L” (link to download). From BLIP’s paper, we can see that this model had the top performance among BLIP versions.
Additionally, based on ED tools documentation, we can choose between two samplers: “beam 16” (default) or “nucleus” (run by adding --nucleus argument). For more details, check out explained on Beam Search (link) and a paper on Nucleus sampling (link). In terms of what to expect - we can get some hints from BLIP paper once again:
Nucleus sampling leads to evidently better performance, despite being more noisy as suggested by a higher noise ratio from the filter. We hypothesis that the reason is that nucleus sampling generates more diverse and surprising captions, which contain more new information that the model could benefit from. On the other hand, beam search tends to generate safe captions that are common in the dataset, hence offering less extra knowledge.
There are a couple more parameters we can adjust - for Nucleus, it will be just the value of q_factor. Based on EDtools documentation: “it simply changes the opinion on the prompt and does not impact repeats. Values ranging from 0.01 to 200 seem sensible and default of 1.0 usually works well.” So we tested five values: (0.01, 1, 20, 100, and 200).
For Beam, we can adjust both q-factor and --min_length parameters. In the documentation, we see: “For the default beam 16 algorithm q-factor limits the ability of words and phrases to be repeated. Higher value reduces repeated words and phrases. 0.6-1.4 are sensible values for beam 16. Default is 1.0 and works well with the defaulted value min_length of 24. Consider using higher values if you use a min_length higher than 24 with beam 16. -min_length adjusts the minimum length of prompt, measured in tokens. Default is 22. Sensible values are 15 to 30, max is 48. Larger values are much more prone to repeating phrases and should be accompanied by increasing --q_factor to avoid repeats.” So we tested a combination of five q-factor values (0.01, 0.6, 1, 1.4, and 5) and five values for min_length (5, 15, 22, 30, and 48).
Nucleus Results
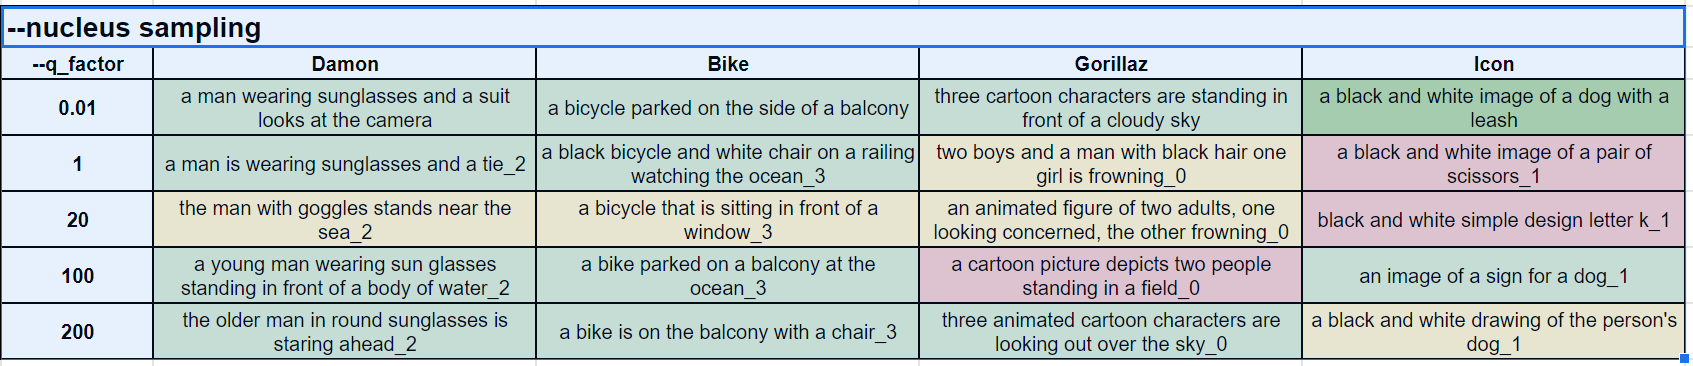
Generally, we agree with the statement that “beam generates safe captions”. Very few of the captions were wrong. For some reason, q_factor 20 didn’t seem to work well but other than that, it is difficult to deduce some directional relation between the generated captions and values of the q_factor argument.
Note that green, yellow, and red are our subjective assessments of the captions but not necessarily quantified and precise methods.
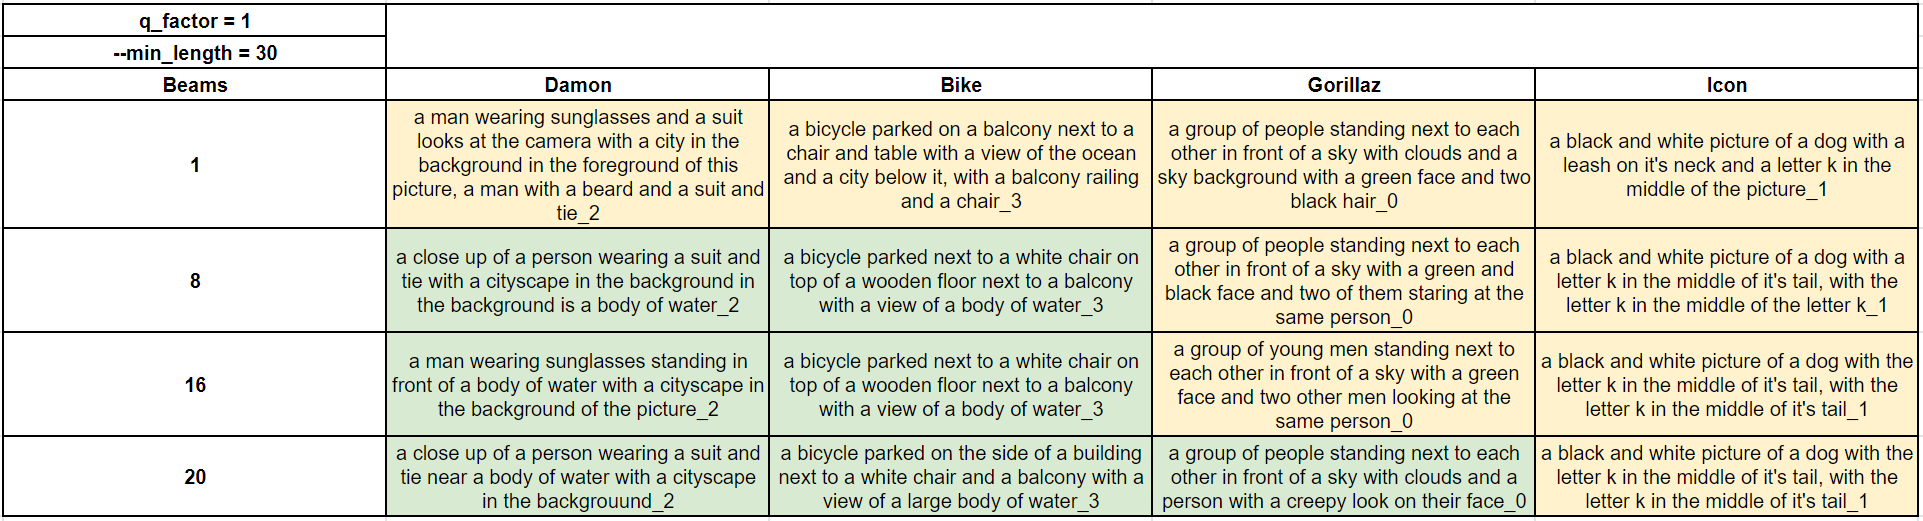
Beam 16 Results
We had 25 combinations of q-factor and min-length, so we present results per image in XY matrix style. Let’s discuss each of them.
Realistic photo of a person
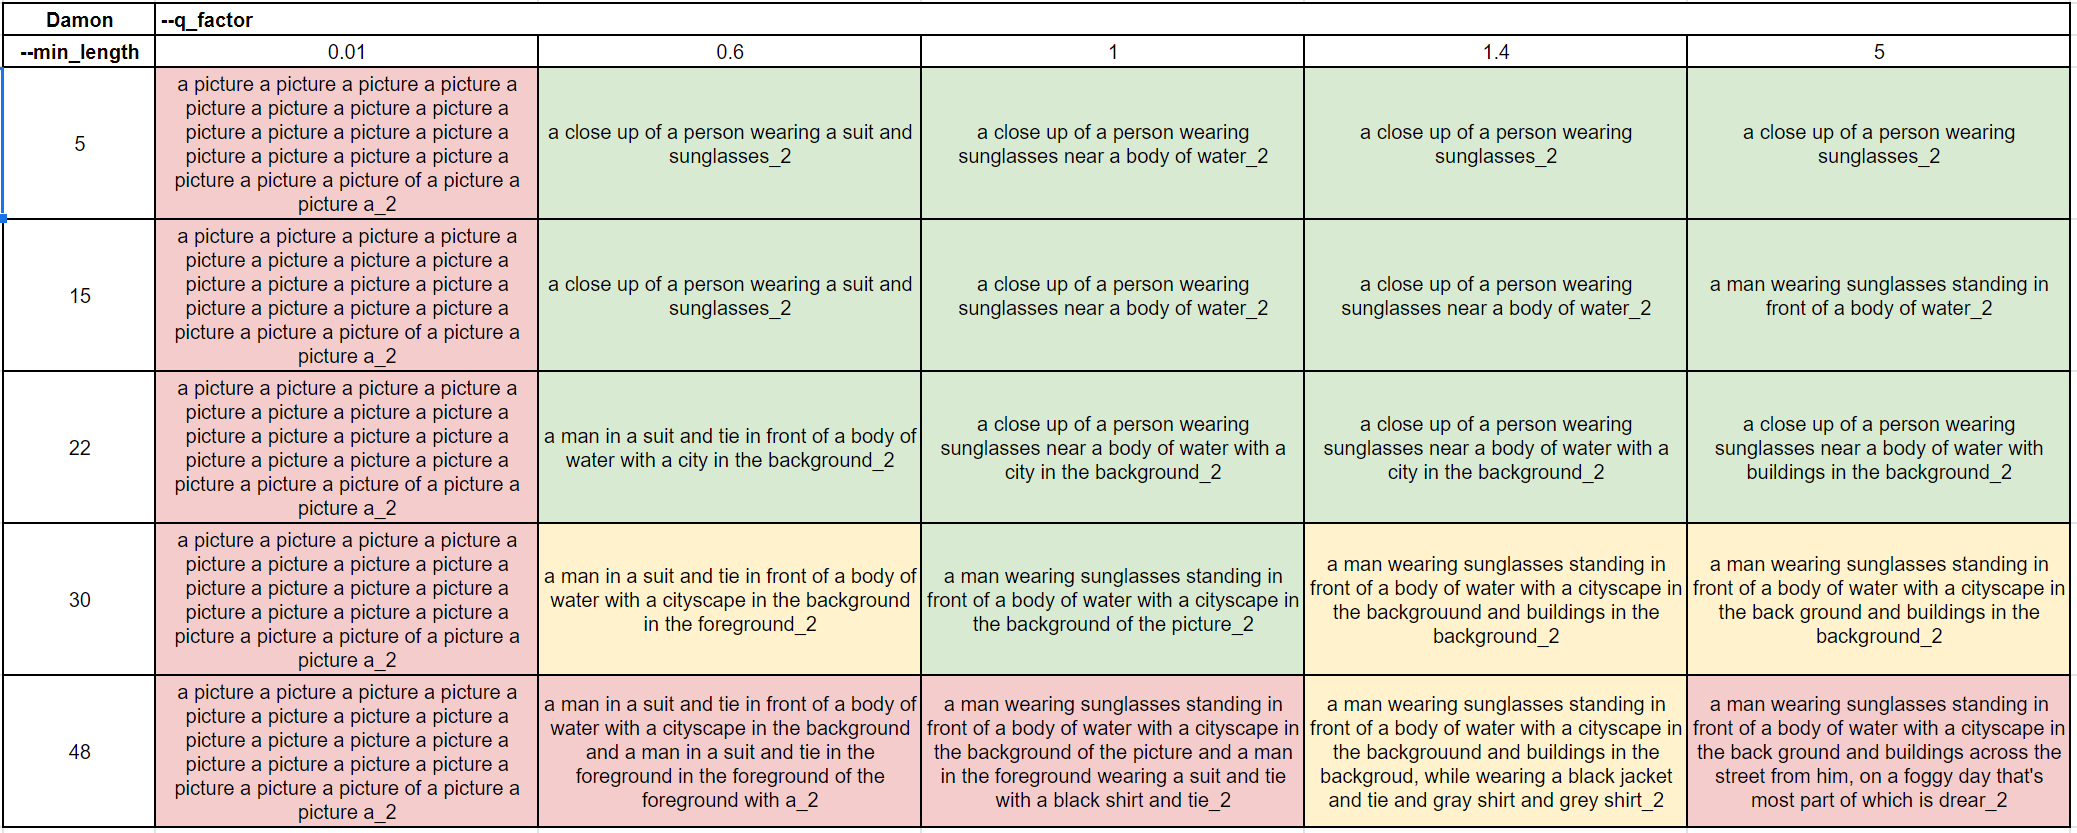
We see that a q_factor of 0.01 is not useful, but anything started from 0.6 seems to work and generates decent alterations across the values. For this particular image, a min_length value of 30 and above seems to be where repeats start to take place. And when it comes to lower values of min_length, we observed a few repeated or almost identical captions. We believe this happens when the image has enough details to describe and the lower limit is ignored.
Realistic photo of an item
Realistic photo of an item
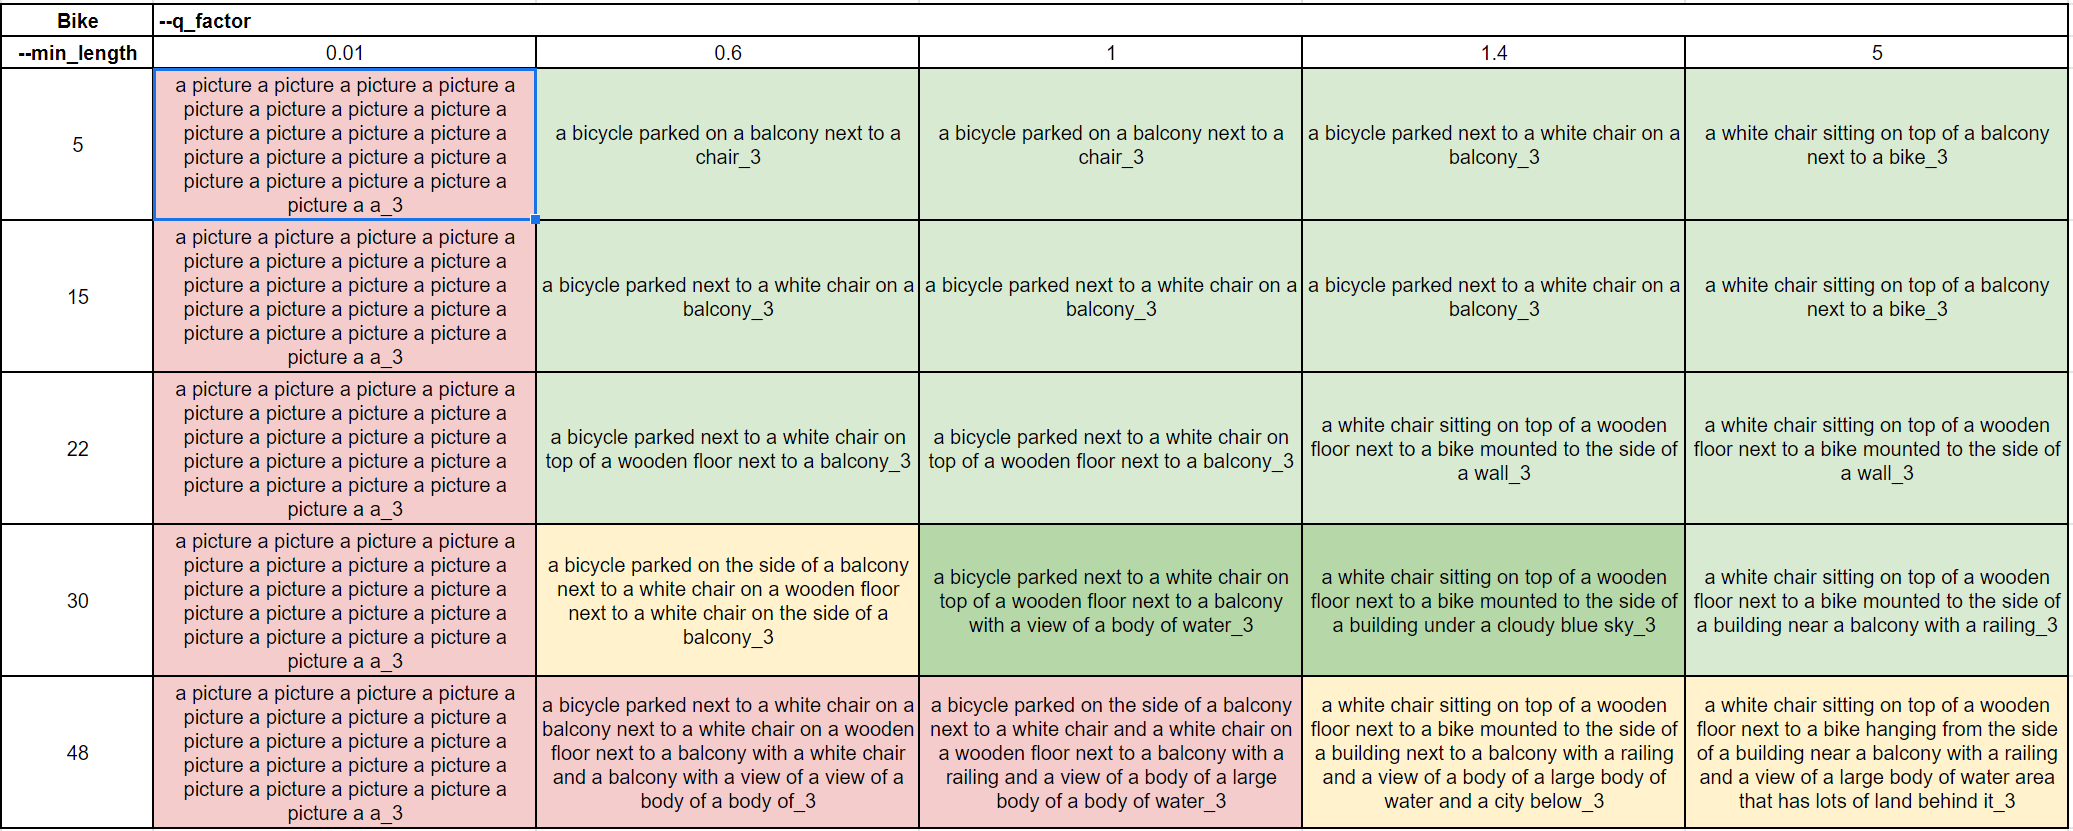
Most of the observations are similar to the previous example, but a few interesting things to highlight. At high q_factor we see that the chair became the first item to be mentioned instead of the bike. Also, we see a few solid results at min_length of 30, which might be the result of this image having more things to describe.
Stylized image with a character
Stylized image with a character
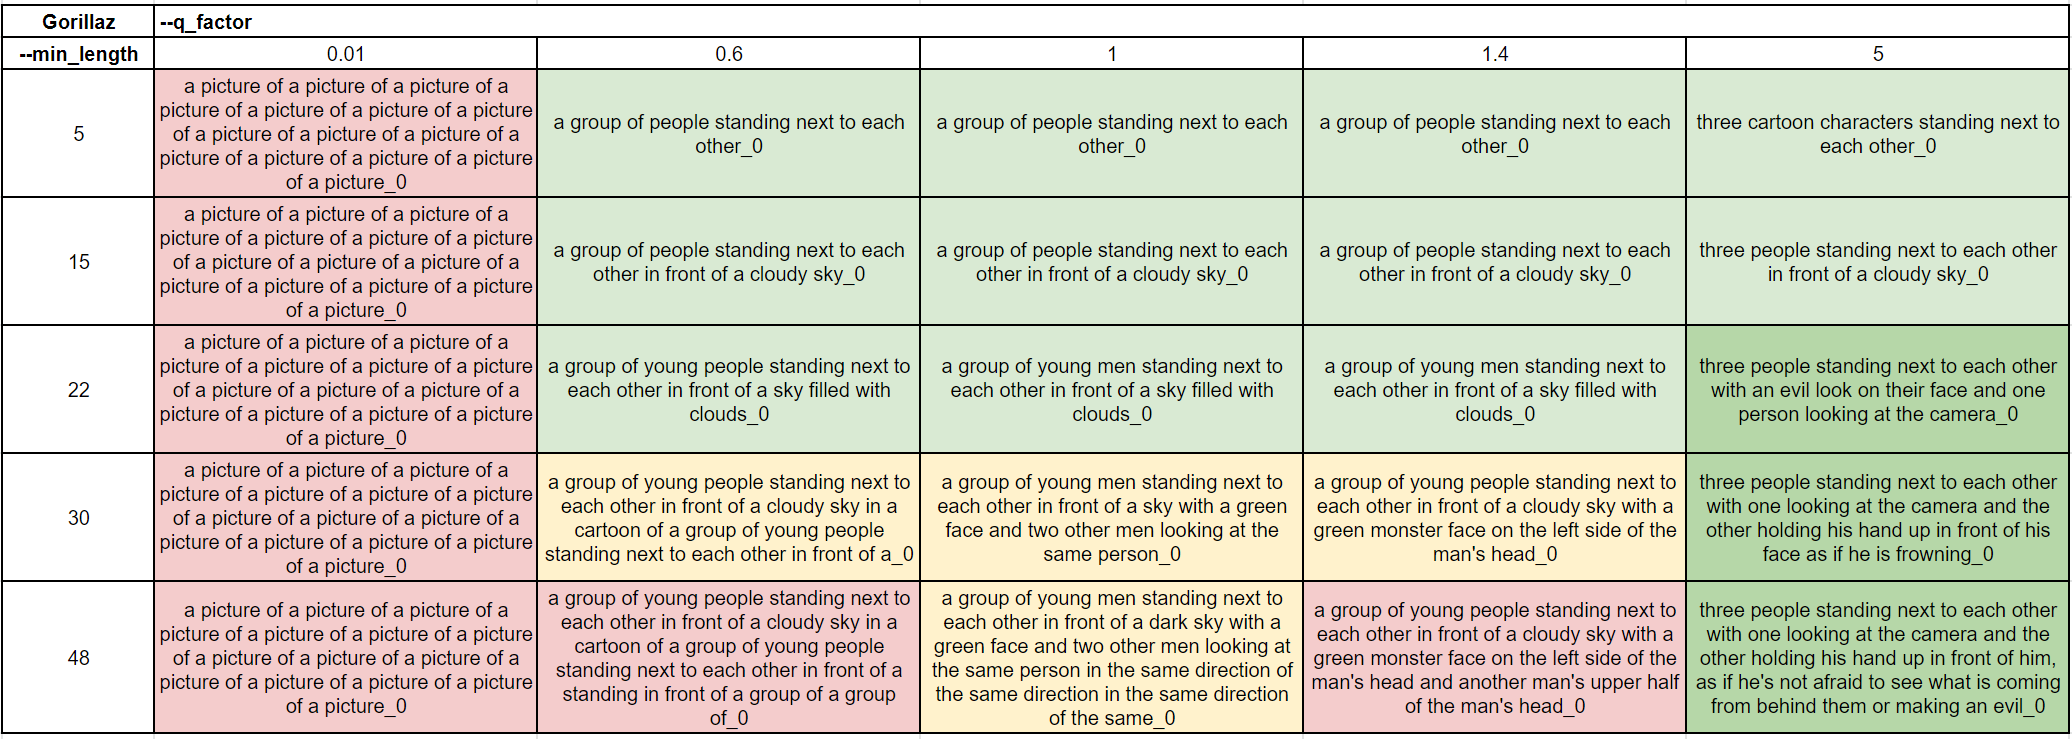
We think that the overall caption quality was lower for this image, but some interesting, overly specific results when the q_factor was high.
Simple icon
Simple icon
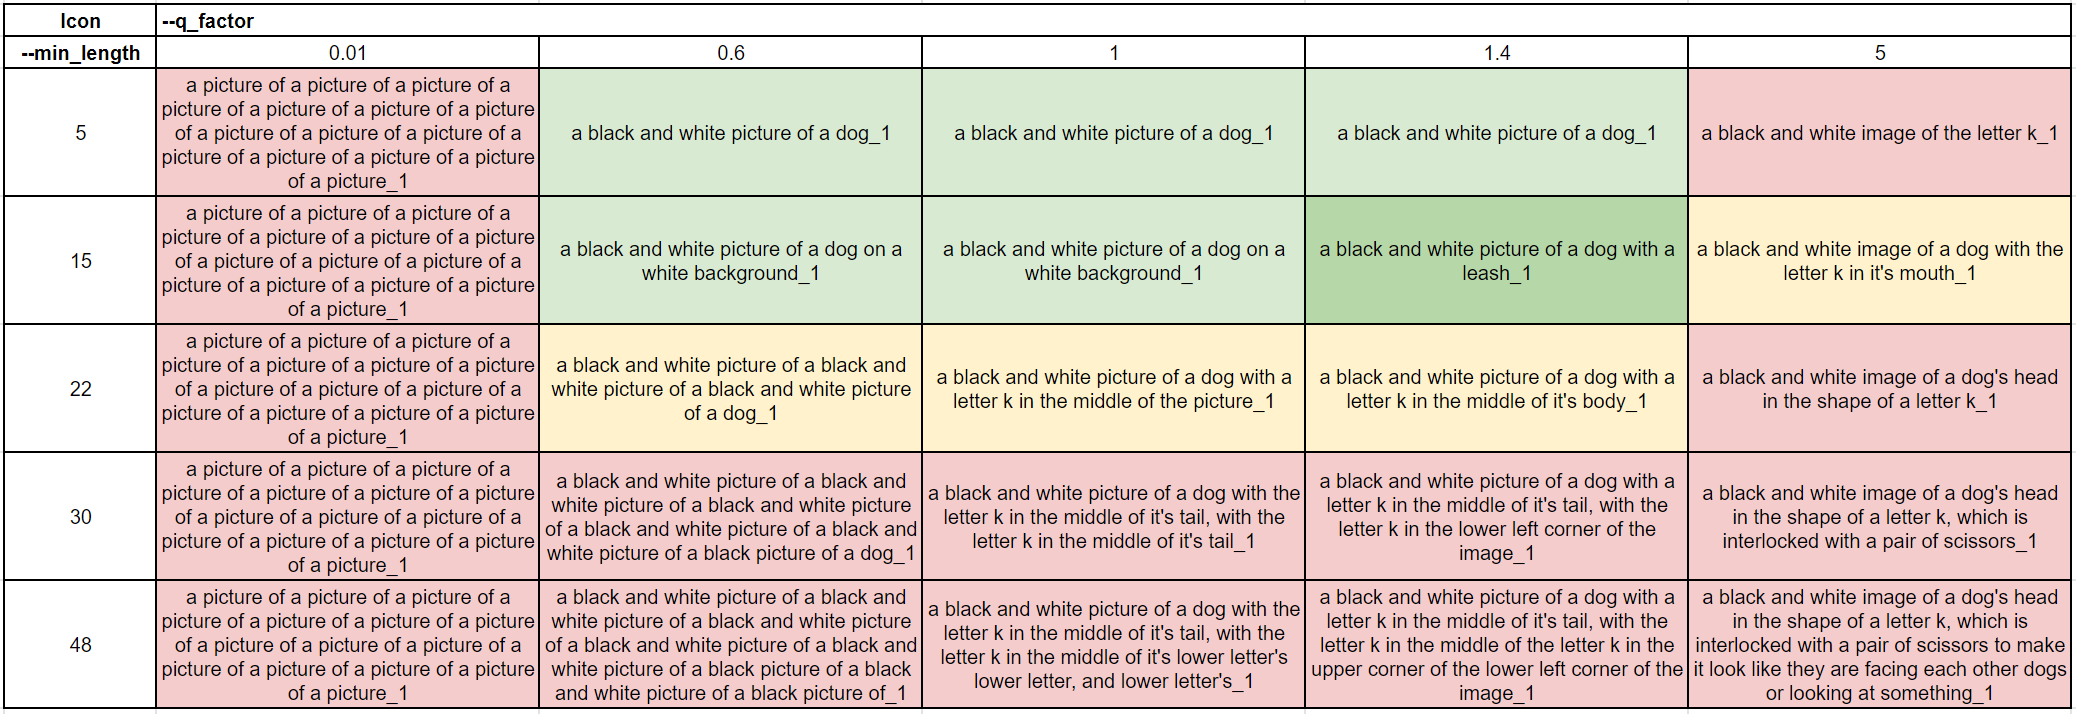
This was interesting - overall quality has decreased, but it’s a special case of a very simple image with very little to describe. Higher -min_length values didn’t work well, confirming that we need to optimize length parameters based on how much there is to describe on the image. Interestingly, high q-factor values didn’t work either, as it added things to the image that were not there (letter k or scissors).
Beam Length
As we were learning about captioning, we realized that EDtools Beam 16 implies that it is a beam sampling method implemented with a beam length of 16. And from the Beam explainer, we learned that the values of this length parameter could impact the output. So we tried four values (1, 8, 16, and 20). We believe that the higher, the better might be the case, but overall, across all values, we observed decent but also different results.
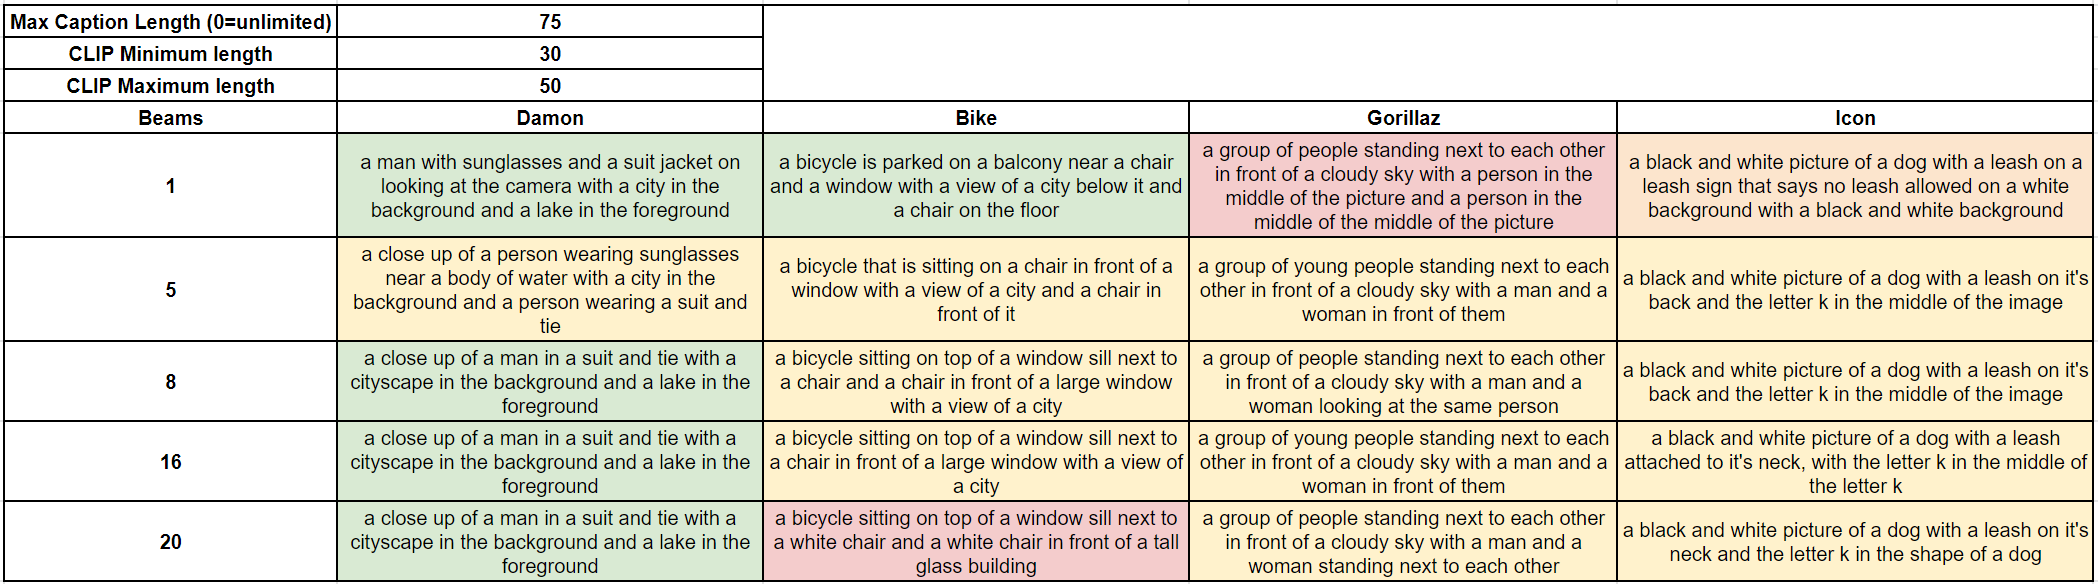
Smart Pre-Processing Extension
We won’t go deep into the BLIP part of the tool since we have explored it already, but a few things worth noting. Unlike EDtools, this implementation uses BLIP’s checkpoint called “BLIP w/ ViT-L” which, in theory, based on the paper, is slightly worse than the one used in EDtools. Also, there is no option to switch between the nucleus and beam sampling; we believe the default is beam here. CLIP Minimum/Maximum length sliders refer to BLIP length and are somewhat similar to EDtools -min_lenght.
Here is a sample of tags we got at various Beam values and default settings:
Clip Additions
Unlike EDtools, we can append generated captions with additional descriptive words using CLIP model so let’s see what we can generate here.
Flavor tags from CLIP
The first option is to add so-called flavor tags from CLIP. We have the option to select the number of max flavors added, and the default value is 4. Decreasing this value results in only the first x flavors being added. We also have an option to check to use v2 clip model or not.
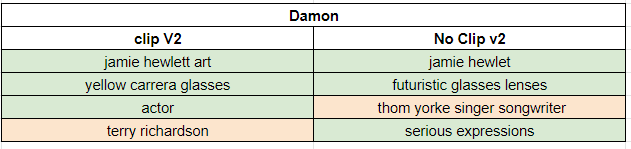
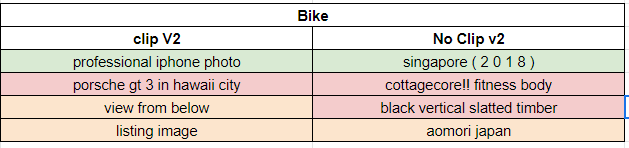
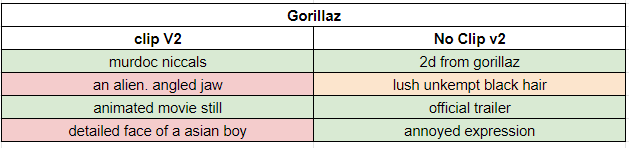
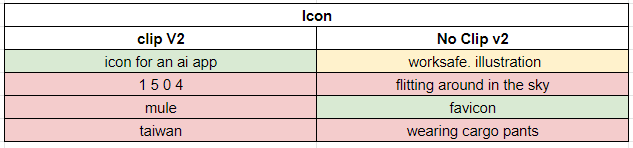
Overall, we see useful tags across both v2 and v1 clip flavor tags. The first tag is solid in almost all cases, while we see a mix of extremely good and not-so-good tags afterward.
Medium tags from CLIP
We see that these tags were not always added, and in the case of not using v2, only one tag was generated. The quality of the tags is mixed.

Movement tags from CLIP
The pattern when to add tags followed the previous case. The quality of the tags is mixed once again.

Artist and Trending tags from CLIP
We will be skipping these two options for a few reasons we might discuss in a different post.
WD14 Tags to Caption
This option comes with two sliders for minimum scores for WD14 Tags and the minimum score for DeepDanbooru tags. Interestingly, the DeepDanbooru tag slider does absolutely nothing, and we are not even sure if DeepDanbooru tags are added here. Also, remember that this option adds tags separated by underscore symbols, which some fine-tuners (like EveryDream) use as a symbol to ignore all the text after.

