Hello FollowFox Community!
Welcome to part of the ComfyUI series, where we started from an empty canvas, and step by step, we are building up SDXL workflows. The goal is to build up knowledge, understanding of this tool, and intuition on SDXL pipelines.
Here is the rough plan (that might get adjusted) of the series:
Welcome to part of the ComfyUI series, where we started from an empty canvas, and step by step, we are building up SDXL workflows. The goal is to build up knowledge, understanding of this tool, and intuition on SDXL pipelines.
Here is the rough plan (that might get adjusted) of the series:
- In part 1 (link), we implemented the simplest SDXL Base workflow and generated our first images
- Part 2 (link)- we added SDXL-specific conditioning implementation + tested the impact of conditioning parameters on the generated images.
- Part 3 (this post) - we will add an SDXL refiner for the full SDXL process
- Part 4 - we intend to add Controlnets, upscaling, LORAs, and other custom additions.
Overview of SDXL Refiner
First, we have to say that we know very little details about the refiner model, and ideally, StabilityAI should provide more context and details. However, we know that it is a separate model, trained after the base model, with the main goal of improving the final output. This model is totally optional in the workflow. Here is what we see in the paper (link):
To improve sample quality, we train a separate LDM in the same latent space, which is specialized on high-quality, high resolution data and employ a noising-denoising processes introduced by SDEdit on the samples from the base model. We follow [1] and specialize this refinement model on the first 200 (discrete) noise scales. During inference, we render latents from the base SDXL, and directly diffuse and denoise them in latent space with the refinement model, using the same text input. We note that this step is optional, but improves sample quality for detailed backgrounds and human faces.
This gives us a few ideas about what we need to do to add SDXL refiner to our workflow but also leaves a few things up to our interpretation:
- We need to reuse the same text prompts.
- We must pass the latents from the SDXL base to the refiner without decoding them.
- It is unclear after which step or portion of denoising with base the latent should be handed over to the refiner. We have seen 80/20 implementations but the paper doesn’t explicitly call this out. “the first 200 (discrete) noise scales” doesn’t seem to imply anything on that necessarily. So we will test some variations here.
Finally, we have been observing the recent trend in the community of abandoning the SDXL refiner and implementing other workflows (different upscaling methods) to improve the final output. In a way, this makes a lot of sense, given that currently, there are almost no custom training protocols for fine-tuning the refiner model. This means that if we apply LoRAs to the base, the refiner won’t use it and, in a way, undo the added details/subjects from the final image.
Adding Refiner to Our Workflow
Heads up - we will do this in two stages. First, we will build a parallel workflow to our base-only implementation and experiment to find the optimal refiner implementation. Then, we will optimize our canvas to have a cleaner, full SDXL with a refiner workflow.
We will start right where we left off in part 2 (link). Make sure to read parts 1 and 2 before proceeding here. Your starting workflow should look like this.
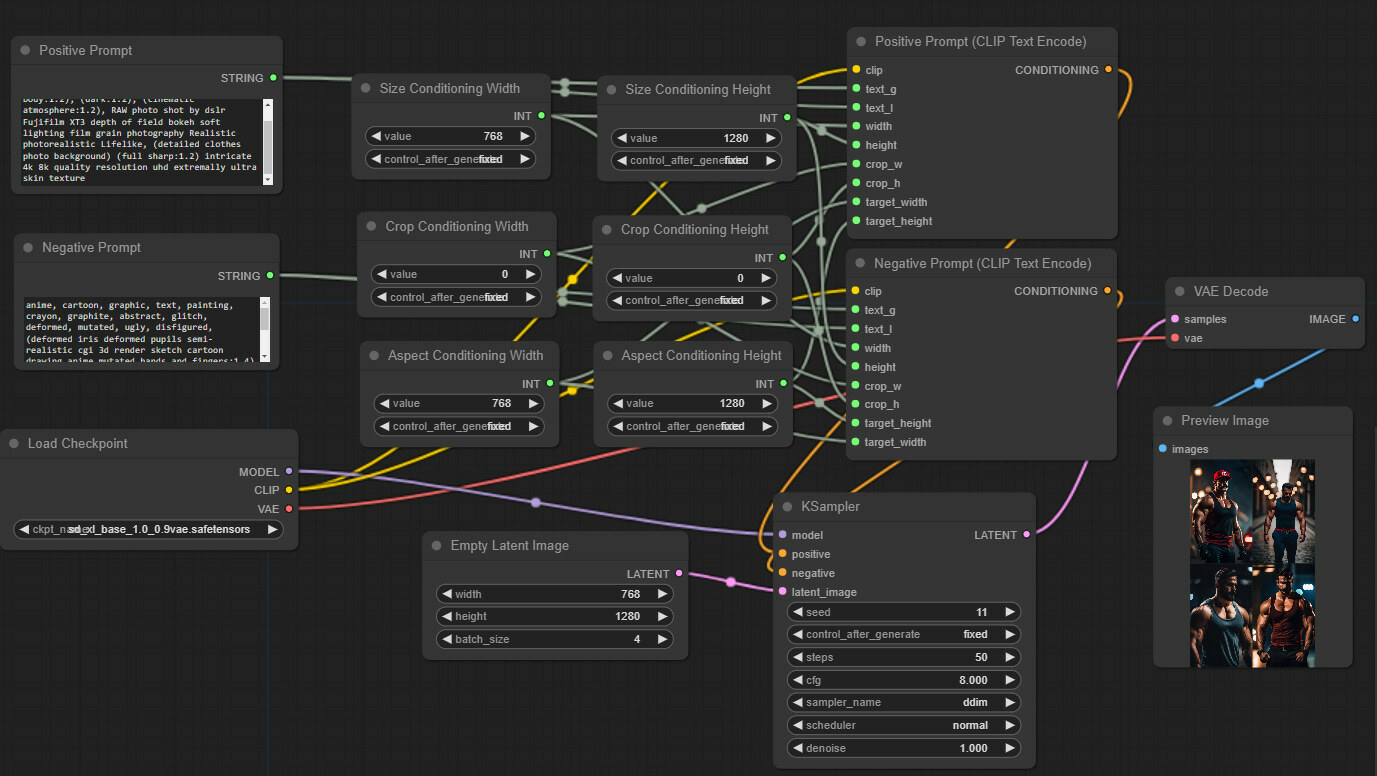
And if you want to load it from an image, here is the one generated with this updated flow. Just drag the image on your ComfyUI canvas (direct link).
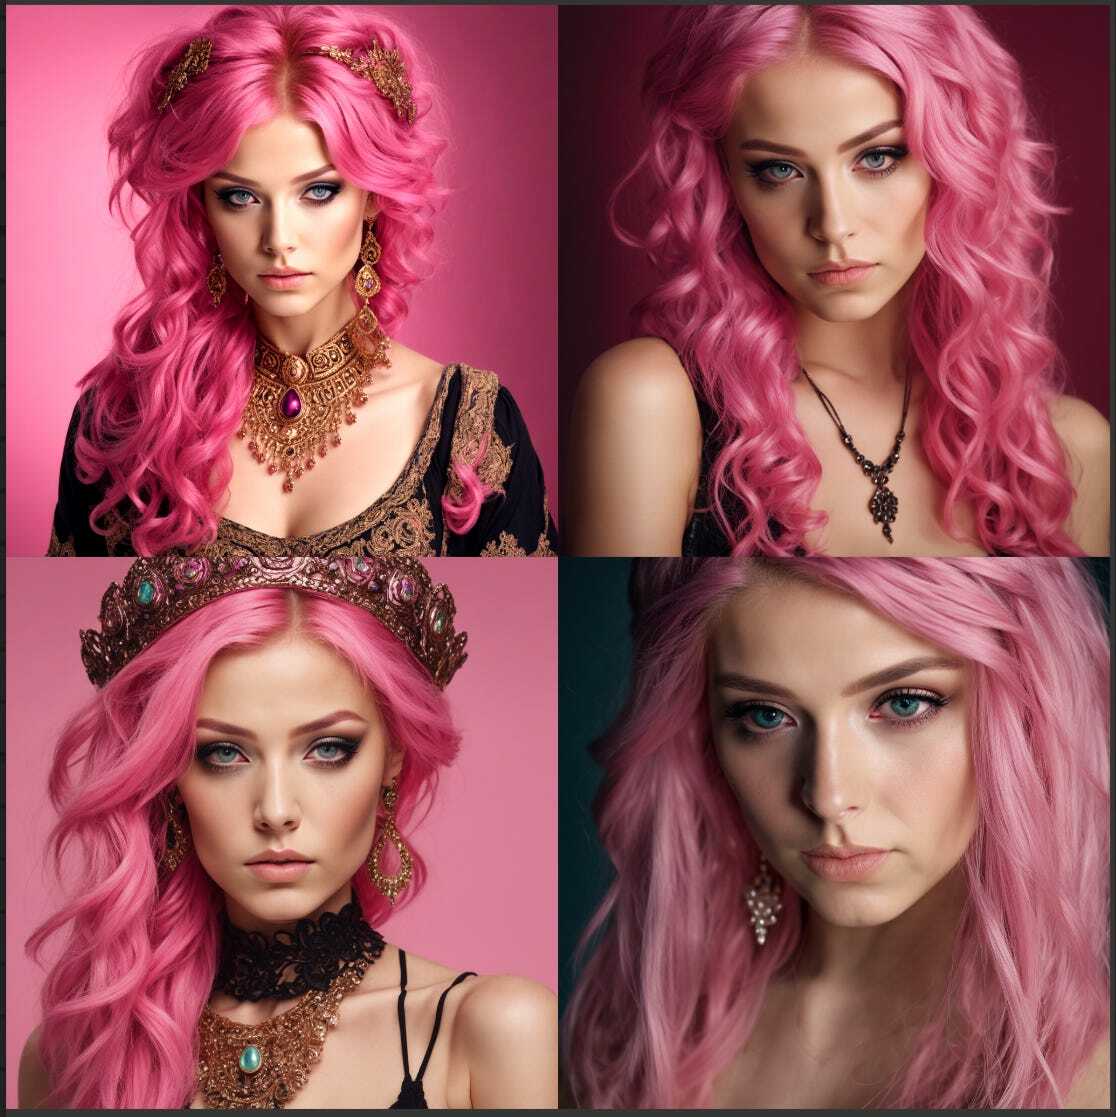
We will also use a new prompt since the paper mentions that it adds details to the realistic generations.
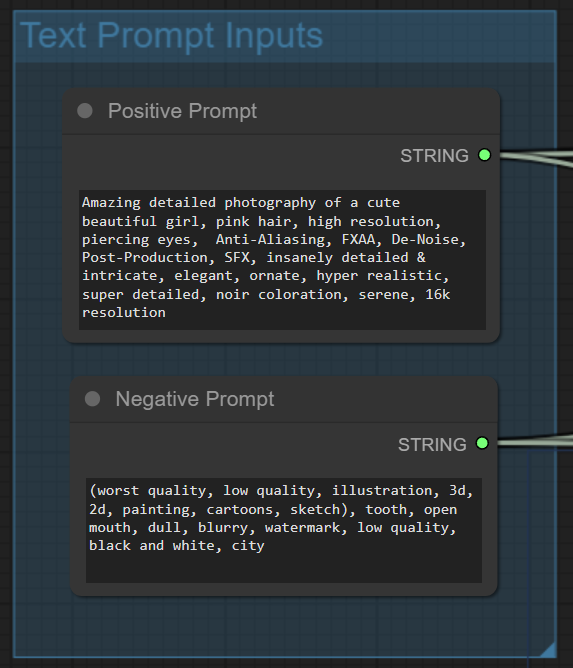
Positive Prompt:
Amazing detailed photography of a cute beautiful girl, pink hair, high resolution, piercing eyes, Anti-Aliasing, FXAA, De-Noise, Post-Production, SFX, insanely detailed & intricate, elegant, ornate, hyper realistic, super detailed, noir coloration, serene, 16k resolution
Negative Prompt:
(worst quality, low quality, illustration, 3d, 2d, painting, cartoons, sketch), tooth, open mouth, dull, blurry, watermark, low quality, black and white, city
Adding advanced Ksampler
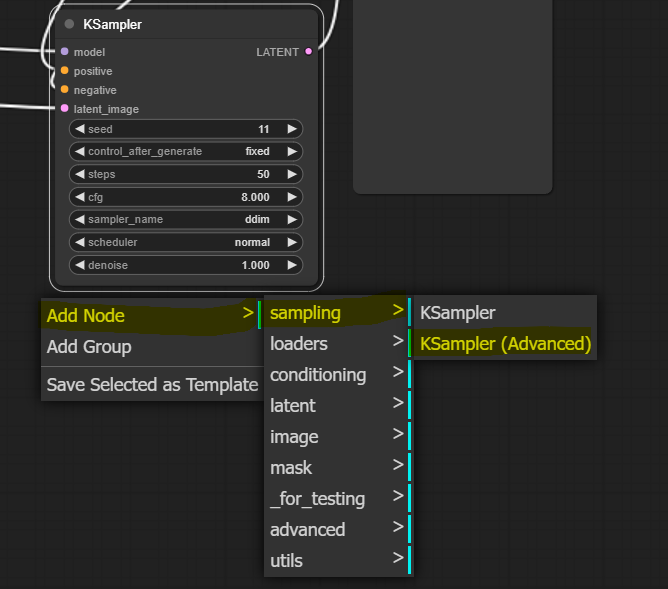
We must use a different sampler node since we need more control over the diffusion process (we must pass almost finished latent to the refiner). Let’s add it and take a close look at it. Right-click on canvas somewhere close to our original sampler and select Add Node > sampling > KSampler (Advanced)
We see that the advanced sampler resembles our original KSampler, but it has a few added things. We update all inputs that match the original KSampler to similar values. We will explore what these things do one by one.
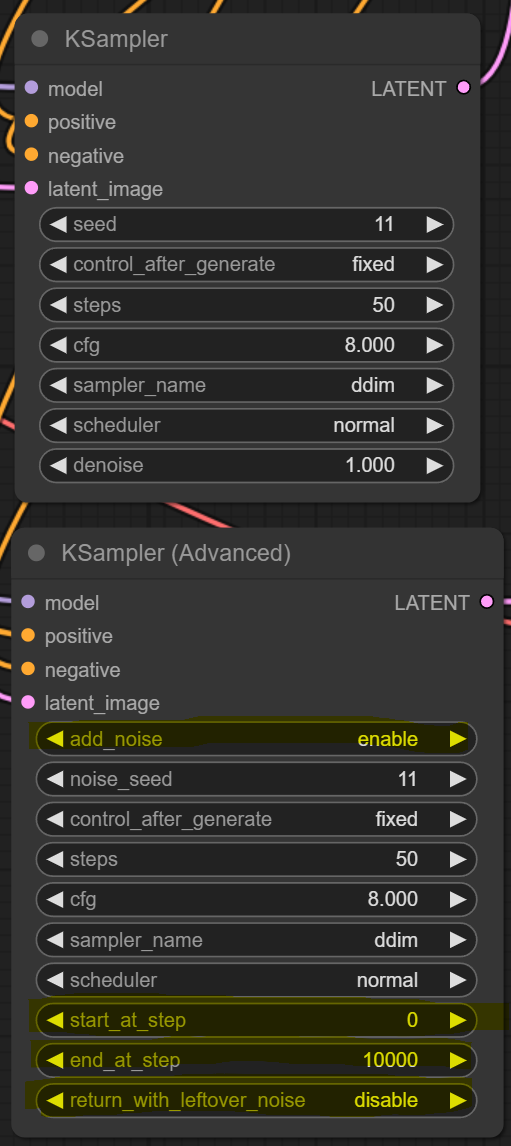
New features highlighted in yellow
Let’s connect this new sampler to everything without changing anything in the original flow. We will compare the outputs of the two. On the left-hand side, connect the model input slot to the MODEL output slot on the Load checkpoint node. Then connect positive and negative input slots to CONDITIONING output slots on positive and negative encoding nodes accordingly. And finally, connect the latent_image input slot to the LATENT output slot on the Empty Latent Image.
We add a VAE Decoding node to the LATENT output slot of our newly added advanced KSampler by left-clicking on the output slot, dragging it onto canvas, and selecting Add Node > latent > VAE Decode. From this node, connect the vae input slot to the VAE output slot of the Load checkpoint node. And to finish the setup, left-click the IMAGE output slot, drag it onto Canvas, and select PreviewImage. Ultimately, our testbed for comparing the old and newer (advanced) samplers looks like this. Note that we are not doing anything with the refiner just yet.
We add a VAE Decoding node to the LATENT output slot of our newly added advanced KSampler by left-clicking on the output slot, dragging it onto canvas, and selecting Add Node > latent > VAE Decode. From this node, connect the vae input slot to the VAE output slot of the Load checkpoint node. And to finish the setup, left-click the IMAGE output slot, drag it onto Canvas, and select PreviewImage. Ultimately, our testbed for comparing the old and newer (advanced) samplers looks like this. Note that we are not doing anything with the refiner just yet.
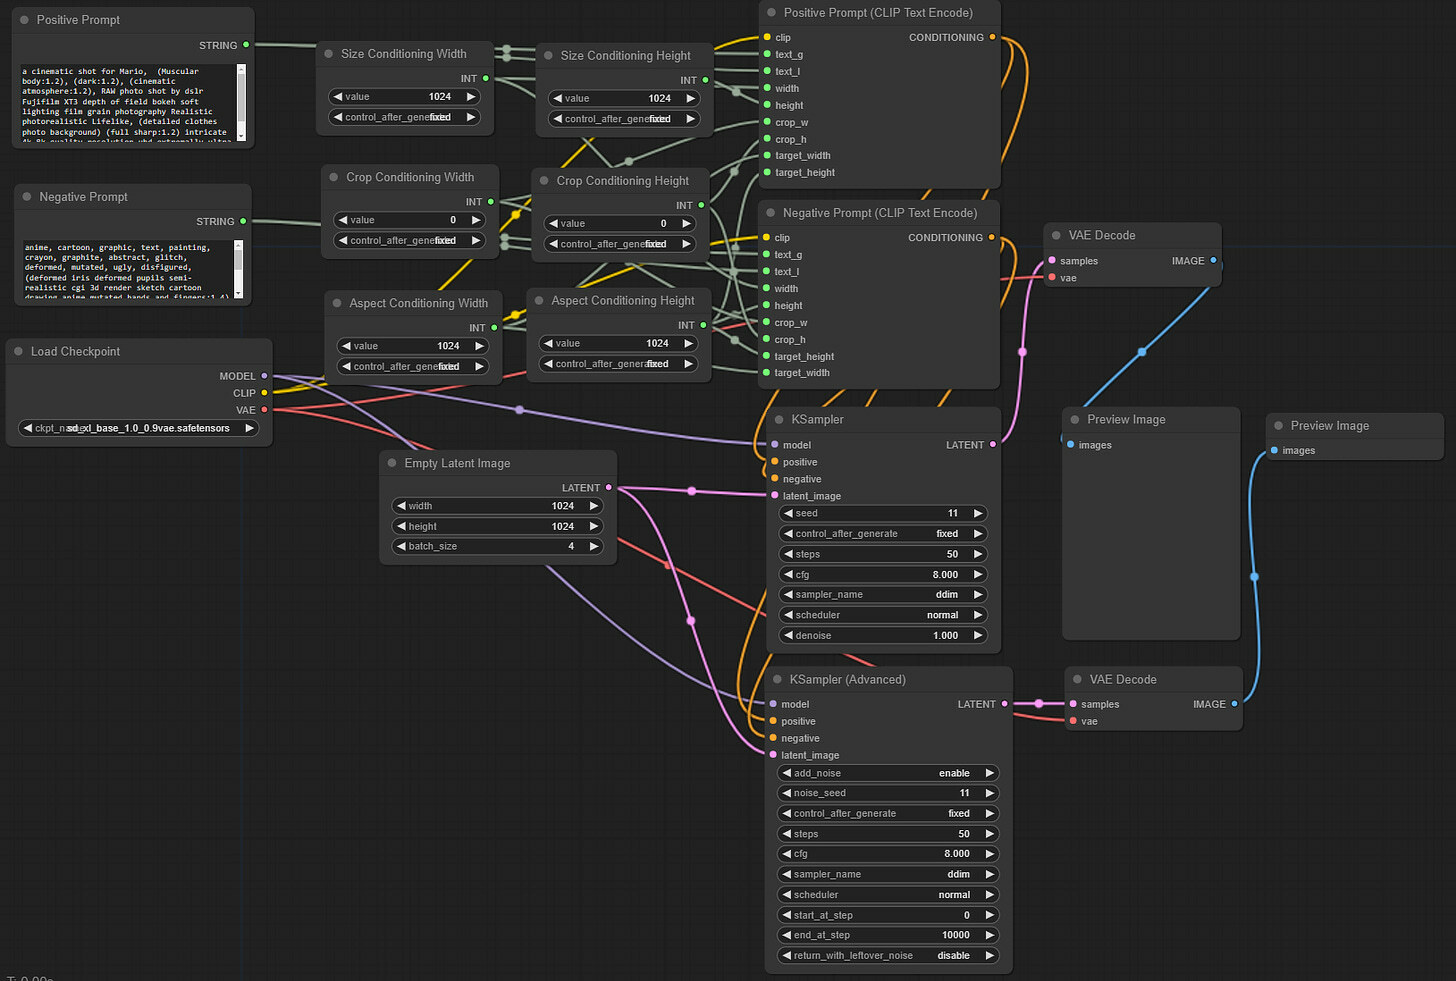
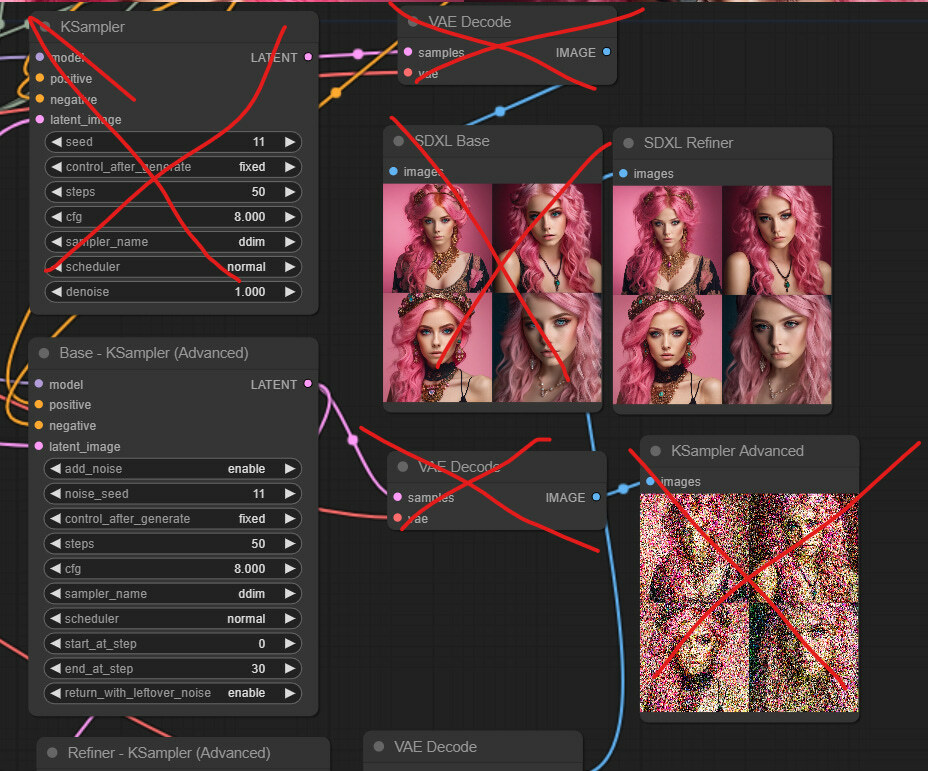
As the first step, let’s generate our image without further changes and see how the two compare. When we press Queue Prompt, we see that the workflow generates one image using the original KSampler and the second one with the new, advanced one.
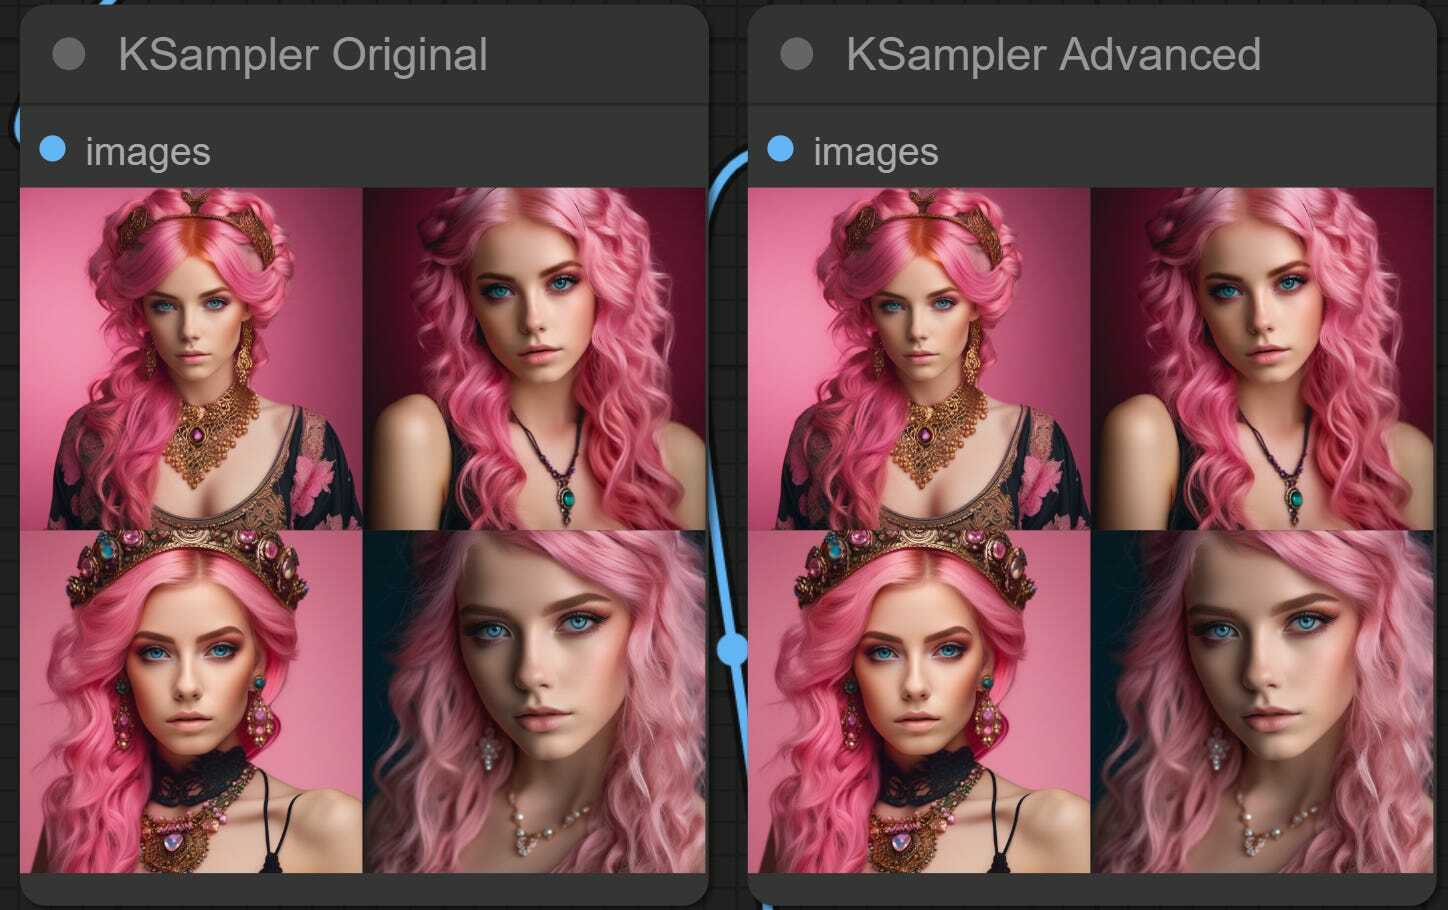
As we see, we got identical output for starters. Now we will start changing one thing at a time.
Disabling add_noise
The first new lever we have in the advanced sampler is called add_noise. What it does, is that once the empty latent image is passed to the sampler, it adds noise. Then the denoising process removes the noise, and that’s how we get our image. Let’s see when we disable this add_noise feature and try to generate the same image as before.
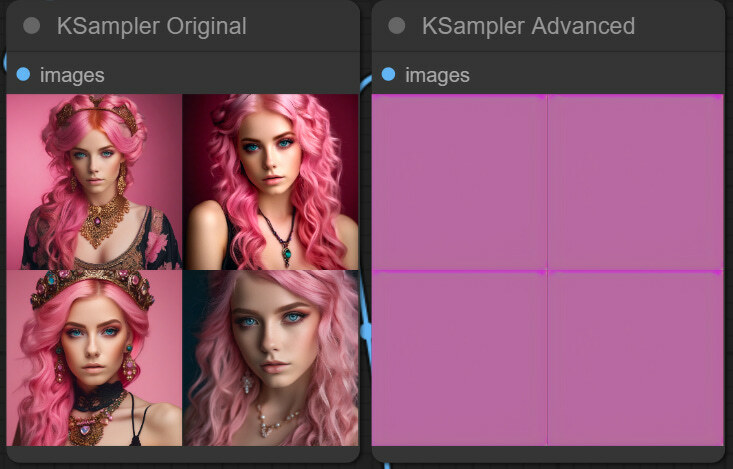
As we see, the denoising process without added_noise failed. However, this implies the Refiner. We will have a separate sampler dedicated to the refiner and want to ensure not to add noise twice. I.e., we will enable adding noise for the base model and disable it once the latents are passed to the refiner.
Changing start_at_step values
When we set the step numbers for the denoising point, we are essentially scheduling the amount of noise that will be removed at each diffusion process step. This lever is needed in this two-model SDXL architecture to tell the second, refiner scheduler to skip the initial denoising steps and start from where we pass the latent from the base.
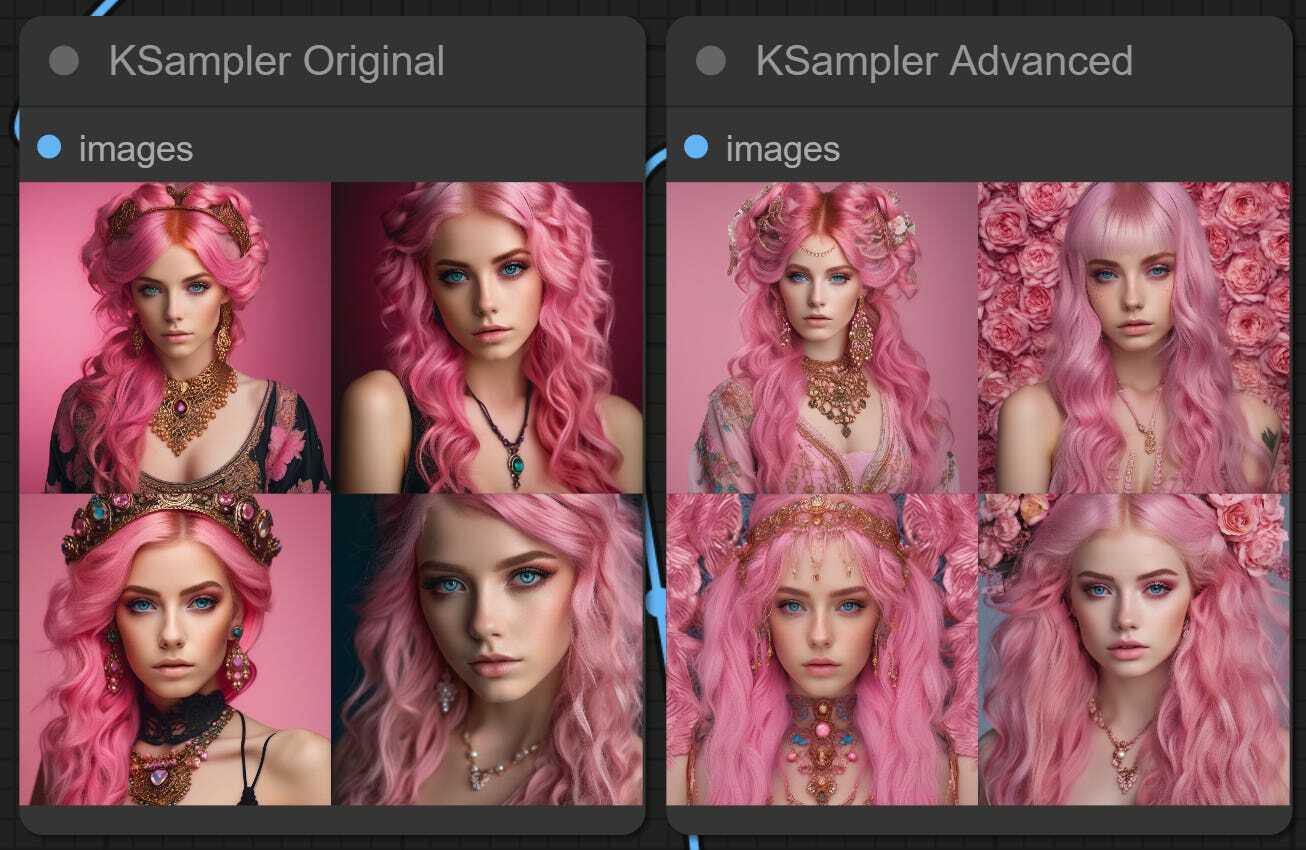
However, since we can use this in isolation, let’s set start_at_step to 10 and see what happens in our current setup. We are just using the base model, skipping the first 10 steps of the 50-step denoising process.
The results are interesting and unexpected and might be worth exploring more with other schedulers, samplers, and the number of skipped steps. Some details might be missing, but the results are good and different. We expected many more artifacts or incomplete images if we skipped the initial steps.
Let’s see what happens if we skip the 5, 15, and 20 steps with this setup.

5, 15, and 20 initial steps skipped
We can explore this fun, random discovery later, but let’s continue with refiner implementation.
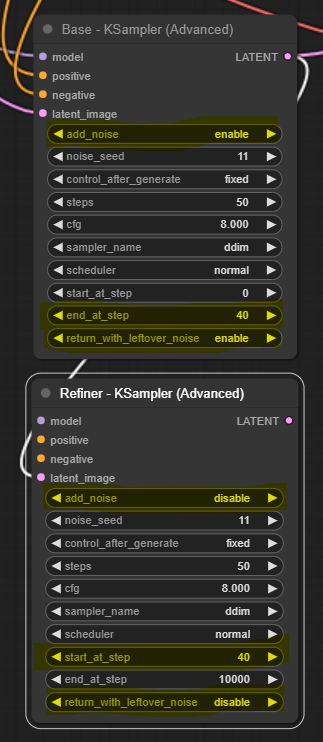
end_at_step and return_with_leftover_noise
This is similar to the last lever, but instead of skipping the initial denoising steps, the last steps can be skipped. So when we set the value of end_at_step higher than our total step count, it doesn’t have any impact. But when we set it to some lower than the step count value, the denoising process ends earlier than planned. This leaves the latent image version with some remaining noise. return_with_leftover_noise lever allows us to keep that leftover noise.
Let’s set start_at_step to 0, end_at_step to 40, and enable return_with_leftover_noise.
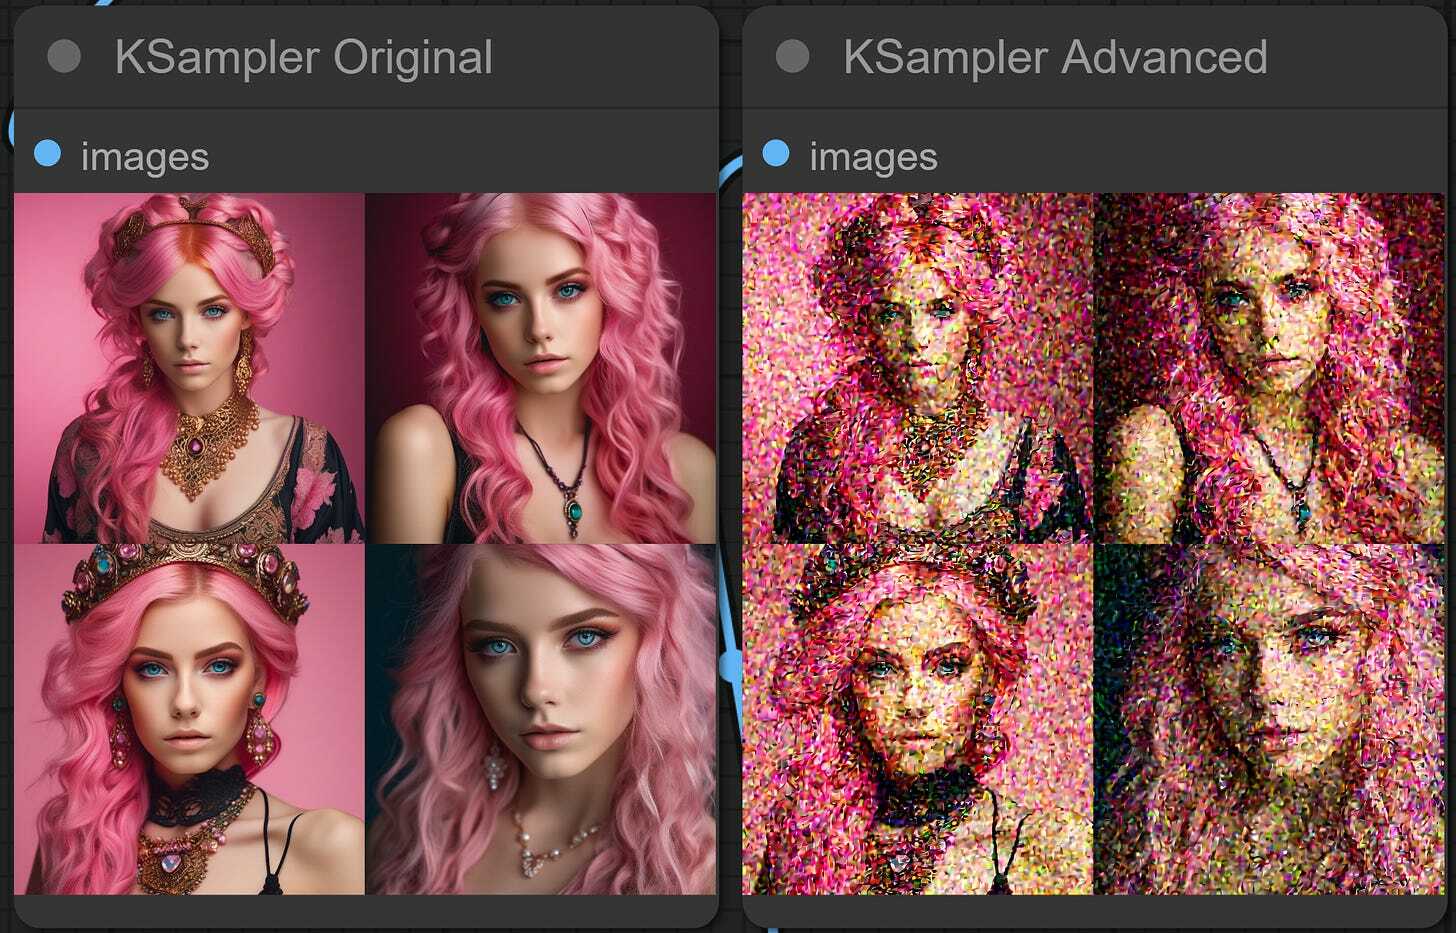
As we can see, we got an image that resembles our original but has tons of leftover noise. This is exactly what we need - we will pass this version of the image to the SDXL refiner and let it finish the denoising process, hoping that it will do a better job than just the base.
With this, we can move on and implement SDXL Refiner.
Implementing the Refiner
We won’t alter anything we have built so far and just add a refiner. This will result in a messy canvas, but we can optimize and clean it up later, once it’s functioning and we know what’s happening.
So far, we know a few things for sure - we will additional KSampler node, an additional checkpoint loader to load the SDXL refiner mode, and a VAE decode and image display nodes to show the results. Let’s start with these, and we will see the rest.
We will start by adding another advanced KSampler: right-click on the canvas, and select Add Node > sampling > KSampler (Advanced). We placed it just right under the first Advanced Ksampler. We changed the titles of these two nodes to make it clear. And finally, we connect the output LATENT slot from the first Advanced KSampler to the input latent_image slot of the newly created KSampler node. In the end, we have something like this. We also changed the parameters, as discussed earlier.
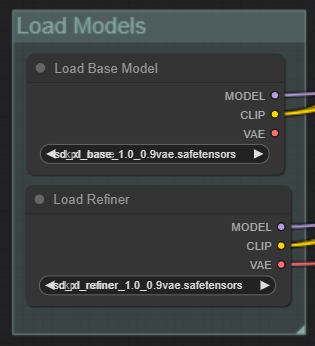
Now let’s load the SDXL refiner checkpoint. On the left-hand side of the newly added sampler, we left-click on the model slot and drag it on the canvas. And then, select CheckpointLoaderSimple. In the added loader, select sd_xl_refiner_1.0_0.9vae.safetensors.
With that, we have two more input slots for positive and negative slots. We thought we could just connect them to positive and negative encoders that we used before, but it turns out it’s a little more complicated. The refiner model was not trained with the same conditioning parameters as the base model (see Part 2 of our series), and thus, prompt input for the refiner sampler cannot be the same as before.
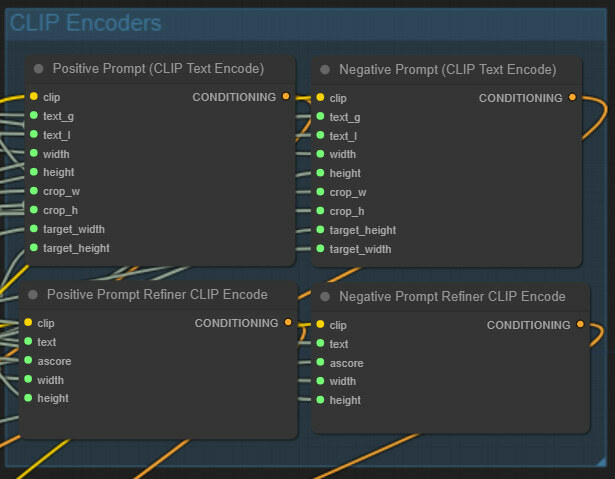
Right-click on the canvas, select Add Node > Advanced > conditioning > CLIPTextEncodeSDXLRefiner. Do these twice, and rename them for clarity. Also, right-click on each of them and select Convert text to input. In the end, we have two such new nodes.
We observe a new conditioning input called “ascore” that has never been discussed in the paper. We also see some sort of width and height inputs that are likely for conditioning used for refiner training. Still, it’s unclear whether it was similar to size or aspect conditioning - two methods discussed for the base model.
Let’s connect these nodes as usual; we hope this is becoming more and more intuitive for you all. We connect left-hand side clip slots from both nodes to the refiner checkpoint loaders’ right-hand side CLIP slot. Then we connect left-hand side text slots to the positive and negative STRING slots of text entry nodes we already had since we will use the same prompts for the refiner. Then we connect both right-hand side CONDITIONING output slots to positive and negative input slots on the refiner’s KSampler.
Finally, let’s take care of the right-hand side of the refiner’s KSampler. Left-click the LATENT output slot, drag it onto Canvas, and add the VAEDecode node. Connect the vae slot of the just created node to the refiner checkpoint loader node’s VAE output slot. Then, left-click the IMAGE slot, drag it onto Canvas, and add the PreviewImage node. This is where we will see our post-refiner, final images. Let’s press Queue Prompt to ensure everything works as intended, and we have added the refiner to our workflow.
A reminder that this looks very messy for now as we are experimenting, and we will do some cleanup later on.
With that, we have two more input slots for positive and negative slots. We thought we could just connect them to positive and negative encoders that we used before, but it turns out it’s a little more complicated. The refiner model was not trained with the same conditioning parameters as the base model (see Part 2 of our series), and thus, prompt input for the refiner sampler cannot be the same as before.
Right-click on the canvas, select Add Node > Advanced > conditioning > CLIPTextEncodeSDXLRefiner. Do these twice, and rename them for clarity. Also, right-click on each of them and select Convert text to input. In the end, we have two such new nodes.
We observe a new conditioning input called “ascore” that has never been discussed in the paper. We also see some sort of width and height inputs that are likely for conditioning used for refiner training. Still, it’s unclear whether it was similar to size or aspect conditioning - two methods discussed for the base model.
Let’s connect these nodes as usual; we hope this is becoming more and more intuitive for you all. We connect left-hand side clip slots from both nodes to the refiner checkpoint loaders’ right-hand side CLIP slot. Then we connect left-hand side text slots to the positive and negative STRING slots of text entry nodes we already had since we will use the same prompts for the refiner. Then we connect both right-hand side CONDITIONING output slots to positive and negative input slots on the refiner’s KSampler.
Finally, let’s take care of the right-hand side of the refiner’s KSampler. Left-click the LATENT output slot, drag it onto Canvas, and add the VAEDecode node. Connect the vae slot of the just created node to the refiner checkpoint loader node’s VAE output slot. Then, left-click the IMAGE slot, drag it onto Canvas, and add the PreviewImage node. This is where we will see our post-refiner, final images. Let’s press Queue Prompt to ensure everything works as intended, and we have added the refiner to our workflow.
A reminder that this looks very messy for now as we are experimenting, and we will do some cleanup later on.
If you want just to load our workflow, download this image and drag it onto your canvas (link).
Initial Tests and Observations with Refiner
The first images generated with this setup look better than the refiner. However, they are imperfect, and we observe recurring issues with eyes and lips.
We used the 80/20 ratio of the base and the refiner steps for the initial images. We stopped the base at 40 out of 50 steps and did the last 10 steps with the refiner.
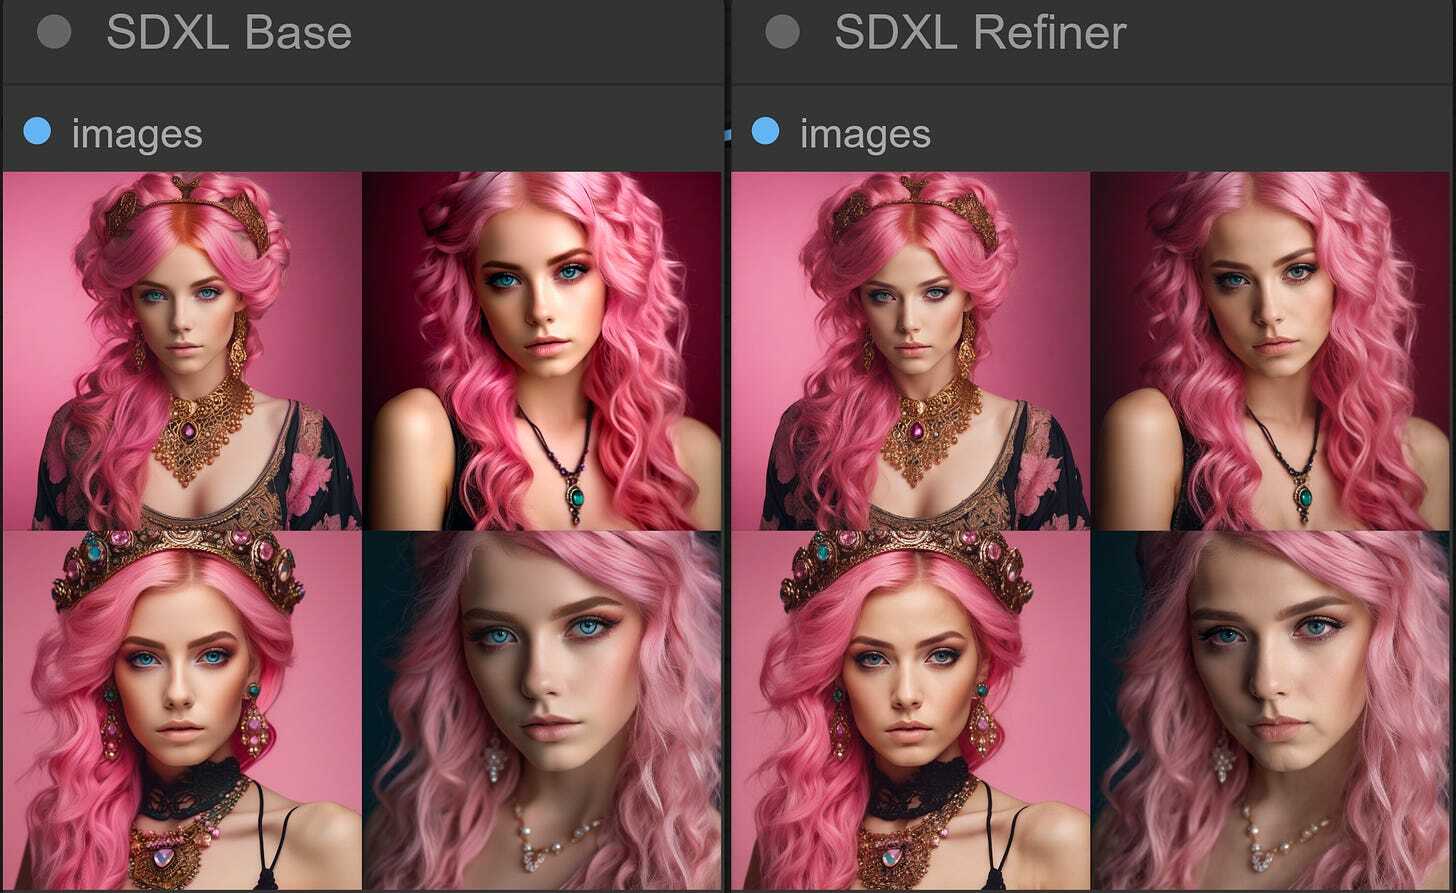
80/20 - 40 base steps followed by 10 refiner steps
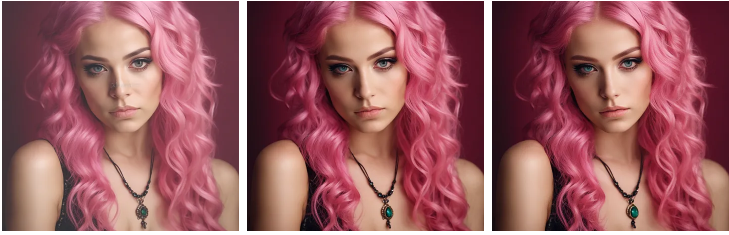
Let’s experiment a bit here and test the 20/80 and 50/50 ratios.
10 base steps and 40 refiner steps
The 20/80 doesn’t seem to work particularly well, resulting in mostly noise passed to the refiner, which does most of the denoising.
50/50 seems a bit more interesting and arguably has a few more things improved over the 80/20 combination. So possibly more experimentation with 70/30 or so ratios might be worth it.
There is a lot more to play around with, but here is a quick summary of the initial findings that we have observed:
There is a lot more to play around with, but here is a quick summary of the initial findings that we have observed:
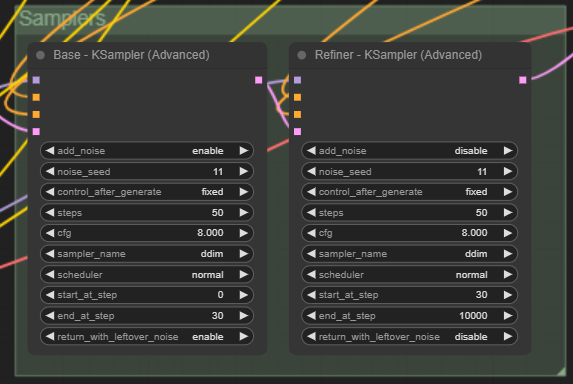
- add_noise on the refiner’s KSampler needs to stay disabled, or we get a noisy image. This makes noise_seed and control_after_generate levers irrelevant since they impact the noise addition process.
- Steps need to be in sync with the base KSampler, or you’ll get an image with noise or poor quality.
- CFG and sample_name can differ from the base KSampler and can positively impact the final image with some combinations.
- scheduler has to be the same as the base KSampler.
- start_at_step has to be equal to the end_at_step of the base, or the image quality decreases.
Ascore and width/height conditioning parameters of the Refiner
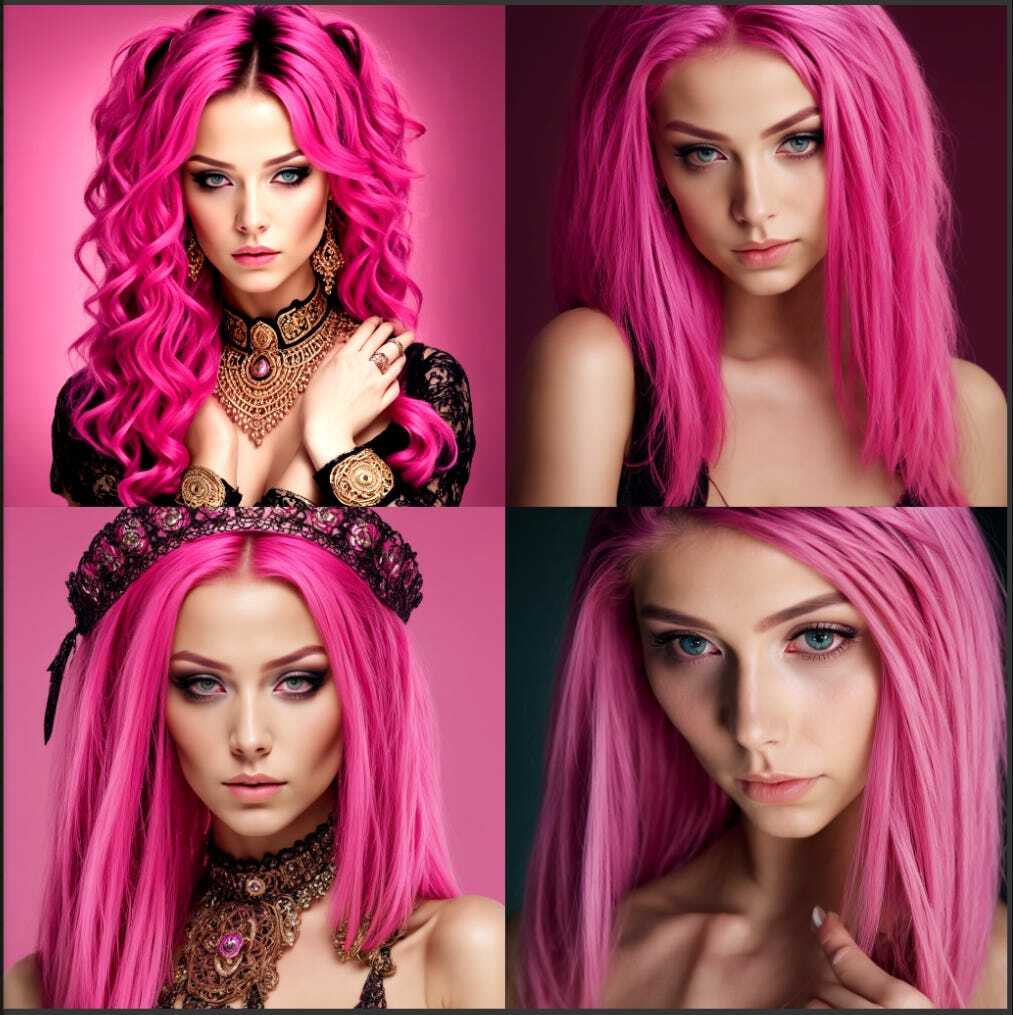
As we noted earlier, the refiner model seems to have been conditioned on image size (similar to the base model) and a new conditioning called aesthetic score. Even though there is not too much detail on the latter in the paper, this refers to the scores given by a specialized model to the images in the training dataset to assess how aesthetically pleasing these images are. So, in theory, the higher the value, the better. However, there are exponentially decreasing numbers of images as the score goes up, so we have to find an optimal spot here, and as we saw, the starting value was set to 6.
Let’s see what happens when we change these ascore values to 4, 6, and 8.
At ascore 4, we see a clear decrease in quality. We observed watermarks and blurriness in many cases. From 6 to 8, the difference is less dramatic: some more details are introduced, but we see some strange artifacts too.
ascore 4,6, and 8
Regarding height/weight size conditioning - it is less clear what values to use. We are assuming that for the refiner higher resolution dataset was used so it might not be wise to sync the values with the size conditioning values of the base. We will sync it with the aspect ratio conditioning values we will use for the flow, but let us know if you have more information about this one.
Cleaning Up the Workflow
Now that we know what’s happening, we can eliminate some unwanted stuff from our workflow and make everything look nicer and cleaner.
We do not need to output and compare images from the base model every time. So we can delete the initial basic sampler node with its VAE Decode, and ImagePreview nodes. We also do not need to display half-denoised images from the base-only sampler.
Next, let’s take care of the CLIP encoding nodes of the refiner model. Right-click on them and convert ascore, width, and height to input slots. Left-click on one of the ascore input slots, drag it on canvas, and select Add Node > utils > Primitive. And make sure both ascore slots are connected to this node. Then, let’s connect both nodes' width and height input slots to the Aspect Conditioning Width and Height nodes that we created earlier. We are not 100% sure this is the optimal setup for these values, but it should be ok for starters.

Now it’s time to group and organize things better. Right-click somewhere on the canvas and select Add Group. You can use this to group certain nodes together visually. After resizing and renaming, we placed text input nodes together.
We did the same for loading models.
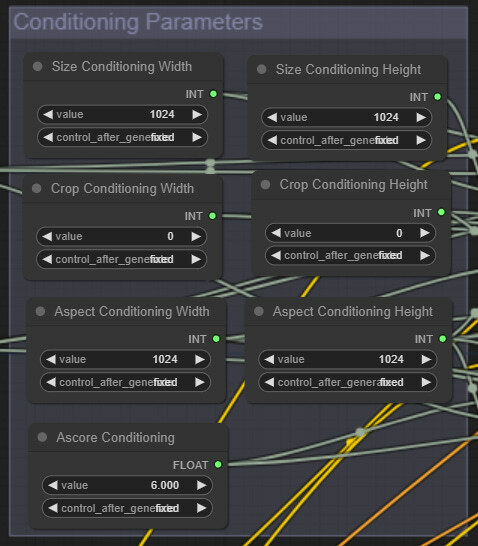
We grouped all conditioning parameter inputs - we have 7 of those for now.
We have two KSamplers - one for the base model and one for the refiner. We grouped the two.
And we have four CLIP encoding nodes, two for the base and two for the refiner. We moved them together and grouped them once again.
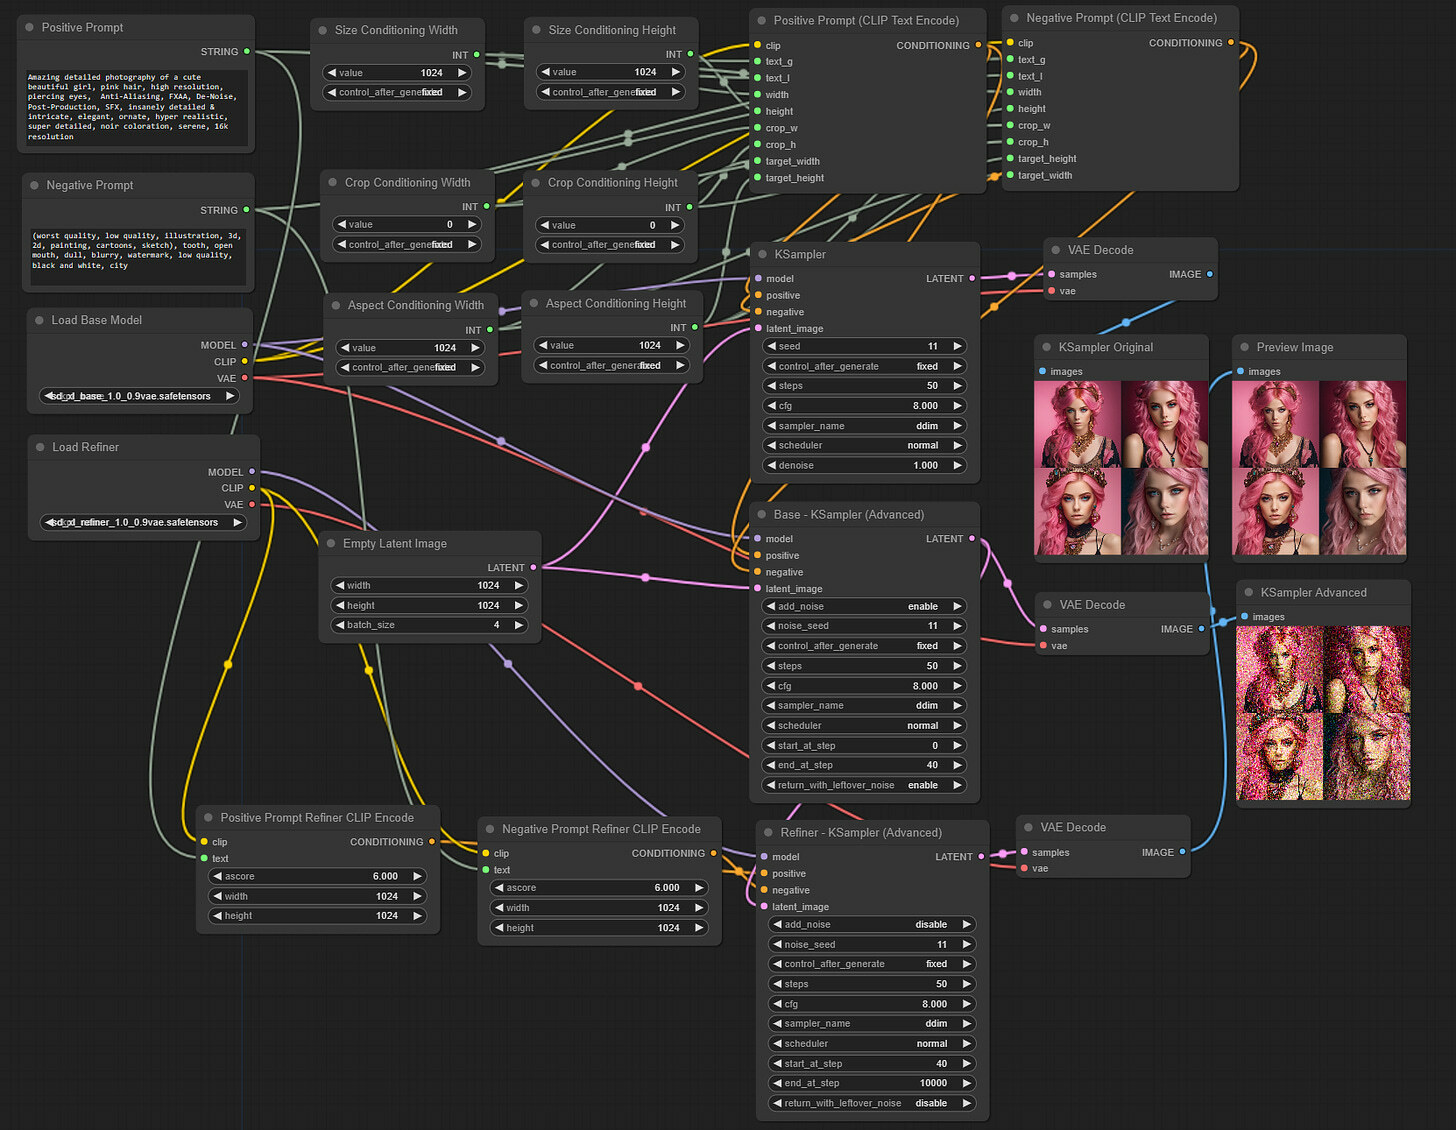
Finally, we reshuffled everything to make an imaginary square, and here is the final workflow that we got. We hope it is organized logically, and we can easily find what we need to edit and change.
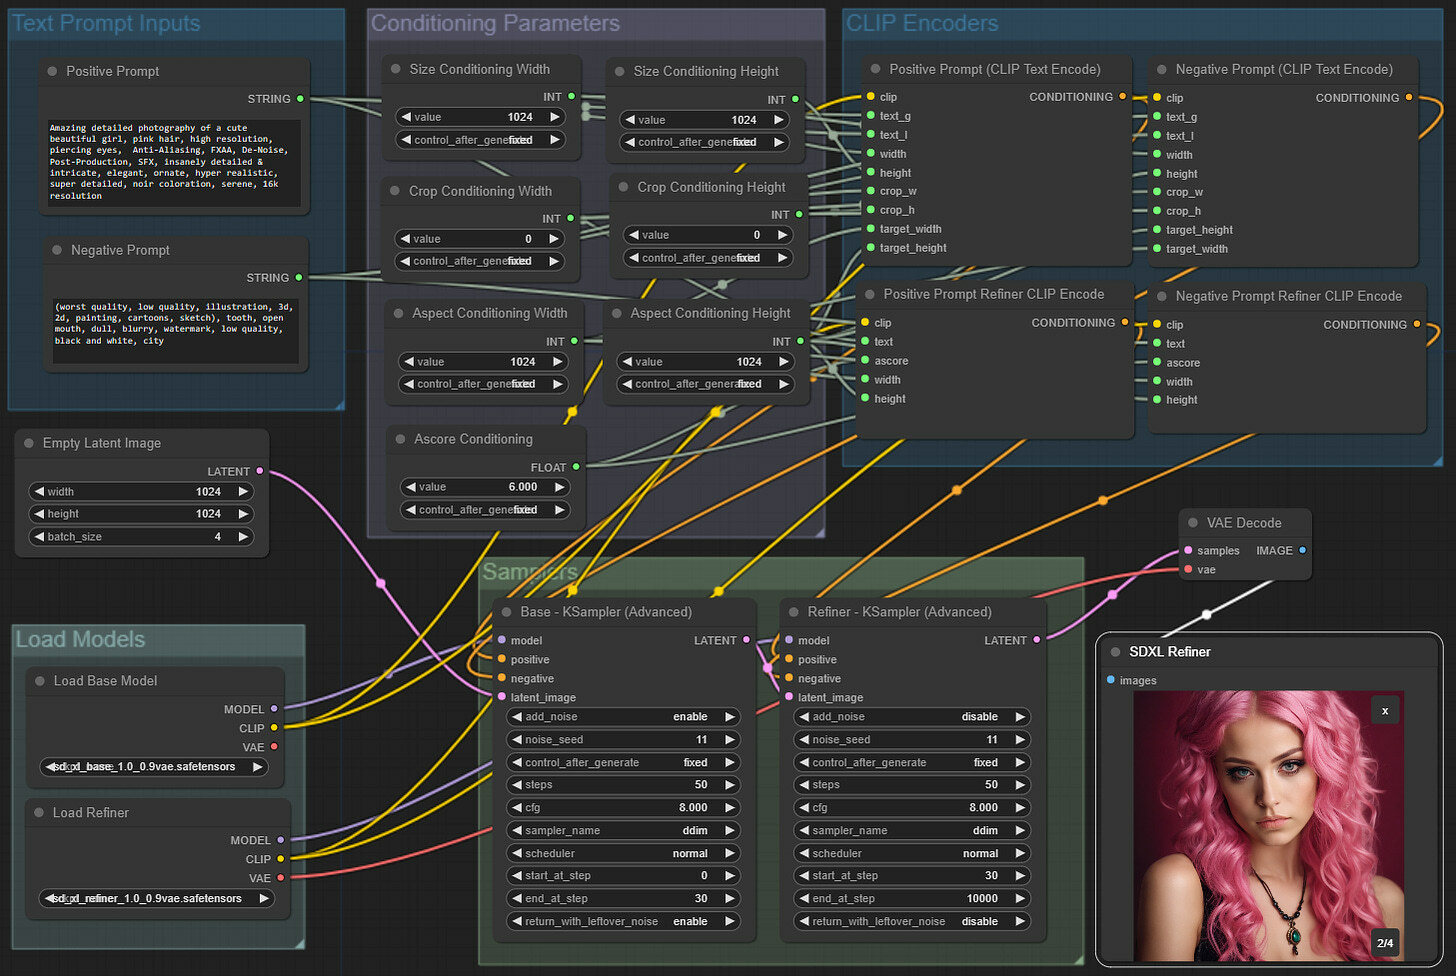
Here is the direct link from this workflow that you can download and drag on your canvas to load automatically (link).
