Overview
This results from 3 Windows reinstalls and many, many trials and errors. We hope that this little documentation could be helpful for you.
Please note this detailed description of an installation protocol that worked on our machine. We replicated the installation a few times (including on a separate Windows 10 machine). That said, it’s likely that on different machines and setups, there will be issues with this exact protocol. However, having such a detailed step-by-step reference point. could help discover your specific problems and deal with them
Our setup is GTX3090 on Windows 11, which was freshly installed (after failing quite a few times on non-fresh Windows).
Why?
When possible, running things locally can be preferred for a few reasons. And AI experts prefer to do it through Linux OS, which Windows users can replicate through WSL (Windows Subsystem for Linux). It’s a bit complicated to get started but helps with good habits of having virtual environments, getting used to working with Linux, and potentially improving performance or doing things that are not possible without Linux
What to expect in this write-up:
- Setting up WSL2 on Windows 11
- Installing the latest Nvidia Drivers
- Installing CUDA in WSL2
- Installing Conda in WSL2
- Installing cudatoolkit with Conda
- Installing git with Conda
- Cloning AUTOMATIC1111 WebUI and Dreambooth extension repositories
- Create a virtual environment with Conda
- WebUI installation with detailed steps
- Manual installation part
- Adding ckpt file
- Mod webui-user-dreambooth.bat and .sh files
- Adding required path variables in WSL2
- Installing Xformers
- Running and testing the installation of both WebUI and Dreambooth extension
- First launch
- Test Image generation
- Test Dreambooth extension
Detailed Steps
Setup WSL2
- Run CMD as admin
- Run the command: wsl --install
- Restart computer
- After restarting, we see Ubuntu is being installed
- It prompted us to create a username and password
- Once installed, I ran update commands for Ubuntu:
- sudo apt update
- sudo apt upgrade
7.Close the ubuntu terminal
8.Run CMD as admin
9.Run the command: wsl --update
10.Problem: it installed Ubuntu 22.04, which is a newer version and causes problems. So I’ll uninstall and install 20.04 instead
11.Uninstall by going to windows, add or remove programs, finding ubuntu, and uninstalling. Restart windows once done
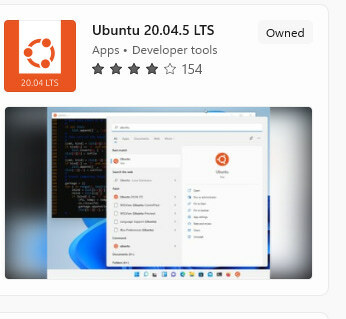
12.To install a new version, I opened Microsoft store, searched for Ubuntu 20.04
8.Run CMD as admin
9.Run the command: wsl --update
10.Problem: it installed Ubuntu 22.04, which is a newer version and causes problems. So I’ll uninstall and install 20.04 instead
11.Uninstall by going to windows, add or remove programs, finding ubuntu, and uninstalling. Restart windows once done
12.To install a new version, I opened Microsoft store, searched for Ubuntu 20.04
13.Launch, wait for installation, and repeat from step 5
Install the latest Nvidia drivers on Windows
- Go to and select system details https://www.nvidia.com/Download/index.aspx?lang=en-us
- We ended up with game-ready drivers, downloaded and installed it
- We restarted PC as requested by the installer
Install WSL2 Cuda
We decided to use CUDA 11.6.2 as Dreambooth wanted to use 11.6, so let’s try that.
- Go to https://developer.nvidia.com/cuda-11-6-2-download-archive
- Select settings for wsl
- Run wsl by entering wsl the run. A dark prompt window appears
- Got to the base folder by entering: cd ~
- Optional: if you want to watch what’s up in that folder in windows explorer, type explorer.exe . (there is a dot after a space in that command).
- Run commands:
b.sudo mv cuda-wsl-ubuntu.pin /etc/apt/preferences.d/cuda-repository-pin-600
c.wget https://developer.download.nvidia.com/compute/cuda/11.6.2/local_installers/cuda-repo-wsl- ubuntu-11-6-local_11.6.2-1_amd64.deb
d.sudo dpkg -i cuda-repo-wsl-ubuntu-11-6-local_11.6.2-1_amd64.deb
e.sudo apt-key add /var/cuda-repo-wsl-ubuntu-11-6-local/7fa2af80.pub
f.sudo apt-get update
g.sudo apt-get -y install cuda
7.After done, we restarted wsl and went to the base folder (cd ~) again.
Install Conda
- Inside wsl, enter: wget https://repo.continuum.io/archive/Anaconda3-2022.10-Linux-x86_64.sh
- then enter: bash Anaconda3-2022.10-Linux-x86_64.sh
- Press enter a bunch of times, enter “yes” when asked, and press enter a few more times.
- Restart wsl go to basre (cd ~)
- Update conda: conda update --all -y
Install cudatoolkit with Conda
- Start WSL, go to base (cd ~)
- Enter: conda install -c anaconda cudatoolkit
- It’s gonna take some time, once done restart WSL and go to base (cd ~)
Install git with Conda
- Start WSL, go to base (cd ~)
- Enter: conda install git -y
Clone Stable Diffusion automatic1111 and Dreambooth extensions
- Decide where to add stable diffusion repo. We used the base folder: cd ~
- Clone automatic1111 by entering in WSL: git clone https://github.com/AUTOMATIC1111/stable-diffusion-webui
- Go to the extensions folder: cd stable-diffusion-webui/extensions/
- Clone dreambooth extension: git clone https://github.com/d8ahazard/sd_dreambooth_extension
Create a virtual environment with Conda
- Open WSL and go to the base folder (cd ~)
- Now go to the stable diffusion folder: cd stable-diffusion-webui
- Create an environment by entering: conda env create -f environment-wsl2.yaml
- Activate the environment by entering the following: conda activate automatic
WebUI manual installation part
- Start WSL and go to the base: cd ~
- Activate environment: conda activate automatic
- Go to stable diffusion location: cd stable-diffusion-webui
- Manually install torch and cu116 as required by dreambooth extension. Run: pip install torch==1.12.1+cu116 torchvision==0.13.1+cu116 --extra-index-url https://download.pytorch.org/whl/cu116
- check if the torch supports GPU; this must output "True". Enter: python -c "import torch; print(torch.cuda.is_available())"
- Create a repositories folder by: mkdir repositories
- Go to the repositories folder by: cd repositories
- Now run these four commands to copy repositories:
b.git clone https://github.com/CompVis/taming-transformers.git repositories/taming-transformers
c.git clone https://github.com/sczhou/CodeFormer.git repositories/CodeFormer
d.git clone https://github.com/salesforce/BLIP.git repositories/BLIP
9.Install required packages by running commands:
a.pip install transformers==4.19.2 diffusers invisible-watermark --prefer-binary
b.pip install git+https://github.com/crowsonkb/k-diffusion.git --prefer-binary
c.pip install git+https://github.com/TencentARC/GFPGAN.git --prefer-binary
d.pip install -r repositories/CodeFormer/requirements.txt --prefer-binary
e.pip install -U numpy --prefer-binary
10.Now go to base cd and run requirements.txt from SD and dreambooths extension installation by running:
a.cd ~/stable-diffusion-webui
b.pip install -r requirements.txt --prefer-binary
c.cd ~/stable-diffusion-webui/extensions/sd_dreambooth_extension
d.pip install -r requirements.txt --prefer-binary
11.Close WSl, Start WSL again, and go to: cd ~/stable-diffusion-webui
12.Activate environment: conda activate automatic
Add ckpt file
- Download desired ckpt model. In our case, we downloaded sd 1.5 from huggingface (registration needed) https://huggingface.co/runwayml/stable-diffusion-v1-5
- Start WSL and go to: cd ~/stable-diffusion-webui/models/Stable-diffusion
- Open explorer by typing explorer.exe .
- An Explorer window will pop up. Paste the ckpt file there
Mod webui-user-dreambooth.bat and .sh files
Unsure if required with the way I launch it but still:
- Start WSL and go to: cd ~/stable-diffusion-webui
- Open explorer by typing explorer.exe .
- Open webui-user-dreambooth.bat with your preferred editor. I use Visual Studio Code.
- Replace the text there with the code from here and save https://github.com/d8ahazard/sd_dreambooth_extension/blob/main/webui-user-dreambooth.bat
- Now do the same with webui-user-dreambooth.sh and replace it with the code from here: https://github.com/d8ahazard/sd_dreambooth_extension/blob/main/webui-user-dreambooth.sh
Add path variables
We’ve been getting a lot of “WARNING! libcuda.so not found!” errors, and this seems to solve it:
- Start WSL and go to: cd ~/stable-diffusion-webui
- Activate environment: conda activate automatic
- Enter this command but replace ”irakli” with your ubuntu user name: nano /home/irakli/.bashrc
- A strange UI will show up, and between the lines, paste these three arguments like this
b.export LD_LIBRARY_PATH=/usr/lib/wsl/lib:$LD_LIBRARY_PATH
c.export PATH=$PATH:$CUDA_HOME/bin

- After pasting arguments, press ctrl+o, then press enter, and then press ctrl+x
- We have already done this, but this fixed an error. Run again: conda install -c anaconda cudatoolkit
Install Xformers
- Start WSL and go to: cd ~/stable-diffusion-webui
- Activate environment: conda activate automatic
- Install xformers through conda: conda install xformers -c xformers/label/dev
- Install ninja: pip install ninja
- Restart wsl
Run automatic1111 for the first time
- Start WSL and go to: cd ~/stable-diffusion-webui
- Activate environment: conda activate automatic
- Launch webui by: python launch.py
- Some installations will start. Wait till it all ends and then close the WSL terminal just before the final testing steps.
Test Image generation
- Restart the computer before any next steps; we had issues by not doing this step before.
- Start WSL and go to: cd ~/stable-diffusion-webui
- Activate environment: conda activate automatic
- Launch webui by: python launch.py
- Go to the local link that is displayed. In my case: http://127.0.0.1:7860/
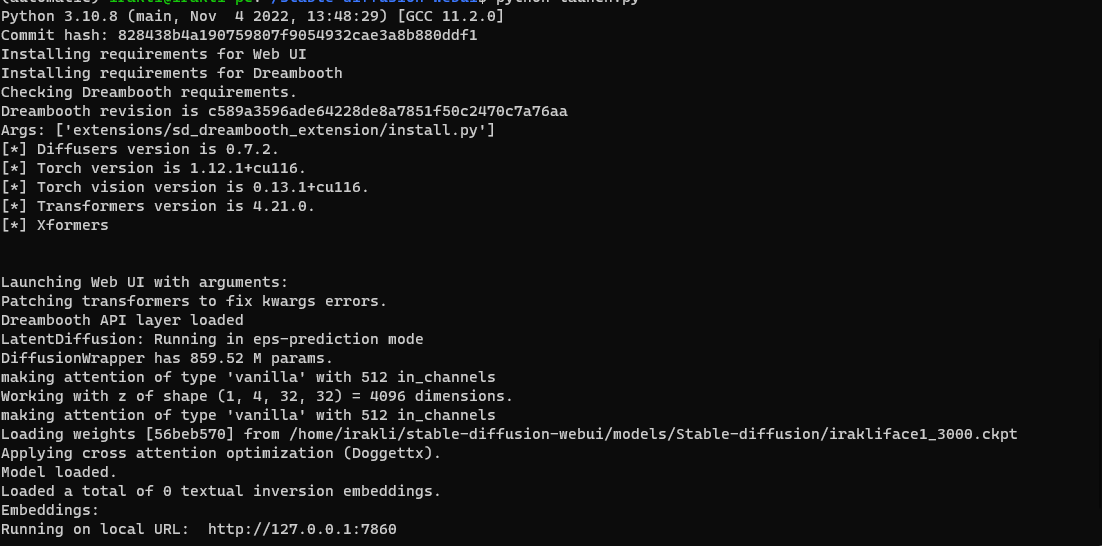
- Generate some image to make sure it works. GG!
- A successful launch, in our case, looks like this:
Test Dreambooth extension
We won’t write detailed instructions on Derambooth fine-tuning here but TLDR:
- Go to the dreambooth tab
- Create model
- Go to train, edit settings, and launch train
- Make sure there are no errors, and if lucky, everything will run smoothly!
