Hello, FollowFox community!
We are preparing a series of posts on Stable Diffusion, and in preparation for that, we decided to post an updated guide on how to install the latest version of AUTOMATIC1111 WEbUI (link) on Windows using WSL2.
update: as of May 28th, this installation is working as intended with the latest Automatic1111 v1.3.0 release
We wrote a similar guide last November (link); since then, it has been one of our most popular posts. But ages have passed; the Auto1111 repo just had its V1.1.0 released, supporting the new torch 2.0 and many large updates (see details). This update is also a great sign of this repo remaining active and relevant, and there is no need to rush to Vlad or other alternatives if you are happy with your workflows on Automatic.
Instead of updating our old installation, we did a fresh install because the old one got quite bloated with many extensions and add-ons. So let’s get started!

Method #1: Using FollowFox.AI’s prebuilt WSL distribution
Just as we did in our first post on LLaMA, we created a fresh WSL distribution that should work straight out of the box; just download the ControlNet models and Stable Diffusion checkpoints and add them to their respective folders.
(The WSL import method may require a machine with RAM exceeding the size of the image the WSL will need to import — we can confirm it worked in a PC with 64 Gb RAM. If your machine has less RAM of 32 Gb or less, we would recommend you going through the manual process.)
In two easy steps:
- Download FollowFox.AI’s prebuilt distribution (HERE; file size is 32 Gb)
- Import and run the distribution to your WSL
In a PowerShell, run the following code substituting <> for the correct inputs:
wsl --import ffai-automatic <install location> <path and name of downloaded file>For instance, if the file was downloaded as D:\WSL\FollowFoxAI-automatic-WSL.tar.gz and you intend to have the WSL stored in C:\WSL, then just run:
wsl --import ffai-automatic C:\WSL D:\WSL\FollowFoxAI-automatic-WSL.tar.gzThis will import FollowFox.AI’s prebuilt WSL distribution to a distribution named “ffai-automatic”. Now, we’ll log in to it with user felix (password: Abcd1234), which is the username under which we installed AUTOMATIC1111’s Stable Diffusion webUI, by running the following code:
wsl -d ffai-automatic --user felixMethod #2: Manual Install
As usual, to give you a sense of what we will be doing, here is the list of steps.
We’ll be starting with a fresh WSL install in order to keep the process simple and clean. If you wish to install on top of a previous WSL install, then start from step 3 below and make the necessary changes/updates to fit your distribution.
(If you would like to preserve your previous WSL installation, but wish to try a fresh install, you can find instructions on how to back up and retrieve it later here.)
- Ensure that we have WSL2 set up
- Install CUDA 11.8 and Conda
- Clone the latest repo and create a fresh Conda environment
- Install all the Dependencies
- Add a Stable Diffusion Checkpoint to the installation
- Do the first test launch and install xformers
- And finally, install the latest ControlNet 1.1
1 - WSL2 Set Up
Open PowerShell, type the command below, go through the installation process, and restart the PC:
wsl --install -d Ubuntu-20.04Once the installation finishes, you will be prompted to create a Unix user and password. Do that, and you’ll log in to your new Linux installation.
Also, go to ‘Start > Optional Features > More Windows Features’, and make sure that Windows Subsystem for Linux and Windows Hypervisor Platform is checked. Restart again if needed.
2 - Install CUDA 11.8 and Conda
Go to https://developer.nvidia.com/cuda-11-8-0-download-archive, and select Linux > x86_64 > WSL-Ubuntu > 2.0 > deb (local).
Make a point of choosing the ‘local’ install, to ensure you will install version 11.8; we tried network install and it defaulted to the latest version of CUDA, which may cause problems.
The installation instructions will show up in a box below the selections. Copy and paste each line in the linux terminal and run them. (Note that you may be required to provide your password for any command involving the “sudo” term – this is the term that Linux uses for commands that require admin privileges.)
The installation should take 5-10 minutes, depending to a large extent on how fast your internet speed is (as you should be downloading about 3 gigabytes in the process).
You should run in the Linux terminal the code listed in the page, which is also reposted below:
wget https://developer.download.nvidia.com/compute/cuda/repos/wsl-ubuntu/x86_64/cuda-wsl-ubuntu.pin
sudo mv cuda-wsl-ubuntu.pin /etc/apt/preferences.d/cuda-repository-pin-600
wget https://developer.download.nvidia.com/compute/cuda/11.8.0/local_installers/cuda-repo-wsl-ubuntu-11-8-local_11.8.0-1_amd64.deb
sudo dpkg -i cuda-repo-wsl-ubuntu-11-8-local_11.8.0-1_amd64.deb
sudo cp /var/cuda-repo-wsl-ubuntu-11-8-local/cuda-*-keyring.gpg /usr/share/keyrings/
sudo apt-get update
sudo apt-get -y install cuda
To install Conda, go to https://www.anaconda.com/products/distribution#linux and find the latest distribution for x86 – you should download it and install it by running the following command lines:
wget https://repo.anaconda.com/archive/Anaconda3-2023.03-Linux-x86_64.sh
bash ./Anaconda3-2023.03-Linux-x86_64.sh
After which you must press Enter and go through the installation until it finishes. Now close your terminal and open it again (to reopen it, look for “Ubuntu 20.04 LTS” in the app list on Start menu). You’ll notice that “(base)” showed up to the left of your username — that indicates that Conda is active and you’re operating in its ‘base’ environment.
At this point, it’s good to update the libraries already installed. Do do so, use the following command lines:
At this point, it’s good to update the libraries already installed. Do do so, use the following command lines:
sudo apt update
sudo apt upgrade
3 - Clone the Repo and Create a Fresh Conda Environment
We wanted to do a fresh installation. If you have an older version installed, you need to make a call - if you want to keep an older version and install a new one separately, do the git pull in a new folder and use a new name for a conda environment. If you prefer to delete the old one, remove the folder and follow the step about conda environment removal.
- Start by cloning the repo, and run this command in WSL2 in the desired folder (base folder in our case):
git clone https://github.com/AUTOMATIC1111/stable-diffusion-webui.git- Now go inside that folder:
cd stable-diffusion-webui- (only if you haven’t done a fresh WSL install) We want to reuse the Conda environment name “automatic,” so we are deleting the previous installation. Run in WSL2:
conda remove -n automatic --all- We will install the new environment based on the conda configs provided in the automatic1111 repository. Still, before doing that, we want to add more channels to our conda configuration for it to be able to find all the packages. To do that, run:
conda config --add channels conda-forge- Now we are ready to create a conda environment based on the settings inside the repo. To do so, run:
conda env create -f environment-wsl2.yaml- Then, activate the newly created conda environment in WSL2:
conda activate automatic4 - Install the Dependencies
- Make sure your conda environment is activated:
conda activate automatic- Create a ‘repositories’ folder:
mkdir repositories- Now we run the following four codes to clone the needed repos:
git clone https://github.com/CompVis/stable-diffusion.git repositories/stable-diffusion
git clone https://github.com/CompVis/taming-transformers.git repositories/taming-transformers
git clone https://github.com/sczhou/CodeFormer.git repositories/CodeFormer
git clone https://github.com/salesforce/BLIP.git repositories/BLIP- Then we pip install a few more dependencies:
pip install diffusers invisible-watermark --prefer-binary
pip install git+https://github.com/crowsonkb/k-diffusion.git --prefer-binary
pip install git+https://github.com/TencentARC/GFPGAN.git --prefer-binary
pip install -r repositories/CodeFormer/requirements.txt --prefer-binary- Install torch, torchvision, and other required packages:
pip install torch==2.0.0+cu118 torchvision==0.15.1+cu118 -f https://download.pytorch.org/whl/cu118/torch_stable.html
pip install jinja2 filelock networkx typing-extensions sympy triton==2.0.0 requests numpy pillow lit cmake
pip install gfpgan clip- Then we install the requirements of WebUI:
pip install -r requirements.txt --prefer-binary- And finally, we updated the numpy package to the latest version:
pip install -U numpy --prefer-binary- Let’s check if torch cuda can see our GPU. After running the following command, we want to see “True” in the output:
python -c "import torch; print(torch.cuda.is_available())"- If you don’t see “True”, check out this section on variable paths from our older post and repeat the above steps with path variables added. Usually, it resolves the issue. (link)
5 - Add a Stable Diffusion Checkpoint to the Installation
You probably have some checkpoints that you can reuse on your machine, and in that case, copy it to the ~/stable-diffusion-webui/models/Stable-diffusion folder. If not, follow the steps for downloading it:
- Download desired ckpt model. In our case, we downloaded sd 1.5 from huggingface (registration needed) https://huggingface.co/runwayml/stable-diffusion-v1-5
- Start WSL and go to:
cd ~/stable-diffusion-webui/models/Stable-diffusion 3.Open Explorer by typing:
explorer . 4.An Explorer window will pop up. Paste the .ckpt or the .safetensors file there.
6 - The First Test Launch and Installing xformers
Let’s do the first launch without xformers, make sure it runs, and then we can install xformers and launch with it.
- Ensure you are in the folder where we installed the WebUI and that the conda environment is active.
conda activate automatic
cd ~/stable-diffusion-webui/- Then run the following command. It will take a bit of time, and once everything is installed, you should see the usual launch message with the URL:
python launch.py- We generated a few images to ensure things are working, 3090 it was averaging 12-14it/s
- Now we close WSL2, restart it, activate the environment, and launch the WebUI with xformers; this will launch another installation and then run as usual:
python launch.py --xformers- It all worked. We generated a few more images and ended up averaging 14-16it
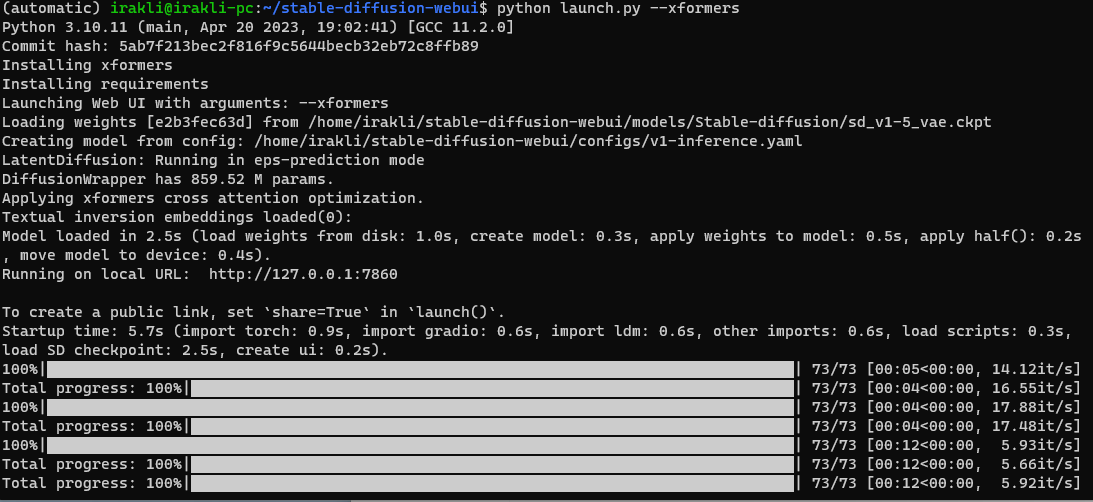
There are a lot of discussions about whether xformers is needed or not anymore with the new pytorch. To check it, we launched with python launch.py ----opt-sdp-attention And got very similar to xformers performance. We have not yet concluded if there is any reason to prefer one launch method over another.
7 - Installing ControlNet 1.1
We won’t go into many add-ons and extensions, but we consider ControlNet a critical part of SD nowadays, so that we will install that. Also, the 1.1 versions bring a lot of awesome control options, so it’s worth installing the latest version.
- Launch the WebUI as usual and go to the extensions tab, press the available tab, and then press the big Load From button.
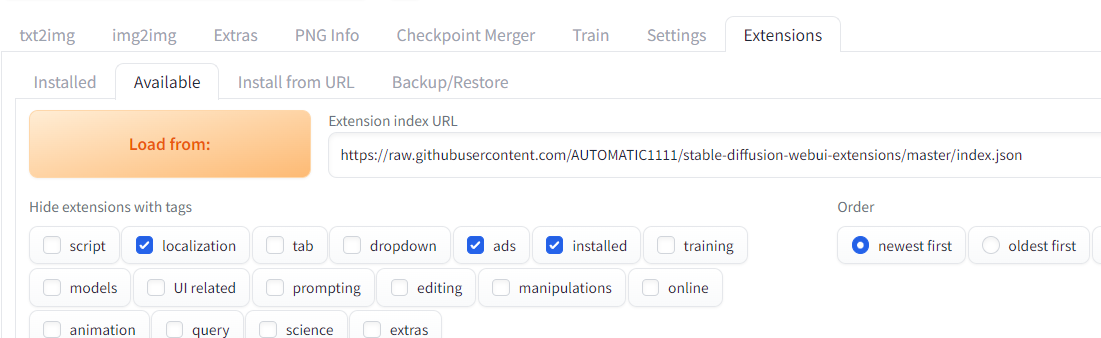
- In the list, find sd-webui-controlnet and press install.
- Now under extensions, go to the Installed tab and press check for updates; if there is anything to update, launch it and then press Apply and restart UI button.
- Now let’s close the WebUI completely and download the ControlNet models.
- We can do that from the official models’ page; you must download just the .pth files (1.45GB each), as yaml files are already in the installation path. (link)
- Paste the downloaded files in the following folder
- \stable-diffusion-webui\extensions\sd-webui-controlnet\models
- Now we relaunch the WebUI using the usual flow, and the ControlNet should be available and usable:
conda activate automatic
cd stable-diffusion-webui/
python launch.py --xformers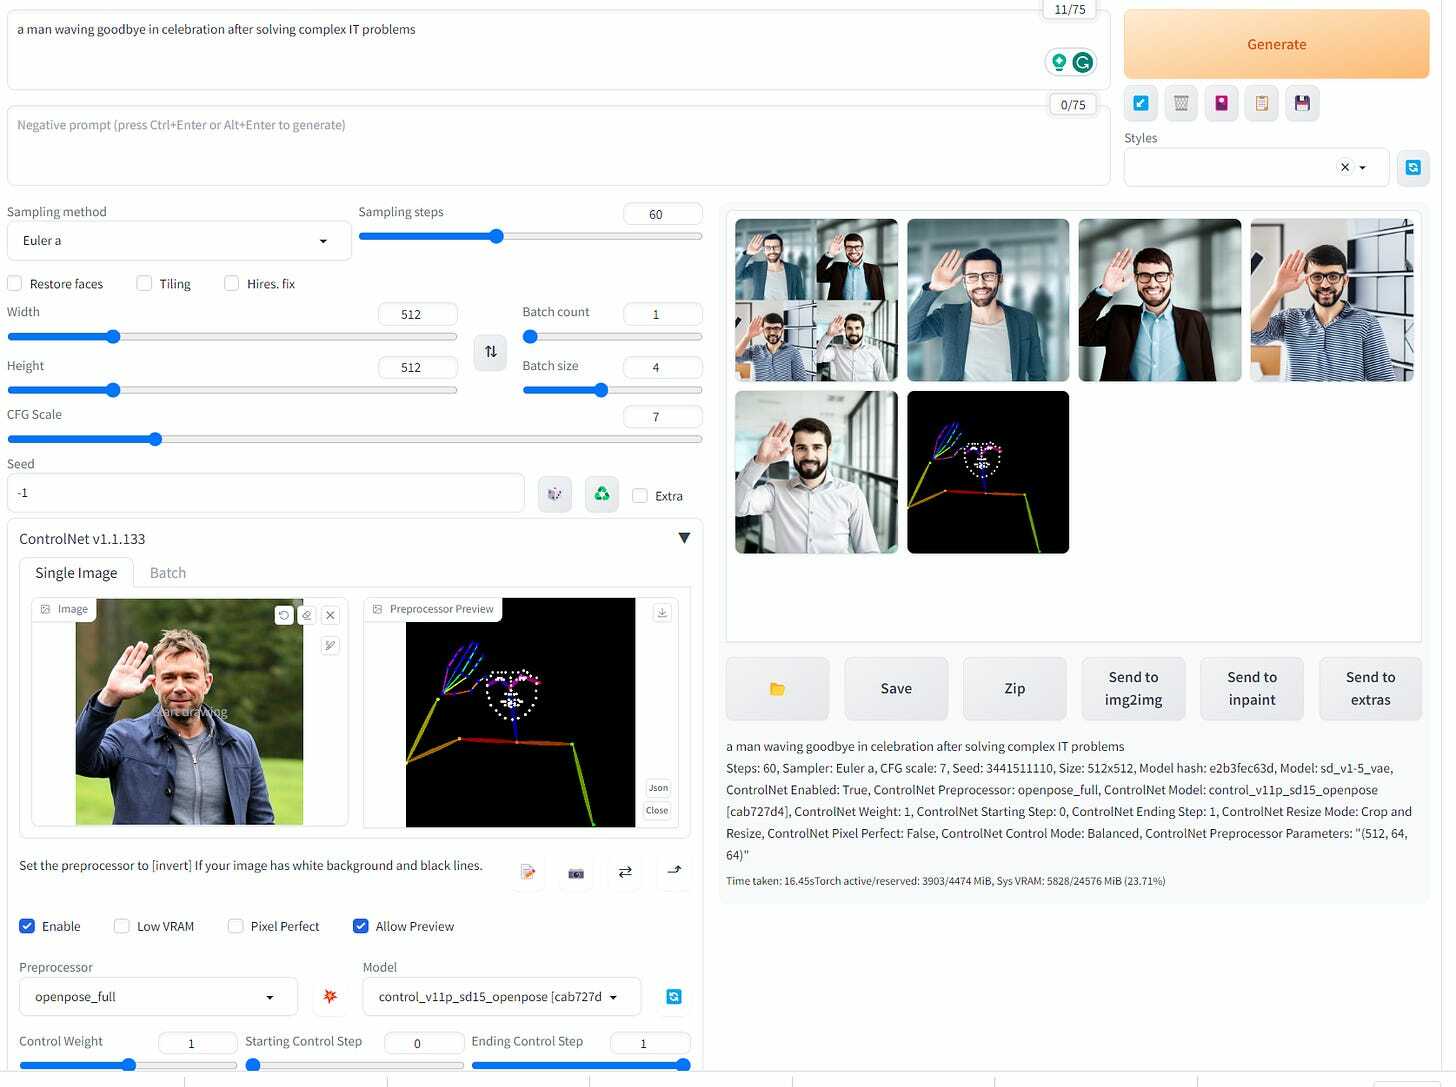
All is working. Enjoy the updated Auto1111!
